Eaton Cutler-Hammer O & M Manual
Fixed spb automatic transfer switch
Hide thumbs
Also See for Cutler-Hammer:
- Instruction leaflet (16 pages) ,
- Quick start instructions (8 pages)
Table of Contents

Related Manuals for Eaton Cutler-Hammer


Summary of Contents for Eaton Cutler-Hammer
- Page 1 BCS Switchgear Inc. Switchgear | Circuit Breakers | Parts | Tech Support Cutler-Hammer IB01602002E O & M Manual for Cutler-Hammer Fixed SPB Transfer Switch Effective October 2002 bcsswitchgear.com | 888.599.0486 Need Help? 888.599.0486...
- Page 2 BCS Switchgear Inc. Switchgear | Circuit Breakers | Parts | Tech Support bcsswitchgear.com | 888.599.0486 Need Help? 888.599.0486...
- Page 3 All possible contingencies which may arise during installation, operation or maintenance, and all details and variations of this equipment do not purport to be covered by these instructions. If further information is desired by purchaser regarding his particular installation, operation or maintenance of particular equipment, contact a Cutler-Hammer representative. Effective 10/02 bcsswitchgear.com | 888.599.0486...
-
Page 4: Table Of Contents
IB01602002E Page iv TABLE OF CONTENTS PAGE SECTION 1: INTRODUCTION Preliminary Comments and Safety Precautions....................1 1.1.1 Warranty and Liability Information ......................1 1.1.2 Safety Precautions ..........................1 General Information.............................1 1.2.1 Transfer Switch Types..........................2 1.2.2 Design Configuration ..........................2 Transfer Switch Catalog Number Identification ....................4 SECTION 2: RECEIVING, HANDLING AND STORAGE Receiving................................5 Handling ................................5... - Page 5 IB01602002E Page v PAGE SECTION 6: TESTING AND PROBLEM SOLVING Testing ................................18 Problem Solving ..............................18 6.2.1 Transfer Switch Appears Inoperative ....................19 6.2.2 Transfer Switch will not Automatically Transfer to Normal ..............19 6.2.3 Transfer Switch will not Automatically Transfer to Emergency ............19 6.2.4 Transfer Switch will not Automatically Recharge Switches ..............20 SECTION 7: MAINTENANCE...
- Page 6 IB01602002E Page vi LIST OF FIGURES Figure Title Page Screw Removal............................23 Slowly Tilting Cover Away ........................23 Lifting Cover Free ............................23 Lifting Cover into Enclosure Frame ......................24 Pushing Cover Fully into Enclosure Frame .....................24 Replacing Screws ............................24 Screw Removal............................25 Inserting Tabs into Screw Holes ......................25 Pulling Cover Out.............................25 7-10 Cover Against Frame..........................26...
-
Page 7: Section 1: Introduction
PING CONTACTS). MISUSE CAN RESULT IN DEATH, ommendations and descriptions contained herein. In no SEVERE PERSONAL INJURY AND/OR PROPERTY event will Cutler-Hammer be responsible to the purchas- DAMAGE. er or user in contract, in tort (including negligence), strict liability or otherwise for any special, indirect, incidental or consequential damage or loss whatsoever, including 1.2 GENERAL INFORMATION... -
Page 8: Transfer Switch Types
There are three types of transfer switch equipment: 1.2.2 DESIGN CONFIGURATION Automatic Transfer Switch The Cutler-Hammer transfer switch is a rugged, compact Automatic transfer switches automatically perform the design utilizing insulated case switches or insulated case transfer function. They consist of three basic elements: circuit breakers to transfer essential loads from one power source to another. -
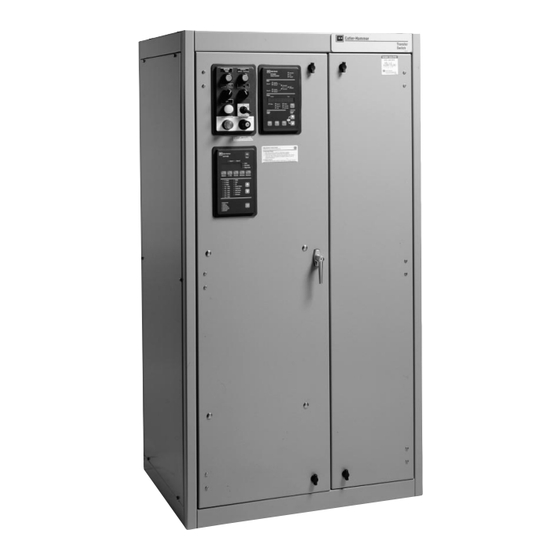
Page 9: Typical Mini Transfer Switch With Dead Front Attached
IB01602002E Page 3 Table 1.1 Withstand Ratings Rating When Used with Upstream Circuit Breker Rating When Used with Upstream Fuse Transfer Switch Option 17C 240V 480V 600V Maximum Fuse 600V max. Amp Rating Selected (kA) (kA) (kA) Fuse Rating Type (kA) 800/1200 1200/1600... -
Page 10: Transfer Switch Catalog Number Identification
IB01602002E Page 4 to position headings in Table 1.2). The catalog number 1.3 TRANSFER SWITCH CATALOG NUMBER ATVISPA31000XSU describes an open transition auto- IDENTIFICATION matic transfer switch with the switching devices mount- Transfer switch equipment catalog numbers provide a AT V I SP A 3 1000 X S U significant amount of relevant information that pertains to a particular piece of equipment. -
Page 11: Section 2: Receiving, Handling And Storage
IB01602002E Page 5 SECTION 2: RECEIVING, HANDLING AND A plastic bag of documents will be found within the enclosure, usually attached to the inside of the door. STORAGE Important documents, such as test reports, wiring dia- grams, appropriate instruction leaflets and a warranty 2.1 RECEIVING registration card, are enclosed within the bag and should be filed in a safe place. -
Page 12: Section 3: Equipment Description
3.1 GENERAL • Power Panel This Cutler-Hammer transfer switch equipment is avail- • Voltage Selection Panel able in three configurations: • Logic Panel • Basic Transfer Switch (open transition only) - ATC-600 (open transition only) •... -
Page 13: Load
(Figure 3-4). 3.2.4 TRANSFER MECHANISM The transfer switch uses Cutler-Hammer SPB Type insu- lated case circuit breakers and insulated case switches with a stored-energy mechanism. An electrical operator automatically recharges the mechanism after the switch- ing device has been closed. -
Page 14: Voltage Selection Panel
IB01602002E Page 8 The switching device is closed by energizing a spring 3.6 OPTIONS (NON-LOGIC PANEL) released solenoid that releases the spring mechanism. A shunt trip will open the switching device if energized. Switch options, which are not part of the logic scheme, are available to meet a variety of other application requirements. -
Page 15: Neutral Se With Ground Fault
21A. Optional Power Cable Connection Terminals Both Power Source Switching Devices: Provides Provides alternate power cable connection terminals. integral overcurrent protection on both Source 1 Consult Cutler-Hammer for available optional terminal sizes. Effective 10/02... -
Page 16: Charger Mounting Dimensions In Inches (Mm)
12Vdc, 5 amp out- with connectors. put. Special lengths are available. Contact Cutler-Hammer. When supplied, the battery charger is provided in a sep- arate wall mounted enclosure (Figure 3-9). Separate instructions and wiring information are provided with the 37. -
Page 17: Enclosure
3.8 STANDARDS Representative production samples of switches and cir- Cutler-Hammer transfer switch equipment enclosures cuit breakers used in Cutler-Hammer Automatic Transfer are listed for application by UL, and are certified to meet Switches are subjected to a complete test program identi- Canadian Standards by Underwriters Laboratories Inc. -
Page 18: Section 4: Installation And Wiring
CAUTION available for special environments. If there are any doubts as to location suitability, discuss it with your Cutler-Hammer representative. EXTREME CARE SHOULD BE TAKEN TO PROTECT THE TRANSFER SWITCH FROM DRILL CHIPS, FIL- Check to make certain that there are no pipes, wires, or... -
Page 19: Power Cable Connections
IB01602002E Page 13 able). See Section 7.3 for cover removal Proceed with the following steps: instructions. Step 1: Verify that the line and load cables comply with Step 2: Gently maneuver the switch into its location applicable electrical codes. using all of the supplied lift brackets. Step 2: Verify that transfer switch rated current and Step 3: Bolt the enclosure to the base. -
Page 20: Voltage Selection Adjustment
IB01602002E Page 14 4.6 VOLTAGE SELECTION ADJUSTMENT 4.7 WIRING Certain devices, such as the Voltage Selection Panel, CAUTION sensing relays and timers, need to be set and/or calibrated prior to placing the transfer switch equipment into service. Adjustments for logic devices are described in the separate POWER CONDUCTORS AND CONTROL WIRING instructional document dedicated to the specific logic being MAY HAVE VOLTAGE PRESENT THAT CAN CAUSE... -
Page 21: Seismic Tested And Approved Product Mounting Instructions
IB01602002E Page 15 These cleats must be Seismic Tested and Approved Product Mounting Instructions In all cases, the unit must be mounted per the outline drawing. In addition, the floor-mounted units must use the provided cleats. These cleats must be placed between the head of the bolt and the ATVISP, NTVSSP sheet metal enclosure. -
Page 22: Section 5: Operation
IB01602002E Page 16 SECTION 5: OPERATION Each switch in the open transition configuration can be manually operated. Before a switching device can be closed, the stored energy mechanism must be 5.1 GENERAL charged by pumping the handle (Figure 5-1). The switching device can be closed by pushing the close button (Figure 5-2). -
Page 23: Switching Device Closing Precautions
IB01602002E Page 17 WARNING WARNING Attempting to close both switching devices simultaneously OVERLAPPING CONTACTS can cause severe injury Alternate and Normal Sources or death. must be Synchronized Follow Manual Operation Instructions Below Manual Operation Instructions 1. Disconnect Logic Connectors 7805C60H02 2. -
Page 24: Section 6: Testing And Problem Solving
If a problem persists after having completed the problem HIGH VOLTAGES ASSOCIATED WITH OPERA- solving procedure, contact a Cutler-Hammer represen- TIONAL TRANSFER SWITCH EQUIPMENT PRESENT tative for further assistance. When calling for assis- A SHOCK HAZARD THAT CAN CAUSE SEVERE tance, the following is the minimum information required PERSONAL INJURY OR DEATH. -
Page 25: Transfer Switch Appears Inoperative
IB01602002E Page 19 6.2.1 TRANSFER SWITCH APPEARS INOPERATIVE Step 3: Is the emergency switch OPEN? If YES: Proceed to Step 5. Step 1: Verify that all plugs and sockets are properly interconnected. If NO: Proceed to Step 4. Step 2: Verify that the correct system voltage appears Step 4: Measure voltage between terminals A9 and A8 at NORMAL switch. -
Page 26: Transfer Switch Will Not Automatically Recharge Switches
A2 on the switching device that does not automatically recharge. Does the voltage read 120 VAC ± 10 volts? Record reading. If YES: Check electrical operator inside the switching device. If NO: Verify wiring to A6 and A2. Step 2: If problem persists contact Cutler-Hammer. Effective 10/02... -
Page 27: Section 7: Maintenance
IB01602002E Page 21 SECTION 7: MAINTENANCE In general, transfer switch equipment is designed to be relatively maintenance free under normal usage. How- ever, because of the variability of application conditions 7.1 INTRODUCTION and the importance placed on dependable operation by this type of equipment, inspection and maintenance checks should be made on a regularly scheduled basis. - Page 28 IB01602002E Page 22 Table 7.1 Periodic Maintenance Procedures Step Action a. Make transfer switch equipment safe for Disconnect line power from equipment being serviced by inspection and/or maintenance. opening next highest disconnect device. Make certain that any accessory control power is switched off and logic plugs disconnected.
-
Page 29: Cover Removal And Replacement
IB01602002E Page 23 7.3 COVER REMOVAL AND REPLACEMENT Many of the maintenance procedures outlined in Table 7.1 require the removal and replacement of side and rear covers. For all NEMA 1 enclosed transfer switches, see Section 7.3.1 for cover removal and replacement instructions. -
Page 30: Lifting Cover Into Enclosure Frame
IB01602002E Page 24 Cover Replacement Step 1: Grasp the cover at the sides and lift the bottom of the cover into the enclosure frame (Figure 7-4). Hold the bottom of the cover in place with your foot. Step 2: Move your hands around to the front and push the cover fully into the enclosure frame (Figure 7-5). -
Page 31: Nema 3R Cover Removal And Replacement
IB01602002E Page 25 7.3.2 NEMA 3R COVER REMOVAL AND REPLACEMENT A 3/8” wrench is required to perform this procedure. Cover Removal Step 1: Locate the screws used to secure the cover to the frame and remove them with the 3/8” wrench (Figure 7-7). -
Page 32: Cover Against Frame
IB01602002E Page 26 Cover Replacement Step 1: Place the cover against the frame (Figure 7-10). Step 2: Locate the cover lifting handles (provided with the equipment) and insert the tabs into the screw holes (Figure 7-11). Step 3: Grasp the cover lifting handles and pull up, slid ing the upper cover flange under the roof flange (Figure 7-12). -
Page 33: Pushing Bottom Of Cover In Place
IB01602002E Page 27 Slide Up Under Roof Flange Push In Place Figure 7-14 Replacing Screws and Sealing Washers Figure 7-13 Pushing Bottom of Cover in Place Effective 10/02... -
Page 34: Section 8: Renewal Parts Guide
IB01602002E Page 28 SECTION 8: RENEWAL PARTS GUIDE 8.1 GENERAL Refer to Figures 8-1 and 8-2 for assistance with select- ing and ordering selected transfer switch renewal parts. Example: To order the Air Filter Replacement Kit for an ATVISPB31200XRU transfer switch, order Catalog Number TSAFFM as shown in Figure 8-1. - Page 36 ING OR USAGE OF TRADE, ARE MADE REGARDING THE INFORMATION, RECOMMENDATIONS AND DESCRIPTIONS CONTAINED HEREIN. In no event will Cutler-Hammer be responsible to the purchaser or user in contract, in tort (including negligence), strict lia- bility or otherwise for any special, indirect, incidental or...
Need help?
Do you have a question about the Cutler-Hammer and is the answer not in the manual?
Questions and answers