Table of Contents
Troubleshooting

Related Manuals for laguna PX-16 SHEARTEC II


Summary of Contents for laguna PX-16 SHEARTEC II
- Page 1 PX-16 SHEARTEC II Planer Owner's Manual Owner's Manual Laguna Tools 744 Refuge Way Grande Prairie, TX Service: +1 (800) 234 1976 Email: customerservice@laguantools.com Copyright Laguna Tools 2022 Updated January 2022...
- Page 3 For immediate service on any Laguna Tools products: Call: +1 (800) 234 1976 Email: customerservice@lagunatools.com Laguna Tools, Inc. LAGUNA® and the LAGUNA Logo® are the registered trademarks of Laguna Tools, Inc. All rights reserved. 04/01/2019 LAGUNA AMERICAN HEADQUARTERS Texas: 744 Refuge Way Suite 200, Grand Prairie, Texas 75050, U.S.A. Phone: +1-800-332-4094 Huntington Beach: 7291 Heil Ave Huntington Beach, CA 92647, U.S.A.
- Page 4 - without the written permission of Laguna Tools. Products that are referred to in this document are either trademarks and/or registered trademarks of Laguna Tools, Inc. The publisher and the author make no claim to these trademarks.
-
Page 5: Table Of Contents
Contents Contents Letter to the Woodworker General Information Safety Rules ........................12 Electrical Safety ........................ 16 Grounding Methods ............................17 Machine Overview ......................19 Machine Specifications ..................... 21 Machine Set-Up & Assembly Unboxing ........................... 24 Machine Placement ......................25 Inventory List ................................ 26 Assembly Operation Power Supply Circuit Requirements... - Page 6 PX-16 SHEARTEC II PLANER Laguna Tools 2021...
-
Page 7: Letter To The Woodworker
Letter to the Woodworker Thank you for investing in a PX-16 Planer by Laguna Tools. This planer is one of a family of unique machines proudly offered by Laguna Tools. Every Laguna machine is engineered for years of dependable service. Please feel free to contact Laguna Tools if you have a question or suggestion. -
Page 8: General Information
PX-16 SHEARTEC II PLANER General Information SAVE THESE INSTRUCTIONS Refer to them often and use them to instruct others. Please read and understand all warnings and operation instructions before using any tool or equipment. Always follow basic safety precautions to reduce the risk of personal injury. Improper operation, maintenance or modification of tools or equipment could result in serious injury and property damage. - Page 9 General Information...
- Page 10 PX-16 SHEARTEC II PLANER...
- Page 11 General Information...
-
Page 12: Safety Rules
PX-16 SHEARTEC II PLANER Safety Rules PLEASE READ AND UNDERSTAND ALL SAFETY WARNINGS AND OPERATING INSTRUCTIONS BEFORE USING THIS MACHINE FAILURE to follow all instructions listed below, may result in electric shock, fire, and/or serious personal injury or property damage.Woodworking can be dangerous if safe and proper operating procedures are not followed. As with all machinery, there are certain hazards involved with the operation of the product. - Page 13 General Information SAFETY PRECAUTIONS ARE OVERLOOKED OR IGNORED, PERSONAL INJURY TO THE OPERATOR MAY RESULT. SAFETY EQUIPMENT SUCH AS GUARDS, PUSH STICKS, HOLD-DOWNS, FEATHER BOARDS, GOGGLES, DUST MASKS AND HEARING PROTECTION CAN REDUCE YOUR POTENTIAL FOR INJURY. BUT EVEN THE BEST GUARD WON’T MAKE UP FOR POOR JUDGMENT, CARELESSNESS OR INATTENTION.
- Page 14 PX-16 SHEARTEC II PLANER PARTS. ALWAYS TIE BACK OR COVER LONG HAIR. WEAR NON-SLIP FOOTWEAR TO REDUCE RISK OF SLIPPING AND LOSING CONTROL OR ACCIDENTALLY CONTACTING CUTTING TOOL OR MOVING PARTS. HAZARDOUS DUST. DUST CREATED BY MACHINERY OPERATIONS MAY CAUSE CANCER, BIRTH DEFECTS, OR LONG-TERM RESPIRATORY DAMAGE.
- Page 15 General Information STABLE MACHINE. UNEXPECTED MOVEMENT DURING OPERATION GREATLY INCREASES RISK OF INJURY OR LOSS OF CONTROL. BEFORE STARTING, VERIFY MACHINE IS STABLE AND MOBILE BASE (IF USED) IS LOCKED. USE RECOMMENDED ACCESSORIES. CONSULT THIS OWNER’S MANUAL OR THE MANUFACTURER FOR RECOMMENDED ACCESSORIES.
-
Page 16: Electrical Safety
PX-16 SHEARTEC II PLANER Electrical Safety Electrical Safety- A Electrical Cord and Plug is not provided with Ordered Machine. Make sure to follow Electrical Installation stated in the instructions below. Power Supply A separate electrical circuit should be used for each machine. This circuit should not be less than the wiring listed below and should be protected with an appropriate circuit breaker based on the total running and start-up amperage's (listed below). -
Page 17: Grounding Methods
General Information Grounding Methods Grounding Methods- Electrical Cord and Plug is not provided with Ordered Machine. When a proper qualified electrical cord and plug is installed please follow the following ground methods and procedures. Grounding Methods Provided by CSA Group. Fig. - Page 18 PX-16 SHEARTEC II PLANER Fig. A.) The tool has a grounding plug that looks like the plug illustrated in Fig A.) A temporary adapter, which looks like the adapter illustrated in Fig B may be used to connect this plug to a 2 Pole receptacle as shown in Fig.
-
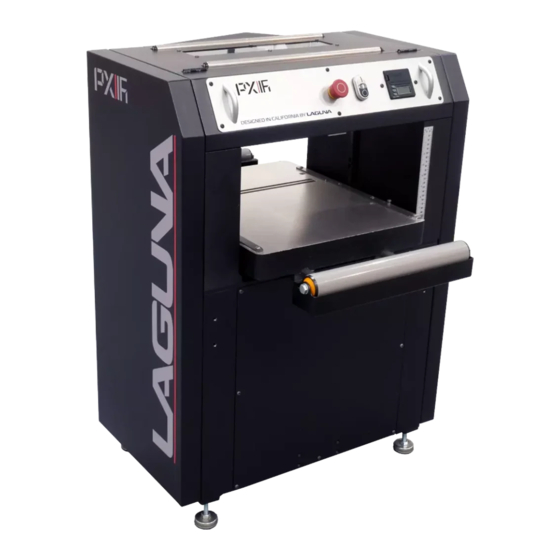
Page 19: Machine Overview
General Information Machine Overview The Limiter: Acts as a stop to prevent the cutterhead from contacting the table and to prevent stock from sliding past the edge of the cutterhead. Table Rollers: The Rollers act as a stop to reduce the chance of stock from sliding past the edge of the cutterhead or table. A.) Emergency Stop (E-STOP): Stops all functions of machine, however, power continues to machine. - Page 20 PX-16 SHEARTEC II PLANER C.) Digital Read Out (DRO): Thickness Display. Limiter: The Limiter: Acts as a stop to prevent the cutterhead from contacting the table and to prevent stock from sliding past the edge of the cutterhead. Table Rollers: The Rollers act as a stop to reduce the chance of stock from sliding past the edge of the cutterhead or table.
-
Page 21: Machine Specifications
General Information Machine Specifications The All-New PX-16 Planer signals an innovative new design for Laguna planers. The Laguna PX-16 is loaded with new ergonomic features to make woodworking safer and more enjoyable. Features: Infeed and Outfeed Rollers – The PX-16 features infeed and outfeed rollers to assist with material loading and feeding while keeping a compact footprint. - Page 22 PX-16 SHEARTEC II PLANER...
-
Page 23: Machine Set-Up & Assembly
Machine Set-Up & Assembly Machine Set-Up & Assembly Setup Overview ***(MUST READ)*** When setting up your PX-16 Shear-Tec: II Planer, please take a moment to read this overview prior to starting. The machine comes mostly assembled. You will have to assemble the leveling feet, the dust chute, and calibrate the height. -
Page 24: Unboxing
PX-16 SHEARTEC II PLANER Unboxing Your Machine will likely be delivered by a third-party delivery service. Before unpacking your new machine, first inspect the packaging, the invoice, and the shipping documents supplied by the driver. When unpacking your machine, separate all enclosed items from the packing materials and inspect them for damages. Ensure that there is no visible damage to either the packaging or the machine BEFORE the driver leaves. -
Page 25: Machine Placement
Machine Set-Up & Assembly Machine Placement Before you remove your machine from the packaging, select the area where you will use your machine. There are no hard and fast rules for its location, but below are a few guidelines: 1.) There should be sufficient area at the front of the machine to allow you to work on it comfortably. 2.) There should be sufficient area at the back of the machine to allow access for adjustments and maintenance to be conducted. -
Page 26: Inventory List
PX-16 SHEARTEC II PLANER Inventory List The following depicts items shipped with your machine. Before assembling, ensure that you have received all parts shown below. Machine parts should arrive sealed in plastic bags. Remove parts from plastic bags before laying them out to inventory them. -
Page 27: Assembly
Assembly Assembly Machine Preparation and Setup: 1.) Level machine using the four leveling feet on each of the four corners. Lock leveling feet into position with the nut on the leveling foot stud. Leveling Feet **OPTIONAL** If Installing Universal Casters: 1.) Raise and block planer for attaching caster set. - Page 28 PX-16 SHEARTEC II PLANER Machine Preparation and Setup: 2.) Clean all rust protected surfaces with a commercial de-greaser. DO NOT use acetone, gasoline, lacquer thinner or any type of cleaner that could damage paint. Coat cleaned surfaces with WD-40® or 20W machine oil.
- Page 29 Assembly Place Gauge Block on either side of the Bottom Roller, to assure that Bottom Roller recess is at the same height set across the table. 3.) Turn the knobs (See Figure G) to move the table roller up or down to the desired position, then secure Bottom Roller in position.
- Page 30 PX-16 SHEARTEC II PLANER Make sure level the Carbide Blade Roller using a Calibrated Leveling Indicator & Leveling Block. Using these instruments verify readouts of Bottom Dead Center of the Carbide Blade Roller. 3.) To level and secure the Top Roller, use the same technique, and use the same Calibrated Leveling Indicator &...
- Page 31 Assembly 1.) On the Top of the exposed Carbide Blade Roller area, locate 4 large Allen Set Screws on the Corners of the Planer (See Figure J), to adjust the amount of pressure (Increase/Decrease) on the Top Roller, use appropriate T- Wrench as pictured below.
- Page 32 PX-16 SHEARTEC II PLANER...
-
Page 33: Operation
Operation Operation PLACE THE PLANER ON A “SECURE AND STABLE SURFACE” FOR OPERATION.“CLAMP OR BOLT” THE PLANER INTO POSITION. 1.) Establish the proper depth of cut (Equal to or less than 1/16”), using either the DRO (Digital Read Out) or Scale. 2.) Pull out and lock each extension roller to support long stock. -
Page 34: Power Supply Circuit Requirements
PX-16 SHEARTEC II PLANER Power Supply Circuit Requirements The power source circuit for your machine must be grounded and rated for the amperage given below. Never replace a circuit breaker on an existing circuit with one of higher amperage without consulting a qualified electrician to ensure compliance with wiring codes. -
Page 35: Calibrating The Thickness
Calibrating The Thickness Calibrating The Thickness NOTICE!-The following procedures describe the use of a “Calibrating Board”. It is a piece of hardwood which has been surfaced on one side with a jointer, drum sander or wide belt sander. With the Planer “OFF”- ·... -
Page 36: Calibrating The Dro (Digital Read Out)
PX-16 SHEARTEC II PLANER Calibrating The DRO (Digital Read Out) 1.) Remove the battery cover of the DRO and install (2) AAA batteries. NOTICE! DRO Button Reference and Use It is helpful to familiarize these buttons and their purpose with the Wixey™... -
Page 37: Maintenance & Troubleshooting
Maintenance & Troubleshooting Maintenance & Troubleshooting FAILURE TO MAINTAIN THIS MACHINE USING REQUIRED ROUTINE UPKEEP, SAFEGUARDING & PREVENTIVE MEASURES WILL VOID WARRANTY. General Keep your machine clean. At the end of each day, clean the machine. Wood contains moisture, and if sawdust or wood chips are not removed they will cause rust. -
Page 38: Shear-Tec Ii Knife Rotation/Replaement
PX-16 SHEARTEC II PLANER Shear-tec II Knife Rotation/Replaement KNIFE INSERTS ARE DANGEROUSLY SHARP. USE EXTREME CAUTION WHEN INSPECTING, REMOVING, OR REPLACING KNIFE INSERTS. TURN PLANER OFF AND DISCONNECT POWER BEFORE PERFORMING ANY MAINTENANCE OR ADJUSTMENTS! • MAKE SURE ALL KNIFE INSERT SCREWS ARE TIGHTENED SECURELY. LOOSE INSERTS CAN BE PROPELLED AT HIGH SPEED FROM A ROTATING CUTTERHEAD, CAUSING INJURY. -
Page 39: Lubrication
Maintenance & Troubleshooting Lubrication Lubrication Table Position Grease Gear Box Chain Chain Chain Chain Chain Lead Screw The Gear Box Oil (#80 Weight Oil) must be changed after 2500 hours of work (Instructions to replace Gear Box Oil is as follows). - Page 40 PX-16 SHEARTEC II PLANER The lubricant in the gear box must be drained and replaced every 2,500 hours. Multi-purpose gear box lubricant (#80 Weight Oil) will be suitable. To Replace the lubricant: 1.) Remove the Bottom Gear Box Oil Drain Plug. Drain dirty oil thoroughly.
- Page 41 Maintenance & Troubleshooting Washer. 5.) Remove Parts #97- Shaft, #96-Retaining Ring, #95-Knob, #98- Hex Screw, #99-FlatWasher, and Pt.#100- Chain Sprocket. 6.) Remove Part’s., .1-Roller, .2-Roller Bracket, & .3-Hex Screw. 7.) Remove Pt.# 101- Shoulder Screw, Pt.#102-Spring Washer, Pt.#153-Cap Screw. 8.) Remove Gear Box Cover-#105. 9.) Oil Inner Box mechanism with #80 Weight Oil.
-
Page 42: Front/Rear Precision Adjustment
PX-16 SHEARTEC II PLANER Front/Rear Precision Adjustment... - Page 43 Maintenance & Troubleshooting...
- Page 44 PX-16 SHEARTEC II PLANER...
-
Page 45: Troubleshooting
Maintenance & Troubleshooting Troubleshooting... -
Page 46: Wiring
PX-16 SHEARTEC II PLANER Wiring REVIEW THE ELECTRICAL SAFETY PAGES PRIOR TO PERFORMING ANY WIRING PROCEDURES. Electrical Information:... -
Page 47: Replacement Parts Diagrams
Replacement Parts Diagrams Replacement Parts Diagrams BASE: TABLE: CUTTER ASSEMBLY:... - Page 48 PX-16 SHEARTEC II PLANER...
-
Page 49: Replacement Parts Tables
Replacement Parts Tables Replacement Parts Tables... - Page 50 PX-16 SHEARTEC II PLANER...
- Page 51 Replacement Parts Tables...
- Page 52 PX-16 SHEARTEC II PLANER...
- Page 53 Replacement Parts Tables...
-
Page 54: Dealer Machinery Warranty
We will repair or replace, without charge, any parts determined by Laguna Tools, Inc. to be a manufacturer’s defect. We require that the defective item/part be returned to Laguna Tools with the complaint. An RMA (return merchandise authorization) must be requested, from Laguna Tools, and included with all parts or machines returned to Laguna Tools for warranty consideration. -
Page 55: Customer Service Contact Information
For immediate service on any Laguna Tools products: +1 (800) 234-1976 customerservice@lagunatools.com Laguna Tools, Inc. LAGUNA® and the LAGUNA Logo® are the registered trademarks of Laguna Tools, Inc. All rights reserved. 12/01/2021 LAGUNA AMERICAN HEADQUARTERS Texas: 744 Refuge Way Suite 200, Grand Prairie, Texas 75050, U.S.A. - Page 56 LAGUNA AMERICAN HEADQUARTERS Texas: 744 Refuge Way Suite 200, Grand Prairie, Texas 75050, U.S.A. Phone: +1-800-332-4094 Huntington Beach: 7291 Heil Ave Huntington Beach, CA 92647, U.S.A. Phone: +1-949-474-1200 South Carolina: 825 Bistline Dr. Ste 101, West Columbia, SC 29172, U.S.A. Phone: +1-800-234-1976 Minnesota: 5250 West 74th St, Edina, MN 55439, U.S.A Phone: +1-949-474-1200...
Need help?
Do you have a question about the PX-16 SHEARTEC II and is the answer not in the manual?
Questions and answers