Table of Contents
Advertisement
Quick Links
Advertisement
Table of Contents

Related Manuals for laguna MPLAN25-15-3-0130


Summary of Contents for laguna MPLAN25-15-3-0130
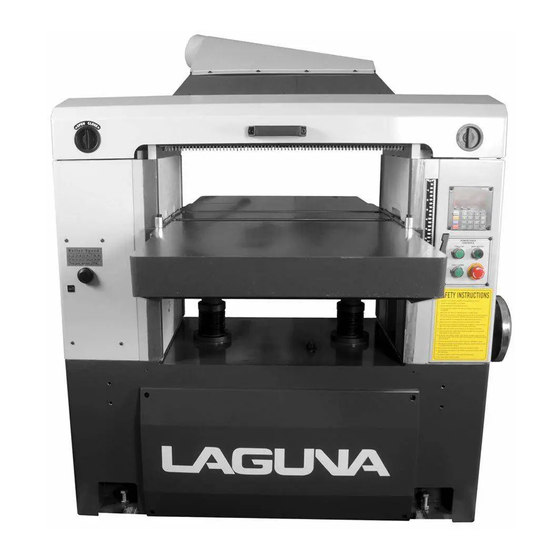
- Page 1 Operating Manual Model MPLAN25-15-3-0130 with CSA MPLAN25-10-1-0130 WARNING ! This tool should be connected to a grounded metal permanent wiring system; 2072 Alton Parkway. Irvine, CA 92606 or to a system having an equipment-grounding Ph: 800.234.1976 | www.lagunatools.com conductor...
-
Page 2: Safty Rule
WARNING Read this manual completely and observe all warning labels on the machine. Every attempt to provide a safe, reliable, easy-to-use piece of machinery. Safety, however, is ultimately the responsibility of the individual machine operator. As with any piece of machinery, the operator must exercise caution, patience, and common sense to safely run the machine. - Page 3 14. DISCONNECT TOOLS before servicing; when changing accessories, such as blades, bits, cutters, and the like. 15. REDUCE THE RISK OF UNINTENTIONAL STATING. Make sure switch is in off position before plugging in. 16. USE RECOMMENDED ACCESSORIES. Consult the owner's manual for recommended accessories.
-
Page 4: Table Of Contents
Table of Contents Page Safty Rule ........................ 1 Uncrating the Machine ..................... 4 Machine Preparation and Setup ................4 Dust Chute Assembly ....................5 Table Roller Handle Assembly ................. 5 Control Panel ......................5 Operation Panel ....................... 6 Raising and Lowering Table .................. 18 Adjusting Thickness Scale .................. -
Page 5: Uncrating The Machine
Uncrating the Machine Retain all packaging materials in case it becomes necessary to ship the machine to another site. Machine Preparation and Setup WARNING! The equipment used to lift this machine must have a rated capacity at, or above the weight of the planer. -
Page 6: Dust Chute Assembly
Dust Chute Assembly Mount the dust chute to the planer hood with eight M6x10 hex head screws B. Make sure the dust collection system has sufficient capacity and suction for your planer. Always turn on the dust collection system before starting the planer. (Fig. -
Page 7: Operation Panel
Operation Panel Function: 1. One or two speed positioning 7. Resolution: 0.1mm/ 0.05mm/ 0.01mm 2. Manual / Single mode 8. Correct zero point 3. 10 sets single program 9. Display: RPM speed 4. 10 sets tool offsets 10. Protection for tool / motor fault 5. - Page 8 Manual Mode Description: To move the machine table by pressing M15 keyboard. fast forward backward fast Example: M15 displays 100.00mm, to move the machine table: ※ Note: Be sure in “manual” mode. (LED lamp of “manual / Single” key is blinking) The upper window shows “HAnd”...
- Page 9 Pre-Set Program (10 sets) Description: Pre-set program 10 sets, enter program # 0~9 to execute. Example: Program 1=10mm, Program 2=20.00mm. Step1. Press ProG select enter a key (0-9, total of 10sets). ※ Note: Be sure in manual mode. Step2. (Enter program 1=10mm), press ProG more press Step3.
- Page 10 Fast Program Description: To facilitate frequently used positions, the keys 0 to 9 have associated preset target values. And the positioning can be started immediately. Example: Program 1=10.00mm, program 2=20.00mm. Execute program 2 as below: Step1. Select singe mode LED lamp off. 100.00 100.00 Step2.
- Page 11 Load datum values A. Description: To load current value according to working piece. Example: M15 current value display100.00mm, actual size: 100.50mm, follow the steps as below: Step1. Select singe mode LED lamp off. 100.00 100.00 , enter new Step 2. Press OriGin value, press 100.00...
- Page 12 Resolution Description: Select resolution: 0.1mm/0.01mm/0.05mm. Example: M15 current value display100.0mm, to select display:100.00mm follow the steps as below: Step 1. Select single mode LED lamp off. 100.0 100.0 Step 2. Press to select resolution. 100.0 Step 3. Press (0.1 / 0.01 / 0.05) 0.01 100.00 Step 4.
- Page 13 Sensor Calibration A. Description: For better accuracy, please execute calibration immediately after installed sensor each time. Step 1. Fix sensor, keep 1mm gap from tape (RECOMMENDED). Gap sensor-tape Step 2. Press Target value display GO (Enter parameter) Step 3、Press and hold to start.
- Page 14 B. Troubleshooting of calibration: a. Display: GAP LO Possible cause: The gap is too narrow. Excluding: Please enlarge the gap. Press follow step 2 again. b. Display: GAP Hi Possible cause: The gap is too big. Excluding: Please narrows the gap and press calibration again.
- Page 15 Parameter Parameter Display Description Default Remarks CHAnGE Load datum value Select counting direction (+ / -) -dir OriGin Load origin 0.00mm OffS- Set tool diameter 0.00mm ─ ─ ┤├─ POSdir Positioning mode ─ SPEEd One or two speed positioning LoAd 0 Load tool diameter 0.00 Lo-End...
- Page 16 Parameter Lock And Open Description: Needless function can open or close, to prevent client operation unsuitable to cause the fault. Step 1. Select single mode LED lamp off 100.00 100.00 Step 2. Press PASS target value display ”PASS” blinking, _ _ _ _ current value display: _ _ _ _ blinking Step 3.
- Page 17 Troubleshooting 1. Possible Cause: No sensor SEnSor Excluding: a. Power off Error b. 9 Pin connector is loosen or wire broken c. The gap is too big between sensor and tape. 2. Possible Cause: A motion in the wrong direction. CHAnGE Excluding: a.
- Page 18 5. Possible Cause: Current value over soft low and high Lo Err (F10、F11) ※ Note: Frame show Lo/Hi Excluding: a. Check machine table whether over the travel. b. Press LED blinking press to exit. c. Please reload origin datum values refer to page8.
-
Page 19: Raising And Lowering Table
Raising and Lowering Table Turn the handwheel A (Fig. 7) clockwise to raise the table. One revolution equals 1/32” or 0.03”. Note: The handwheel is spring loaded. Push in on the handwheel and rotate until the pins engage the detents. Adjusting Thickness Scale 1. -
Page 20: Sheartec Ii Cutterhead
ShearTec II CUTTERHEAD Knife inserts are dangerously sharp. Use extreme caution when inspecting, removing, or replacing knife inserts. The knife inserts on the 25” Planer are four-sided. When dull, simply remove each insert, rotate it 90° for a fresh edge, and re-install it. No further adjustment is necessary. -
Page 21: Setup Of Feed Rollers, Chip Breaker And Pressure Bar
Setup of Feed Rollers, Chip Breaker and Pressure Bar WARNING! Disconnect machine from the power source before performing any adjustments or maintenance. Failure to comply may cause serious injury! The planer comes set up from the factory and shouldn’t need any adjustment. If you find adjustment is necessary, follow the below listed sections for setting the infeed roller, chip breaker,... -
Page 22: Anti-Kickback Fingers
Anti-Kickback Fingers Anti-kickback fingers help prevent stock from being kicked out of the machine towards the user. Keep the fingers clean and free from sawdust, pitch gum, etc. so they operate smoothly. Adjustment of In-Feed Roller The in-feed roller should be set 0.02” below the lowest point of knife. -
Page 23: Adjustment Of Pressure Bar
Adjustment of Pressure Bar The pressure bar should be set even with the lowest point of knife. 1. Disconnect machine from power source. 2. Place a hard wood gauge under a knife in cutterhead. Raise table until wood gauge contacts the knife in its lowest position. 3. -
Page 24: V-Belt Adjustment
V-Belt Adjustment Three V-belts A, Figure 21) drive the cutterhead. The single V-belt (B, Figure 21) drives the in-feed and out-feed rollers. Belt tension has been set at the factory. If the belts have stretched and need adjustment. 1. Disconnect machine from power source. 2. -
Page 25: Maintenance
Maintenance WARNING! Disconnect the machine from power source before proceeding with any maintenance, lubrication or assembly! Failure to comply may cause serious injury! Periodic, or regular inspections are required to ensure that the machine is in proper adjustment, and that all hardware is tight. -
Page 26: Troubleshooting
Halted Feeding If the in-feed roll takes stock away from you while feeding, then feeding stops before contacting the knives, the chipbreaker is probably too low. Or the in -feed roller is not set low enough, or does not have enough pressure. In a similar situation, the in -feed roll takes the stock, the chipbreakers lift, and stops as you hear the knives contact the material. -
Page 27: Wiring Diagrams
Wiring Diagrams... -
Page 29: Parts Diagrams
PARTS DIAGRAMS... -
Page 35: Parts List
PARTS LIST Part No. Descriptions Q'ty 171398-000 DUST HOOD 000801-101 ROUND HEAD HEX SCREW M6*1.0P*10 171393-000 CHIP BRACKER 000104-110 SOC HD CAP SCREW M8*1.25P*30 006305-100 SPRING WASHER 8.2*15.4 050320-000 BRACKET 008006-100 HEX NUT M8*1.25P 171559-000 TOP COVER 340007-615 BLOCK 250123-615 HANDLE 000104-108 SOC HD CAP SCREW... - Page 36 Part No. Descriptions Q'ty 000105-109 SOC HD CAP SCREW M10*1.5P*75 280056-901 COMPRESSED SPRING 000105-105 SOC HD CAP SCREW M10*1.5P*40 050455-000 PRESSURE PLATE - REAR 070019-902 SPROCKET 360189-000 OUTFEED ROLLER 030202-002 BALL BEARING 6007-2NSE 030219-002 BALL BEARING 6210-2NSE 012005-003 8*7*35 922577-000 SHEARTEC 2 CUTTERHEAD ASSY 58.1 923578-000...
- Page 37 Part No. Descriptions Q'ty 050305-000 PRESSURE PLATE - FRONT 280053-000 SPRING 050463-000 PRESSURE PLATE BASE - RIGHT 360627-902 FIXING SHAFT 360632-902 FIXING SHAFT 250160-615 SPACER 172281-905 ANTI-KICK BACK 010107-000 RETAINING RING RTW-47 380388-902 HEX SCREW 000102-103 SOC HD CAP SCREW M5*0.8P*10 000302-210 ROUND HD SCREW...
- Page 38 Part No. Descriptions Q'ty 107.21 320316-000 GEAR 107.22 360646-000 SHAFT 107.23 320209-000 GEAR 107.24 012003-007 5*5*20 107.25 360647-000 GEAR SHAFT 107.26 043001-000 OIL LENS 107.27 381073-000 BUSHING 107.28 360648-000 GEAR SHAFT 107.29 050466-008 GEARBOX 107.30 320211-000 GEAR 107.31 043401-000 PLUG PT1/4"-19 107.32 012003-001 5*5*8...
- Page 39 Part No. Descriptions Q'ty 000203-102 SET SCREW M6*1.0P*8 230122-000 UNIVERSAL HANDLE 050318-902 FIXING SHAFT 000104-112 SOC HD CAP SCREW M8*1.25P*40 900487-000 MOTOR ASSY 1/2HP*230V/460V*60HZ*3PH 900485-000 MOTOR ASSY 1/2HP*230V*60HZ*1PH 000003-105 HEX. SCREW M8*1.25P*25 000103-107 SOC HD CAP SCREW M6*1.0P*20 006303-100 SPRING WASHER 6.1*12.3 290015-901 SHOULDER SCREW...
- Page 40 Part No. Descriptions Q'ty 320310-902 SPROCKET 920372-000 HANDWHEEL ASSY 050458-902 HANDWHEEL BASE 923453-000 MOTOR CORD 921337-000 MOTOR CORD 012003-004 5*5*15 360631-000 HANDWHEEL SHAFT 280091-000 SPRING 000104-103 SOC HD CAP SCREW M8*1.25P*12 000203-106 SET SCREW M6*1.0P*16 380226-902 BUSHING 011106-101 8*18 000103-102 SOC HD CAP SCREW M6*1.0P*10 006001-021...
- Page 41 Part No. Descriptions Q'ty 280067-901 SPRING 170897-000 COVER - REAR 021802-000 RELIEF BUSHING NB-2430 021805-000 RELIEF BUSHING NB-1216 170894-008 WIRING BOARD 008308-100 HEX LOCK NUT M10*1.5P 170638-156 HOOK 000105-103 SOC HD CAP SCREW M10*1.5P*30 000006-206 HEX. SCREW M16*2.0P*55L 008011-200 HEX NUT M16*2.0P 050314-008 FOOT...
- Page 42 Part No. Descriptions Q'ty 921335-000 POWER CORD 190074-901 SPACER 010205-000 RETAINING RING ETW-8 171399-902 BRACKET 921133-000 INDUCTION PLATE 150001-000 IDLE 000105-107 SOC HD CAP SCREW M10*1.5P*50 040005-000 HEX. WRENCH 040007-000 HEX. WRENCH 040204-000 WRENCH BOX 12*14 040206-000 WRENCH BOX 17*19 040207-000 WRENCH BOX 22*24...
- Page 43 Part No. Descriptions Q'ty 006504-100 TOOTH WASHER 8.4*15(BW-8) 021003-000 CORD CLIP ALT-150M 201506...
Need help?
Do you have a question about the MPLAN25-15-3-0130 and is the answer not in the manual?
Questions and answers