Table of Contents
Advertisement
Quick Links
For Standard Height
Doors and Panels Only
Read the instructions in this manual before beginning installation. Save these instructions
and refer to them for inspection, maintenance, and troubleshooting information.
For questions regarding the operation, installation or maintenance of this product, visit bradleycorp.com
or call 800.BRADLEY (800.272.3539).
Product warranties and parts information may also be found on our website at bradleycorp.com.
*HDWC-INSTR-042*
HDWC-INSTR-042 Rev. A: ECO 20-14-002S
© 2021 Bradley
Page 1 of 29
6/25/2021
Installation
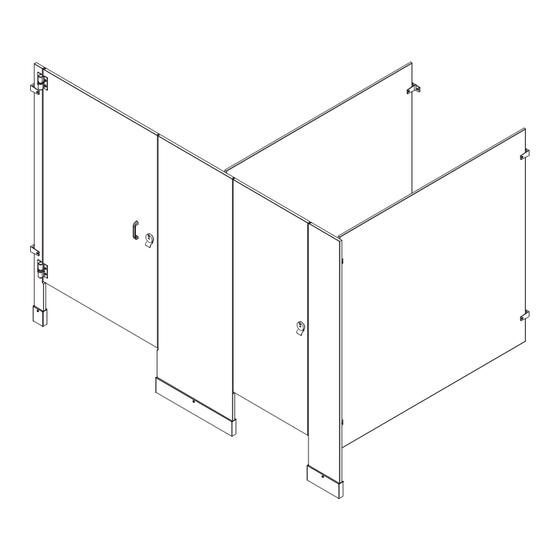
Phenolic Privacy Restroom Partitions
Floor-Braced - Series 500
Table of Contents
Safety Information . . . . . . . . . . . . . . . . . . . . . . . . . . . . . .2
Supplies Required . . . . . . . . . . . . . . . . . . . . . . . . . . . . . .3
Hardware Provided . . . . . . . . . . . . . . . . . . . . . . . . . . . . .3
Example of Submittal Drawing. . . . . . . . . . . . . . . . . . . . .3
Door Descriptions & Part Numbers . . . . . . . . . . . . . . . . .4
Pilaster Descriptions & Part Numbers . . . . . . . . . . . . . . .5
Pilaster Configurations & Part Numbers . . . . . . . . . . . . .6
Layout Dimensions for Brackets . . . . . . . . . . . . . . . . .8-9
Mounting Brackets to Wall . . . . . . . . . . . . . . . . . . . . . . .10
Leveling Screws to Pilaster . . . . . . . . . . . . . . . . . . . . . .11
Mounting Brackets to Pilaster . . . . . . . . . . . . . . . . .12-13
Pilaster Mounting Hardware . . . . . . . . . . . . . . . . . . . . .14
Pilasters and Panels . . . . . . . . . . . . . . . . . . . . . . . .15-16
Wall-Hung Pilasters . . . . . . . . . . . . . . . . . . . . . . . . .17-18
Pilaster Shoes . . . . . . . . . . . . . . . . . . . . . . . . . . . . . . . .19
Hinges . . . . . . . . . . . . . . . . . . . . . . . . . . . . . . . . . . .20-21
Door Hardware. . . . . . . . . . . . . . . . . . . . . . . . . . . . .22-27
Urinal Screens . . . . . . . . . . . . . . . . . . . . . . . . . . . . .28-29
Menomonee Falls, WI 53052 USA
800 BRADLEY (800 272 3539)
P.O. Box 309
+1 262 251 6000
bradleycorp.com
Advertisement
Table of Contents

Subscribe to Our Youtube Channel
Related Manuals for Bradley 500 Series


Summary of Contents for Bradley 500 Series
-
Page 1: Table Of Contents
Product warranties and parts information may also be found on our website at bradleycorp.com. *HDWC-INSTR-042* P.O. Box 309 HDWC-INSTR-042 Rev. A: ECO 20-14-002S Menomonee Falls, WI 53052 USA © 2021 Bradley 800 BRADLEY (800 272 3539) +1 262 251 6000 Page 1 of 29 6/25/2021 bradleycorp.com... -
Page 2: Safety Information
Separate parts from packaging and make sure all parts are accounted for before discarding packaging material. If any parts are missing, do not begin installation until you obtain the missing parts. Bradley • HDWC-INSTR-042 Rev. A: ECO 20-14-002S 6/25/2021... -
Page 3: Supplies Required
60-1/2" (1537) 36" (914) Wall to Centerline Center to Center 1" (25) 61-1/4" (1556) to Face 1/2" (13) 3" 20-1/2" 1" (25) Gap 3" (76) 36" 24" 24" 10" (914) (610) (610) (254) Bradley • HDWC-INSTR-042 Rev. A: ECO 20-14-002S 6/25/2021... -
Page 4: Door Descriptions & Part Numbers
Right Hinge In / Left Hinge Out, W/Latch Holes Hinge Out, W/Latch Holes Outside of Stall C490-XXNSIRH-XXXX C490-XXNSILH-XXXX Right Hinge In / Left Left Hinge In / Right Hinge Out, W/Latch Holes Hinge Out, W/Latch Holes Bradley • HDWC-INSTR-042 Rev. A: ECO 20-14-002S 6/25/2021... -
Page 5: Pilaster Descriptions & Part Numbers
Privacy Alcove, Privacy Wall, Right Hinge In / Left Latch In / Right Latch In / Left Hinge In / Left Hinge Out Right Latch Out Left Latch Out Right Hinge Out Bradley • HDWC-INSTR-042 Rev. A: ECO 20-14-002S 6/25/2021... -
Page 6: Pilaster Configurations & Part Numbers
Privacy, Right Hinge In Right Latch In / Left Latch Out Left Hinge In / Right Hinge & Left Hinge Out & Left Hinge In & Left Hinge Out Out & Left Hinge Out Bradley • HDWC-INSTR-042 Rev. A: ECO 20-14-002S 6/25/2021... -
Page 7: Pilaster Configurations & Wall Hung Part Numbers
Privacy Wall, Privacy Wall, Left Latch In / Right Latch In / Right Hinge In / Left Hinge In / Right Latch Out Left Latch Out Left Hinge Out Right Hinge Out Bradley • HDWC-INSTR-042 Rev. A: ECO 20-14-002S 6/25/2021... -
Page 8: Layout Dimensions For Brackets
Panel Centerline: Measure the stall width across the (483) back wall and place a mark at the base of the rear wall ("B"). Repeat this step for each panel, starting each measurement from the last panel centerline ("B1"). Bradley • HDWC-INSTR-042 Rev. A: ECO 20-14-002S 6/25/2021... - Page 9 Panel Centerline: Measure the stall width across the back wall and place a mark at the base of the rear wall "A1" ("B"). Repeat this step for each panel, starting each measurement from the last panel centerline ("B1"). Bradley • HDWC-INSTR-042 Rev. A: ECO 20-14-002S 6/25/2021...
-
Page 10: Mounting Brackets To Wall
Ø5/16" hole (min. 2" (51) deep) at each hole location. Insert the plastic anchors in all holes and 'Ear' U-Bracket secure the brackets to the wall with the Bracket #14 x 2" screws provided. Bradley • HDWC-INSTR-042 Rev. A: ECO 20-14-002S 6/25/2021... -
Page 11: Leveling Screws To Pilaster
Remove bracket and drill Ø1/4" holes through the pilaster. Secure bracket to the pilaster using the #10-24 x 1/2" barrel nuts and #10-24 x 3/4" shoulder screws provided. Bradley • HDWC-INSTR-042 Rev. A: ECO 20-14-002S 6/25/2021... -
Page 12: Mounting Brackets To Pilaster
57-1/2" Secure the continuous bracket to the pilasters (1461) using the #14 x 5/8" screws provided. Bottom Bracket Refer to the submittal drawing for the correct orientation of the pilaster. Bradley • HDWC-INSTR-042 Rev. A: ECO 20-14-002S 6/25/2021... - Page 13 #10-24 x 1/2" for the correct barrel nuts and #10-24 x 1/2" shoulder orientation of the pilaster. screws provided. * For third stirrup bracket option only. Bradley • HDWC-INSTR-042 Rev. A: ECO 20-14-002S 6/25/2021...
-
Page 14: Pilaster Mounting Hardware
From the highest point in the room, adjust the support nut and washer to approximately 1" (25) above the finished floor. Level and adjust the remaining support nuts and washers to this height. 1" (25) Bradley • HDWC-INSTR-042 Rev. A: ECO 20-14-002S 6/25/2021... - Page 15 Secure the panel to the bracket using the #10-24 x 1/2" barrel nuts and #10-24 x 1/2" shoulder screws provided. Refer to the submittal drawing for the correct orientation of the pilaster. Spacer 12" (305) Bradley • HDWC-INSTR-042 Rev. A: ECO 20-14-002S 6/25/2021...
-
Page 16: Pilasters And Panels
#10-24 x 1/2" barrel nuts and #10-24 x 3/8" machine screws provided. Refer to the submittal drawing for the correct orientation of the pilaster. Spacer 12" (305) Bradley • HDWC-INSTR-042 Rev. A: ECO 20-14-002S 6/25/2021... -
Page 17: Wall-Hung Pilasters
Notch indicates bottom of pilaster. Notch indicates bottom of pilaster. Pilaster Plumb Line 12" Ref. 12" Ref. (305) (305) Floor Floor Bradley • HDWC-INSTR-042 Rev. A: ECO 20-14-002S 6/25/2021... - Page 18 Notch indicates bottom of pilaster. Notch indicates bottom of pilaster. Pilaster Plumb Line 12" Ref. (305) 12" Ref. (305) Floor Floor Bradley • HDWC-INSTR-042 Rev. A: ECO 20-14-002S 6/25/2021...
-
Page 19: Pilaster Shoes
Position pilaster shoe so that it rests flush with the floor. Using the hole in the shoe as a template, drill a Ø15/64" hole through the pilaster. Secure the shoe to the pilaster using the #14 x 5/8" screws provided. Bradley • HDWC-INSTR-042 Rev. A: ECO 20-14-002S 6/25/2021... -
Page 20: Hinges
Hinge Leaf Hinge Leaf Hinge Pin with Teeth without Teeth Any Hand (2) Any Hand (2) Top Hinge (with Hinge Cam) Pilaster Pilaster Door Side Side Side Bottom Hinge (No Hinge Cam) Bradley • HDWC-INSTR-042 Rev. A: ECO 20-14-002S 6/25/2021... - Page 21 The gap between the bottom of the door and the pilaster Slots on Bushing leaf is needed for rise of the door when opened. Bradley • HDWC-INSTR-042 Rev. A: ECO 20-14-002S 6/25/2021...
- Page 22 (.762) Pilaster Door Keeper .125" #14 x 5/8" (3.175) Torx Screws When the door latch is correctly installed, the red indicator color should appear when the latch is in the closed position. Bradley • HDWC-INSTR-042 Rev. A: ECO 20-14-002S 6/25/2021...
- Page 23 Remove the second dampening strip from the liner and place the bottom edge 3" (76) up from the bottom notch, and apply pressure to adhere to the pilaster. 3" (76) Bradley • HDWC-INSTR-042 Rev. A: ECO 20-14-002S 6/25/2021...
- Page 24 Inswing Door Secure the flat strike to pilaster wall using the #10 x 1" screws provided. Refer to Step G for installing the keeper and Step J for installing the dampening strip. Bradley • HDWC-INSTR-042 Rev. A: ECO 20-14-002S 6/25/2021...
-
Page 25: Door Hardware
Pilaster (.762) Door Keeper .125" (3.175) #14 x 5/8" Torx Screws When the door latch is correctly installed, the red indicator color should appear when the latch is in the closed position. Bradley • HDWC-INSTR-042 Rev. A: ECO 20-14-002S 6/25/2021... - Page 26 Secure to the door using the #10 x 5/8" screws provided. bottom edge 3" (76) up from the bottom notch, and apply pressure to adhere to the pilaster. 3" (76) 3" (76) 3" (76) Bradley • HDWC-INSTR-042 Rev. A: ECO 20-14-002S 6/25/2021...
- Page 27 Secure the flat strike to pilaster wall using the Flat Strike #10 x 1" screws provided. Outswing Door Refer to Step G for installing the keeper and Step K for installing the dampening strip. Bradley • HDWC-INSTR-042 Rev. A: ECO 20-14-002S 6/25/2021...
- Page 28 Using the bracket as a template, drill Ø1/4" holes through the urinal screen at each bracket hole. Secure the urinal screen to the brackets with the #10-24 x 1/2" barrel nuts and #10-24 x 1/2" shoulder screws provided. Bradley • HDWC-INSTR-042 Rev. A: ECO 20-14-002S 6/25/2021...
-
Page 29: Urinal Screens
Using the bracket as a template, drill Ø1/4" holes through the urinal screen at each bracket hole. Secure the urinal screen to the bracket with the #10-24 x 1/2" barrel nuts and #10-24 x 3/8" machine screws provided. Bradley • HDWC-INSTR-042 Rev. A: ECO 20-14-002S 6/25/2021...
Need help?
Do you have a question about the 500 Series and is the answer not in the manual?
Questions and answers