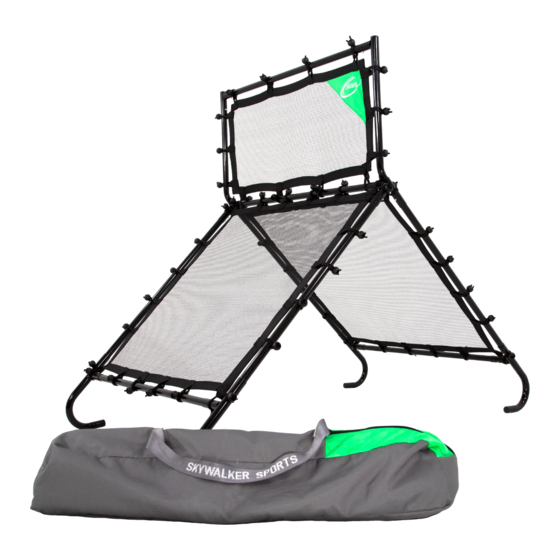
Summary of Contents for Skywalker SPORTS SSMSTR01
- Page 1 ASSEMBLY, MAINTENANCE, & USER MANUAL MODEL #SSMSTR01 WARNING Read all precautions and instructions in this manual before using this equipment. Skywalker Holdings LLC Save this manual for future reference. P.O. Box 574, Brigham City, UT 84302...
-
Page 2: Table Of Contents
HEY WE'VE GOT SOMETHING REALLY IMPORTANT TO SAY Skywalker Sports belongs to a family of brands focused on providing active products. Check us out online! We've got assembly videos (for those of you who prefer movies over books), FAQs (so you know you're not the only one who needs help), additional products (including trampolines, playground, sports, and fitness equipment), and most importantly, find us on social media! Because we want to be your friend. -
Page 3: Part List
BEFORE YOU BEGIN Thanks for choosing Skywalker Sports! We’re just as excited as you are to help your family live an active (but most importantly FUN) lifestyle. This model is one of our favorites, and we’re confident you’ll love it too. To make things easier for you, we’ve listed important information that you need to know. -
Page 4: Part Identification
PART IDENTIFICATION Before you begin, take a look at the drawings below to make sure you have all the parts! The numbers in the squares to the left (key numbers) will help you identify the parts during assembly. Left Joint (x1) Right Joint (x1) Left Leg (x2) Straight Tube... - Page 5 Upper Net (x1) Bag (x1)
-
Page 6: Exploded Drawing
EXPLODED DRAWING (12) (12) (11) (11) (13) (10) (10) (14) -
Page 7: Assembly
ASSEMBLY READ THIS BEFORE YOU BEGIN • The assembly steps refer to parts by their descriptions and key numbers (see the part list on page 3). • The assembly steps are written in a specific order, and if you don’t follow them exactly, you may end up having to start all over again. - Page 8 ASSEMBLY STEP 3 Using the right joint (2), attach a straight tube (5) to the right side of the joint and then attach the right leg (4) to that straight tube. Now, attach the remaining straight tube (5) into the bottom of the right joint (2) (into the first hole).
- Page 9 STEP 5 Slide the short side of the two corner joints (12), onto both ends of a straight tube (5). Then insert two top tubes (11) into the long sides of the corner joints (12). Make sure the bends of both top tubes are facing out. Straight Top Tube Corner Joint...
- Page 10 ASSEMBLY STEP 7 Attach a corner of the lower net (6) to the frame by placing two elastics with ball (7) through the same tab then stretch to each side of the frame as shown below. Note: To attach the elastic with ball, hold the ball end at the bottom of the frame then thread the elastic through the tab.
- Page 11 STEP 9 Attach the remaining tabs of lower net (6) to the frame using the elastics with ball (7). Elastic with Ball (x16) STEP 10 Repeat steps 7-9 to attach the remaining lower net (6) to the opposite side of the frame. Lower Net (x1) Elastic with Ball (x24)
- Page 12 ASSEMBLY STEP 11 Attach the corners of the upper net (13) to the upper portion of the frame using eight elastics with ball (7) as shown. Elastic with Ball (x8) Upper Net (x1) (13) STEP 12 Attach the remaining tabs to the upper part of toss back using elas- tics with ball (7).
- Page 13 STEP 13 You can also choose to use just one panel of your Training Rebounder. To use this portion, remove one lower panel from the other sections of the training rebounder, keep the corner joints on the section you remove. Now place a peg (9) into each of the corner joints.
-
Page 14: Maintenance And Care
MAINTENANCE & CARE INFORMATION Congratulations and high five on successfully assembling your new Skywalker Sports Multi Sport Training Rebounder. Now, the best way to keep your new training rebounder in tip top shape, is to periodically check for: • Missing, improperly positioned, or insecurely attached netting or frame pieces •... -
Page 15: Warranty
LIMITED WARRANTY Skywalker Holdings, LLC warrants its products to be free from defects in material and workmanship under normal use and service conditions. The steel frame is warranted for three (3) years after the date of purchase. All other parts are warranted for one (1) year after the date of purchase. Warranty coverage extends only to the original retail purchaser from the date of original purchase. - Page 16 NOTE: SKYWALKER HOLDINGS, LLC IS NOT RESPONSIBLE OR LIABLE FOR INDIRECT, SPECIAL OR CONSEQUENTIAL DAMAGES ARISING OUT OF OR IN CONNECTION WITH THE USE OR PERFORMANCE OF THE PRODUCT OR OTHER DAMAGES WITH RESPECT TO ANY ECONOMIC LOSS, LOSS OF PROPERTY, LOSS OF REVENUE OR PROFITS, LOSS OF ENJOYMENT OR USE, COST OF REMOVAL, INSTALLATION OR OTHER CONSEQUENTIAL DAMAGES.


Need help?
Do you have a question about the SPORTS SSMSTR01 and is the answer not in the manual?
Questions and answers