
Related Manuals for Thermo Scientific Barnstead TII 1403 Series


Summary of Contents for Thermo Scientific Barnstead TII 1403 Series
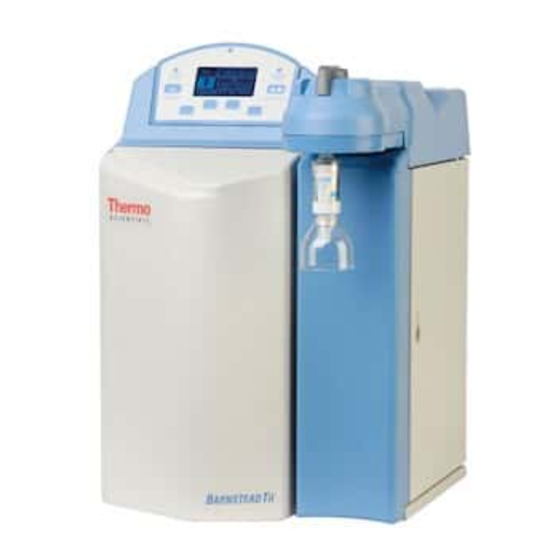
- Page 1 Barnstead TII Type II Water System - Series 1403 and 1404 Operating Manual and Parts List LT1403X8 Rev. 1 _________________________________________________________________________________ Part of Thermo Fisher Scientific...
- Page 2 D14031 (7165) 12 LPH 90V-240V D14041 (7166) 24 LPH 90V-240V MANUAL NUMBER LT1403X8 (7007165) 3/25/11 Added info for N.I.S.T. module in Optional Accessories - pg3-20 7/19/10 Transfer to Marietta (was LT1403X8 7/17/09) ECR/ECN DATE DESCRIPTION Thermo Scientific Type II Water System...
- Page 3 Thermo Fisher Scientific makes no representations or warranties with respect to this manual. In no event shall Thermo be held liable for any damages, direct or incidental, arising out of or related to the use of this manual. ©2010 Thermo Fisher Scientific. All rights reserved. Type II Water System Thermo Scientific...
- Page 4 Always use the proper protective equipment (clothing, gloves, goggles, etc.) 4 Always dissipate extreme cold or heat and wear protective clothing. 4 Always follow good hygiene practices. 4 Each individual is responsible for his or her own safety. Thermo Scientific Type II Water System...
- Page 5 We can also provide you with a quotation on our Extended Warranty for your Thermo Scientific products. Whatever Thermo Scientific products you need or use, we will be happy to discuss your applications. If you are experiencing technical problems, working together, we will help you locate the problem and, chances are, correct it yourself...over the telephone without a service...
-
Page 6: Table Of Contents
Procomm ......... . .3-25 Connecting and Starting the Printer ..... . .3-26 Thermo Scientific Type II Water System... - Page 7 Set Units ..........4-9 Type II Water System Thermo Scientific...
- Page 8 Maintenance Log ..........8-1 Thermo Scientific...
-
Page 10: Safety Information
1. Use a properly grounded electrical outlet of correct voltage and current handling capacity. 2. Do not locate the Thermo Scientific TII directly over equipment that requires electrical service. Routine maintenance of this unit may involve water spillage and subsequent electrical shock hazard if improperly located. - Page 11 Note The UV lamp contains mercury. If broken or no longer needed, do not dispose of the UV lamp in the trash. Recycle or dispose of the UV lamp as hazardous waste. Type II Water System Thermo Scientific...
-
Page 12: Product Information
Read the instructions carefully to ensure that you receive maximum benefit from the Thermo Scientific TII. Also, please fill out and return the enclosed warranty registration card, as it will help us assure you of proper warranty coverage. -
Page 13: Tii Water Specifications
500 ppm NaCl feed water solution @ 25°C (77°F), @ 4.5 bar (65 psig), 15% recovery. Flow rate and recovery will decrease with lower water temperature and pressure. The use of a hot water mixing valve before the RO system is recommended for water cooler than 15°C (59°F). Type II Water System Thermo Scientific... -
Page 14: Technical Specifications
Above -3" (7.6 cm) minimum for removal of top cover Front - 4.75" (12.1 cm) minimum for opening front door Thermo Scientific TII is equipped with four power cords and cor- Electrical Requirements responding fuses taped to each power cord to be plugged into a grounded electrical outlet of the appropriate voltage. - Page 15 Part I: General Requirements Per the provisions of the Electromagnetic Compatibility Directive 2004/108/EC, and per the provisions of the Low Voltage Directive 2006/95/EC. Copies of the Declaration of Conformity are available upon request. Type II Water System Thermo Scientific...
-
Page 16: Installation
Remove the unit from its shipping container and ensure that the following items are removed before discarding the packaging materials: 1. Thermo Scientific TII unit 2. Drain Water Tubing. Approximately 6 ft. (1.83 m) of 1/4” (0.64 cm) O.D. drain tubing (TU1190X12) with no fittings (Fig 3-1) 3. -
Page 17: Locating Unit
(Left) Blank Display (DL1190X18), (Right) Control Panel Wall Mount Bracket Note Also required for installation (purchased separately): 1. A storage reservoir. If a Thermo Scientific TII storage reservoir (D14061, D14062, D14063, D14064, D14071, D14072, D14073 or D14074) is also purchased, see contents in separate box. -
Page 18: Wall Mounting
Install the Thermo Scientific TII on a wall in a convenient location that is accessible to an atmospherically vented drain and electricity. 1. Locate the wall bracket packed separately from the unit. -
Page 19: Push-To-Connect Tubing Removal
Installation Push-to-Connect The following instructions will apply when you need to attach a piece of tubing to your Thermo Scientific TII during installation, unless otherwise Fitting Tubing Install noted in the installation instructions. To make tubing connections: 1. Make sure the tubing is cut off reasonably square and that no plastic burrs or ridges are present. -
Page 20: Quick Disconnect Fittings
2. Wet the o-ring on the coupling insert and push into the coupling body until you hear a click. Gently pull on the tubing to ensure it is secure. 3. To remove, press the metal thumb pad to release and pull coupling insert out. Thermo Scientific Type II Water System... -
Page 21: Uv Lamp Installation
Section 3 Installation UV Lamp Installation Locate the UV chamber inside the left door of the Thermo Scientific TII (Figure 3-7). Install the UV Lamp as follows: Figure 3-7. UV Chamber 1. Disconnect the power cord from the unit. 2. Access the left side of the unit by unlatching the screw securing the door with a flathead screwdriver. -
Page 22: Mps Cartridge Installation
Section 3 Installation Cartridge / Membrane Your Thermo Scientific TII has been shipped with one RO membrane for the Installation 12 lph unit, or two RO membranes for the 24 lph unit, which you will install. The Startup Kit (D502138) includes a... -
Page 23: Carbon Filter Installation
For easier installation, connect bottom first. RO Membrane Installation Figure 3-9a. Schematic of the UV and RO Placement in the Thermo Scientific TII. (a) is FEED, (b) is PRODUCT, and (c) is REJECT. Type II Water System Thermo Scientific... -
Page 24: Lph Units (1 Membrane)
Figure 3-9b. 24 lph RO Membrane Installation Figure 3-10. RO Membrane Housing Label 2. Open the left side door on the Thermo Scientific TII. 3. Referencing Figure 3-9A, locate the three unconnected tubes (two with elbows, one without) labeled FEED (A), PRODUCT (B) and REJECT (C). -
Page 25: Lph Units (2 Membranes)
See Figure 3-9b. The correct orientation for the installed membrane will be vertical with the Feed connection on the bottom. 2. Open the left side door on the Thermo Scientific TII. 3. Locate the four unconnected tubes (three with elbows, one without) labeled FEED 1, PRODUCT, PRODUCT and REJECT 2. -
Page 26: Cleaning Preparation
DRAIN DRAIN TUBE 10. Secure drain end of tube as Figure 3-12. Cleaning Block Installation pressurized water will exit the system during the cleaning procedure. Thermo Scientific Type II Water System 3-11... -
Page 27: Atmospheric Drain
We recommend a customer supplied shut off valve be installed in your feed water line. 3. The quick disconnect end of the tubing will be inserted into the feed water inlet on the lower left corner in the rear of the Thermo Scientific TII (Figure 3-13). Atmospheric Drain The RO reject and flush water is sent to drain through this connection. -
Page 28: Ro Membrane Rinse
If they have not, refer to UV Lamp, Cartridge, Membrane Installation and Cleaning Preparation in this section. When new RO membranes are installed in the Thermo Scientific TII, the membranes should be rinsed to remove all traces of preservative from the membranes. -
Page 29: Reservoir Connection
Answer yes to both questions. Once initiated, the rinse procedure will last two hours, and will stop automatically. Caution Do not allow the Thermo Scientific TII to operate unless water is available to the unit. Warning Use a properly grounded electrical outlet of correct voltage and current handling capacity. -
Page 30: System Cleaning Procedure
See Figure 3-20 to help locate the reservoir display. This figure shows that the reservoir is 75% full. Reservoir Display DI Display RO Display Figure 3-20. Typical TII Display Thermo Scientific Type II Water System 3-15... - Page 31 TII is attached to a suitable reservoir and that all water and electrical Procedures (cont.) connections between the Thermo Scientific TII and the reservoir are in place. The system should be cleaned before the first use, before a new cartridge pack is installed, or whenever the one-year cleaning timer alerts you.
-
Page 32: Cartridge Pack Installation
5. Lower unit manifold until it is flush with the top of the cartridge pack. 6. Hand-tighten wing head screw securely. 7. Close door. 8. DO NOT install the 0.2 micron filter and bell assembly at this time. Thermo Scientific Type II Water System 3-17... -
Page 33: Rinse-Up
6. Remove the hose barb from the dispense valve and proceed to the 0.2 Micron Final Filter Replacement section of this manual. Retain hose barb for future use. 7. Place unit in RUN mode until desired purity is achieved (>15 megohm-cm). 3-18 Type II Water System Thermo Scientific... -
Page 34: Control Panel Wall Mount Bracket
9. An accessory bench mounting display bracket (AY1367X2) can be used. Contact Technical Services to order. Caution Repeated removal and replacement of the control panel from the top cover may eventually cause it to become damaged. Thermo Scientific Type II Water System 3-19... -
Page 35: Optional Accessories
4. Confirm the choice by pressing “OK”. 5. Select “Yes” in the following display to start of the “N.I.S.T. Calibration”. 6. Once the N.I.S.T. calibration has begun, the following text messages 3-20 Type II Water System Thermo Scientific... - Page 36 The calibration can be out of tolerance when the resistivity deviation is larger than 1.5M Ohm-cm and/or the temperature deviation is larger than 0.67 °C. The current calibration values will be shown in the text message. These values will not be saved. Thermo Scientific Type II Water System 3-21...
-
Page 37: Resending N.i.s.t Module For Validation
The validation date of the module is stated on for Validation its validation certificate. After the expiration of the prior validation, the module can be sent back. To do this, contact your local distributor or Technical Services. 3-22 Type II Water System Thermo Scientific... -
Page 38: Dispense Overflow Cutoff Float
If the auto dispense is stopped by the overflow float, the Thermo Scientific TII will change modes to normal recirculation. -
Page 39: Computer/Printer Setup
Installation Dispense Overflow Cutoff Float (continued) Figure 3-27. Dispense Overflow Cutoff Float Computer/Printer Connect Thermo Scientific TII to a computer through the RS-232 port using hyperterminal or procomm. Setup One Hyperterminal RS-232 Capture Instructions 1. Connect the 9 pin serial cable (part no. WHX18) from the Thermo Scientific TII RS-232 port on the back left side of the unit to (COM2:) port or (COM1:) port on back of computer. -
Page 40: Procomm
ê. Also, the ° symbol may be displayed as ø. Procomm 1. Connect the 9 pin serial cable from the Thermo Scientific TII RS-232 port on the back left side of the unit to (COM2:) port or (COM1:) port on back of computer. -
Page 41: Connecting And Starting The Printer
1. Make sure the printer and Thermo Scientific TII are turned OFF. the Printer 2. Connect the Thermo Scientific TII to the printer via the RS232 port on the back left side of the unit. Use the tan printer cable included with the Epson printer. -
Page 42: Using Your Tii
7. The system should be left in RUN during the workday. 8. If the Thermo Scientific TII is to be shut down for an extended period of time, the unit should be completely drained and the cartridges and membrane(s) removed and refrigerated to prevent the growth of bacteria. -
Page 43: Buttons
Refer to “Automatic Dispensing” in the “User Settings” section of this manual for more information. Four blank buttons appear on the control panel and perform various functions as defined on the display throughout operation. See the “Operation” section for more detailed descriptions. Type II Water System Thermo Scientific... -
Page 44: Di Run Mode
When the reservoir is full, the RO system will automatically return to STANDBY. Figure 4-3. DI Run Mode Screens - a) DI system in Run and RO system in Standby, b) RO and DI systems both in Run. Thermo Scientific Type II Water System... -
Page 45: Automatic Flush (Ro Membrane)
STANDBY once power is restored. Automatic Flush In the Standby Mode, the Thermo Scientific TII will initiate a four minute automatic flush of the RO membrane once every three hours and fifty-six (RO Membrane) minutes of operation. -
Page 46: Automatic Dispensing
The screen will show current settings for Remote Volumetric, Unit Volumetric, Timed Dispense or OFF. Press MODE to choose setting and use the up and down arrows to set volume or time. 3. Press DISPENSE. Thermo Scientific Type II Water System... -
Page 47: Setting The Time And Date
OK. Date 2. Scroll to the SET DATE screen and press OK. Using the arrow keys, select date and press OK. Note Time format is 12 hour, and date format is day/month/year. Type II Water System Thermo Scientific... -
Page 48: Setting The Feedwater Chlorine Level
Conditions” section later in this manual to interpret the error. Setting the Feedwater To ensure that the RO membrane(s) in the Thermo Scientific TII are not damaged by free chlorine in the feed water, the system electronically tracks Chlorine Level the amount of chlorine processed by the carbon prefilter (D502115) and alerts the user when the carbon capacity is exhausted. -
Page 49: Display Contrast
Note When “UNIT UNDER COUNTER” is set to “ON,” Auto Dispense will not be available from the main unit dispenser, though the manual dispense knob is still operational. Display Contrast The Thermo Scientific TII display can be adjusted based on user preference. Type II Water System Thermo Scientific... -
Page 50: Connecting Tii To Nanopure System
Section 4 Using Your TII Set Units The Thermo Scientific TII can display readings in a variety of units. Use this option to set desired units. Printer Attached The Thermo Scientific TII can print readings to an optional printer accessory (AY1137X1). -
Page 52: Maintenance And Servicing
3. Remove the prefilter by pulling the cartridge straight out. 4. Replace the prefilter by following the instructions located in the “Prefilter Installation” section of this manual. 5. Reset the prefilter timer by following the “Timers” section of this manual. Thermo Scientific Type II Water System... -
Page 53: Carbon Replacement
Section 5 Maintenance and Servicing MPS Replacement The MPS cartridge incorporated in your Thermo Scientific TII is designed to prevent scale buildup on the membrane(s). This cartridge must be replaced when the anti-scalant level is approximately half dissolved. At this point, the quantity of anti-scalant entering the water is insufficient to effectively prevent scale accumulation on the membrane(s). -
Page 54: Cartridge Pack Replacement
Replacement purity requirements and your usage. Clean your Thermo Scientific TII and replace the cartridge pack when the product water purity drops below acceptable levels of resistivity, when organic levels become too high, or if a new 0.2 micron filter clogs rapidly after installation even though the... -
Page 55: Micron Final Filter Replacement
3. Open the dispense valve and flush at least 3 liters of water through the 0.2 micron final filter. Note It is suggested that PTFE tape be applied to the threads of the 0.2 micron final filter to ensure a tight seal. Type II Water System Thermo Scientific... -
Page 56: Fuse Replacement
Thermo Scientific TII is turned on Replacement and off. Lamp life is based on the Thermo Scientific TII being operated in the normal recirculating mode during regular working hours and then placed in the Standby mode during off hours. Every fourth time the pump goes on in the Standby mode, the UV light will go on. -
Page 57: Procedures To Reset Routine Timers
RESET Õ Are you sure? Õ YES/NO MENU Õ TIMERS Õ SANITIZATION Õ [Display shows time remain- System Sanitization ing in days] RESET Õ Are you sure? Õ YES/NO (Cleaning) Timer Type II Water System Thermo Scientific... -
Page 58: Troubleshooting
Section 5 Maintenance and Servicing Troubleshooting Message Possible Causes Action Ensure Thermo Scientific TII power cord is connected to a live power source and com- Thermo Scientific TII com- No electrical power to Thermo pletely plugged into electrical pletely inactive (pump and dis- Scientific TII. - Page 59 DI pump not functioning. PU1190X1) Check tubing inside system Pinched tubing. and between reservoir and sys- tem. Allow up to 24 hours of recir- Air purge not complete. culation for purging all air from the fluid path. Type II Water System Thermo Scientific...
-
Page 60: System Alarms And Errors
Section 5 Maintenance and Servicing System Alarms and If an error occurs in the Thermo Scientific TII system, the System Alarm LED will illuminate and an error message will appear on the display. Errors Message Possible Causes Action Res Interface Error Reservoir interface cable not Check cable connections. - Page 61 Check resistivity cell lead connections to control board. on control board. Resistivity cell out of Replace resistivity cell (E1403X6). tolerance. Ensure that reading on tag agrees Check cell tolerance with reading in software. 5-10 Type II Water System Thermo Scientific...
- Page 62 RO cell connections to control Check connections. board are unplugged. RO cells are fouled or out of tol- Replace RO cells (E1403X7). erance. Ensure that reading on tag agrees Check cell tolerance with reading in software. Thermo Scientific Type II Water System 5-11...
- Page 63 Possible leak, or MPS or carbon fil- none, check installation of MPS ter installed incorrectly or faulty. (D502114) and carbon filter (D502115) Ensure that reading on tag Check calibration tag. agrees with reading in software. 5-12 Type II Water System Thermo Scientific...
- Page 64 Chamber seal is compromised and Replace quartz sleeve and system UV lamp is getting wet. o-rings (TU733X1 and GSX62) System UV lamp not properly con- Check connection at UV nected to UV cable connector. chamber. Thermo Scientific Type II Water System 5-13...
- Page 65 TII. Error can occur if display is remoted. Information error I2C error Display remoted from unit. only, press any key or turn unit off/on to clear. 5-14 Type II Water System Thermo Scientific...
-
Page 66: Routine Care Alerts
1 year peak service life of the system Replace Res UV (LMX31) and reset reservoir UV lamp has expired. UV lamp timer. 1 year system sanitization/cleaning Clean the system and reset Sanitize System reminder has expired. the sanitization timer. Thermo Scientific Type II Water System 5-15... -
Page 68: Ordering Information
All parts listed herein may be ordered from the Thermo Scientific dealer from whom you purchased this unit or can be obtained promptly from the factory. When service or replacement parts are needed, check first with your dealer. -
Page 69: General Maintenance Supplies
Section 6 Ordering Information Basic Consumables Recommended Max. Description Catalog No. Qty. Shelf Life Thermo Scientific TII Cartridge Pack D502137 2 years RO Carbon Prefilter D502115 2 years MPS Cartridge D502114 2 years 1 Micron Prefilter D502113 2 years 0.2 Micron Final Filter and Bell... -
Page 70: Safety Stock
(continued) * If replaced, all calibration values (DI Cell, RO Cell, Pressure Gauges) will have to be entered for proper operation. ** If replaced, pertinent calibration values in PC1403X1 will have to be updated. Thermo Scientific Type II Water System... -
Page 71: Tii Accessories
Pump Interlock Cable for Barnstead Nanopure AY1403X3 Sanitization Block with Tubing BK1403X2 Alternate Tank Float Assembly AY1403X2 Alternate Tank Float Communication Cable AY1403X4 Alternate Tank Jones Plug Communication Cable AY1403X5 N.I.S.T Calibration Module E1403X5 Type II Water System Thermo Scientific... -
Page 72: Wiring Diagrams
WIRING DIAGRAMS Thermo Scientific Type II Water System... - Page 73 Section 7 Wiring Diagrams Type II Water System Thermo Scientific...
-
Page 74: Maintenance Log
Maintenance Log Date Description Parts Needed (Part #) Notes Thermo Scientific Type II Water System... - Page 76 Thermo Fisher Scientific 401 Millcreek Road Marietta, Ohio 45750 United States www.thermofisher.com...
Need help?
Do you have a question about the Barnstead TII 1403 Series and is the answer not in the manual?
Questions and answers