
Related Manuals for Beretta POWER MAX


Summary of Contents for Beretta POWER MAX
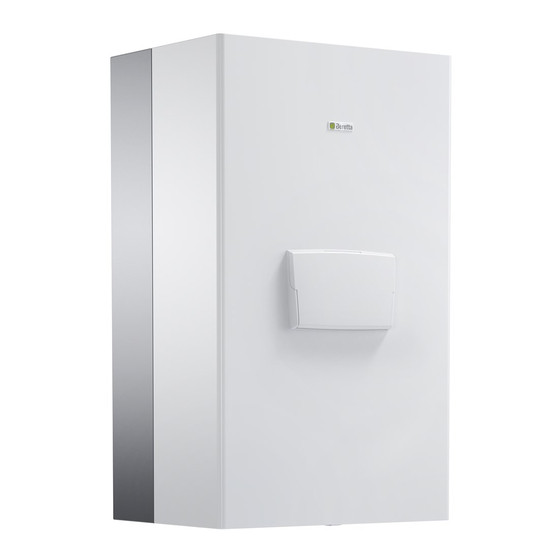
- Page 1 Installation and Operation Manual POWER MAX Condensation | Heating module Installation and Operation Manual...
- Page 2 CONFORMITY For a complete list of accessories and details of their compatibility, refer to the Catalogue. thermal modules POWER MAX comply with: - Regulation (EU) 2016/426 - Directive 92/42/EEC on efficiency requirements and Annex E and Pres. Republic Decree n. 412, 26 August 1993 (****)
-
Page 3: Table Of Contents
CONTENTS GENERAL INFORMATION ....4 3.10 Control board replacement ......54 3.11 Maintenance. -
Page 4: General Information
GENERAL INFORMATION Regularly check that the condensate drain is free from obstruc- tion. We recommend cleaning inside the exchanger once a year, 1.1 General Safety Information extracting jet and burner and removing any installation debris by suction. This operation should be done by personnel from the Technical Assistance Centre only. -
Page 5: Description Of The Appliance
(single coil for models POWER MAX 50 P DEP - POWER - Ignition/detection electrode . MAX 50 P, double coil for models POWER MAX 65 P ÷ POWER - Flue gases temperature probe . MAX 150), to guarantee a good corrosion resistance and the possibility of working with high Δ... -
Page 6: Identification
1.5 Identification The products are identified by: Technical data plate It indicates the technical and performance data. Central heating section Rated heat input Rated useful heat output Electric degree of protection Maximum operating pressure, CH circuit Temperature Efficiency η NOx class IT-GB-GR-IE-PT-SI: G20=20mbar G30/G31=28-30/37mbar II2H3+ SK: G20=20mbar (ES=18mbar) G30=28-30mbar G31=37mbar... -
Page 7: System Layout
1.6 System layout 50 P DEP - 50 P POWER MAX Flue gas analysis outlet Flue gas exhaust connection Gas valve Flue gases pressure switch Combustion chamber Electrical panel Minimum Pressure Switch set at 0,7 bar Exhaust flue probe Condensate drain siphon... - Page 8 65 P - 80 P POWER MAX Flue gas analysis outlet Flue gas exhaust connection Gas valve Combustion chamber Electrical panel Smoke-exhaust flue non-return valve Drain cock Minimum Pressure Switch set at 0,7 bar Pump Main switch Central heating return...
- Page 9 100 - 110 - 130 - 150 POWER MAX Flue gas analysis outlet Flue gas exhaust connection Combustion chamber Electrical panel Smoke-exhaust flue non-return valve Drain cock Minimum Pressure Switch set at 0,7 bar Main switch Central heating return Gas supply...
-
Page 10: Technical Specifications
1.7 Technical specifications POWER MAX Description U.M. 50 P 50 P 65 P 80 P Condensing boiler heating system Appliance type B23; B53; B53P; C13*; C33*; C53*; C63* IT-GB-GR-IE-PT-SI: G20=20mbar G30/G31=28-30/37mbar; II2H3+ SK: G20=20mbar G30=28-30mbar G31=37mbar; II2H3+ ES: G20=18mbar G30=28-30mbar G31=37mbar; II2H3+ BE: G20/25=20/25mbar;... - Page 11 Values referred to atmospheric pressure at sea level. (***) Up to 85°C if combined with the plate heat exchanger accessory. (****) (*****) To adjust the POWER MAX 110 and POWER MAX 150 models in Belgium, Switzerland and Hungary , please refer to the chapter “Adjustments”.
-
Page 12: Pumps
The thermal modulesPOWER MAX 50 P DEP, POWER MAX 50 P, must be inside or outside the appliance (see accessories). POWER MAX 65 P and POWER MAX 80 P are fitted with a circulator. For its sizing, consider the thermal module's water-side pressure drops, which are shown in the chart below. -
Page 13: Water Circuit
1.9 Water circuit 1.10 Positioning the temperature sensors Probes placed on the related sockets of the thermal module (POWER MAX 50 P DEP - POWER MAX 50 P): 6 7 8 Exhaust flue probe Safety thermostat CH flow temperature sensor... -
Page 14: Control Panel
1.11 Control panel CONTROL PANEL AND SYMBOLS RESET PROG MENU Rear light display MENU/Reset key: access to the main menu and restore functioning further to a failure lock-out Navigation keys Main switch (located on the lower part of the appliance) SECONDARY INFORMATION/DISPLAY VISUALISATION 8.8:8.8 8.8:8.8... -
Page 15: Installation
INSTALLATION 2.2 Overall dimensions and weights 2.1 Unpacking the product The thermal module POWER MAX is shipped palletised, packaged and with cardboard protections. The following material is supplied in a plastic envelope inside the package (1): - Instruction manual - Warranty information leaflet - LPG conversion kit - Wall-mounting bracket with plugs (no.4 plugs s=10 mm suit-... -
Page 16: Installation Premises
The minimum surface of ventilation openings is 3,000 cm for gas fuel heating systems. The thermal module POWER MAX can be installed in rooms that are permanently ventilated and equipped with suitably sized ventilation 2.4 Installation in older systems and... -
Page 17: Moving And Removing The Packing
2.6 Thermal module assembly the holes for fixing plugs must be drilled - Drill the holes and insert expansion plugs (3) Thermal modules POWER MAX are supplied complete with a - Fix the bracket to the wall using the screws (4) wall-mounting bracket. - Page 18 - remove the polystyrene block (B) under heat exchanger (only for models POWER MAX 100 - POWER MAX 110 - null - POW- ER MAX 150).
-
Page 19: Water Connections
2.7 Water connections The dimensions and position of thermal module's hydraulic connections are shown in the table below. Front view Bottom view POWER MAX DESCRIPTION 50 P 50 P 65 P 80 P 143,5 143,5 143,5 143,5 143,5 143,5 143,5... -
Page 20: Typical Water System Schematics
Non-return valve Diverter valve High temperature sys- Anti-scald mixer valve Pump (fitted as standard for models tem flow Expansion tank POWER MAX 50 P DEP and POWER High temperature sys- Safety valve MAX 80 P) tem return Drain Domestic cold water... - Page 21 Storage cylinder Outdoor sensor Non-return valve Pump (fitted as standard for models High temperature sys- Anti-scald mixer valve POWER MAX 50 P DEP and POWER tem flow Expansion tank MAX 80 P) High temperature sys- Safety valve High-temperature system circulator...
- Page 22 Non-return valve Diverter valve High temperature sys- Anti-scald mixer valve Pump (fitted as standard for models tem flow Expansion tank POWER MAX 50 P DEP and POWER High temperature sys- Safety valve MAX 80 P) tem return Drain High-temperature system circulator...
-
Page 23: Gas Connections
2.9 Gas connections 2.10 Discharge of combustion products The gas connection must be made respecting the installation reg- The appliance is supplied as standard in B-type configuration (B23- ulations in force, and sized to ensure the correct gas delivery to the B23P-B53P), i.e. - Page 24 Exhaust Ø 80 mm Maximum Pressure drop Model length 45° bend 90° bend Ø 80 mm POWER MAX 50 P 30 m 1,5 m POWER MAX 50 P 30 m 1,5 m POWER MAX 65 P 30 m 1,5 m...
- Page 25 C TYPE INSTALLATION Double pipes Ø 80-125 mm Discharge head Description Maximum Pressure drop Model length POWER MAX 50 P DEP 300 (275*) 45 (30*) 45° bend 90° bend Ø 80-125 mm POWER MAX 50 P 480 (455*) 45 (30*)
-
Page 26: Preparation For The Condensate Drain
This collector is installed as standard in models POWER MAX ule in order not to release any combustion products into the 50 P DEP - POWER MAX 50 P, while it is available as an accessory for environment when the thermal module is first switched on. -
Page 27: System Filling And Emptying
2.12 System filling and emptying N2H4 < 3 mg/l < 15 mg/l The thermal module POWER MAX must be provided with a charging CaCO3 Min. 50 ; Max.150 system to be connected to the appliance's return line. Trisodium phosphate None Chlorine <... -
Page 28: Emptying
- Open the shut-off cocks in order to slowly fill the system - Use the pressure gauge to check that the pressure is rising POWER MAX 50 P DEP - POWER MAX 50 P and the water is exiting through the vent valves - Close the shut-off cocks after the pressure reaches 1.5 bar... -
Page 29: Wiring Diagram
Minimum pressure switch Outdoor sensor (accessory) yellow Flow-meter PWM connection (*) green Factory connections for models POWER MAX 50 P DEP ÷ POWER MAX 80 P Only for models POWER MAX 50 P DEP ÷ POWER MAX 50 P (**) - Page 30 Central heating system pump green For models POWER MAX 50 P DEP ÷ POWER MAX 80 P circulator fitted as standard; for other models, the circulator is provided as an accessory with connections to be executed by the installer. Valid configuration for thermal modules without heat pump c having their own two-way valve, connected in cascade and (**) equipped with primary system circulator.
-
Page 31: Electrical Connections
Before connecting any external electrical components to the appliance (regulators, electric valves, climate control probes, The thermal module POWER MAX is manufactured fully wired and etc.), check to make sure that their electrical characteristics only needs to be connected to the mains, the room/heat demand are compatible with the available inputs and outputs (voltage, thermostat and any other system components. - Page 32 Loosen the fixing screws (2) and remove the protection (3) For connection, see the following figure: ~ 230 V 101 102 103 104 105 106 107 108 109 110 111 112 113 114 115 Circuit breaker Relay / Switch (230V AC) Refer to the device type for the supply tension.
- Page 33 Electrical wiring referred to layout 2 at page "20". Electrical wiring referred to layout 4 at page "21". 10 11 12 13 14 15 16 17 10 11 12 13 14 15 16 17 101 102 103 104 105 106 101 102 103 104 105 106 0-10V 24 V...
-
Page 34: User Navigation Menu
2.14.1 USER navigation MENU Whilst turning on or when any key is pushed for more than 4 minutes, the display is placed on the "basic display" and it provides some general information on the thermal module. °C RESET PROG MENU In this mode, keys have the following functions: Button Function... - Page 35 USER Par. Factory Description Range menu setting Sets the desired flow temperature with heating mode. Active for the Par. 2023…Par. 0003 °C heating mode Par. 2001 = 0 o 3 2024 0048 Establishes the DHW storage tank set-point. 40…71 °C Activates the test mode: off = test mode off fan = the fan is running at the max speed with the burner off...
-
Page 36: Navigation Menu Installer / Manufacturer
2.15 Navigation Menu INSTALLER / MANUFACTURER It is necessary to enter the password to access the INSTALLER / - Press "PROG +" and "PROG -" to increase or decrease the val- MANUFACTURER parameters ue of the first blinking digit - Press "MENU/RESET" and select "Code" by using the "PROG - When the desired value is reached on the single figure, press +"... - Page 37 MENU INSTALLER Par. Default Description Range / MANUFAC- setting TURER It defines the several functioning modes of the heat thermal mod- 2001 0…5 ule. Defines the time in seconds of post-circulation of the thermal mod- ule when working in stand-alone mode; when working in cascade 2005 0…900 Sec.
- Page 38 MENU INSTALLER Par. Default Description Range / MANUFAC- setting TURER Defined Defines the number of fan rpm at max. power (it depends on the 2092 0…12750 by Par. model and is defined at Par. 9098). 9098 Defined Defines the number of fan rpm at minimum power (it depends on 2093 0…12750 by Par.
- Page 39 MENU INSTALLER Par. Default Description Range / MANUFAC- setting TURER The value of this parameter is defined by Par. 9097. 0 = Disabled 1 = General Pump 2 = CH Pump 3 = DHW Pump 4 = System Pump 5 = Cascade Pump Defined 0,1,2,3,4,5,6,7,8, 2126...
- Page 40 MENU INSTALLER Par. Default Description Range / MANUFAC- setting TURER Sets the activation temperature when the maximum flue gas temperature is exceeded. When the flue gas temperature is higher than a set value, the module switches off and an error message 2006 is generated.
-
Page 41: Commissioning And Maintenance
COMMISSIONING AND MAINTENANCE Example of display on stand-by (outdoor probe is not connected) 3.1 Preparing for initial startup °C The thermal module POWER MAX must be commissioned by Technical Assistance Centre , after which step the appliance may operate automatically. -
Page 42: Setting The Heating Parameters
3.2.3 Setting the heating parameters Par. Description The parameter 2001establishes the thermal module's various heating Establishes the minimum outdoor temperature to which operation modes. 2020 the maximum set-point can be associated for climatic regulation Mode 0 Establishes the minimum set-point at the maximum out- (Operation with room thermostat/heat demand and fixed heating set- 2021 door temperature for climatic regulation... - Page 43 Mode 2 Mode 3 (Working on climatic mode with attenuation controlled by a room/heat (Continuous fixed set-point operation with attenuation controlled by demand thermostat, variable set point according to the outdoor tem- room/heat demand thermostat) perature) In this mode the fixed set-point is adjusted in the same way as de- In this case the thermal module operates with a set-point defined by scribed for Mode 0.
-
Page 44: Setting The Domestic Hot Water Parameters
3.2.4 Setting the domestic hot water parameters Mode 4 (Set-point adjustment based on a 0-10V analogical input) The parameter 2035 defines the various operation modes of the ther- The maximum and minimum set-point values are defined respectively mal module for DHW production by Par. - Page 45 Anti-Legionella function Mode 2 (DHW production with storage tank controlled by a thermostat) This function is only on when the circuit for DHW production is on In this case the thermal module is activated when the contact in boil- mode 1. er's thermostat is closed and is deactivated when the latter is opened.
-
Page 46: Checks During And After Initial Start-Up
3.3 Checks during and after initial start-up SUPPLY GAS PRESSURE CHECK When the appliance it started, it must be checked by stopping and - Turn the main system switch "off" then restarting the thermal module in the following way: - Remove the locking screws and the panel's front side - Set the operating mode of the thermal module in heating to 0 - Loosen by about two turns the pressure inlet screw (1) up- (Par. -
Page 47: Error List
3.4 Error List When a display has a technical fault, a numeric error code appears that will enable the maintenance operator to identify the possible cause. There are 3 categories of errors: Permanent: errors that require a manual reset Temporary: errors that are automatically reset once the cause that generated them is removed or stopped Notices: simple warnings that do not block the appliance's operation 3.4.1 Permanent Errors... -
Page 48: Temporary Errors
Flue pressure switch open Check for condensate in the hose con- switch error necting the flue pressure switch to ensure it isn’t blocked Only for models POWER MAX 50 P DEP and POWER MAX 50 P. 3.4.2 Temporary Errors Nr. Error Description... -
Page 49: Warnings
163 T_SELEC- Heat exchanger's flow rate TION1_OPEN too low 164 Boiler model Boiler model not set not detected Only for models POWER MAX 50 P DEP and POWER MAX 50 P. 3.4.3 Warnings Nr. Error Description Checks Solutions Cascade system: the burner of the managing module has lost... -
Page 50: Transformation From One Gas Type To Another
3.5 Transformation from one gas type to Versions POWER MAX 50 P DEP to POWER MAX 50 P - disconnect the fan and gas valve electrical connections another - unscrew the swivel nut (2) on the gas pipe - unscrew the mixer screws (6) to separate mixer-fan... - Page 51 - if it is difficult to insert the diaphragm, unscrew the swivel nut Versions POWER MAX 100 - POWER MAX 150 (3) to completely free the gas pipe. - disconnect the electrical connections of the fan and the gas valve...
-
Page 52: Adjustments
CO2 ADJUSTMENT AT MINIMUM POWER - Select "Lo" using "PROG +" and "PROG -" and press "MENU/ The thermal module POWER MAX is supplied for operation with G20 RESET" to confirm. (methane gas), as indicated by the type plate, and has already been - the appliance will operate at minimum power. -
Page 53: Temporary Or Short-Term Shut-Down
Par. 9097 The following operations shall be necessary if the thermal module is not used for a long period of time: POWER MAX 50 P DEP 46 (*) - turn the main switch of the thermal modules and the main sys-... -
Page 54: Control Board Replacement
Model Par. 9097 POWER MAX 50 P DEP 46 (*) Table of the compulsory maintenance activities (to be per- POWER MAX 50 P 46 (*) formed every 2000 working hours or at least once a year) -
Page 55: Cleaning And Removing Internal Components
3.12 Cleaning and removing internal Access to the control panel and the internal parts of the thermal module components - Remove the locking screws and the panel's front side - Pull and slide the electrical panel's box towards the outside (1) Before any cleaning operation, disconnect the electric power supply by switching the main system switch to "off”. - Page 56 Removing the fan and the burner models POWER MAX 50 P DEP Disassembling of the fan and burners models POWER MAX 65 - POWER MAX 50 P P - POWER MAX 80 P - Remove the locking screws and the panel's front side...
- Page 57 Disassembling of the fan and burners models POWER MAX 100 - Removing the top closing for cleaning the heat exchangers mod- POWER MAX 110 - POWER MAX 130 - POWER MAX 150 els POWER MAX 50 P DEP - POWER MAX 50 P...
- Page 58 Disassembling the flange for cleaning the exchanger models models POWER MAX 65 P - POWER MAX 80 P POWER MAX 100 - POWER MAX 110 - POWER MAX 130 - POW- - Remove the locking screws and the panel's front side...
-
Page 59: Condensate Drain Siphon Cleaning
3.12.1 Condensate drain siphon cleaning For models POWER MAX 65 P, POWER MAX 80 P, POWER MAX 100, POWER MAX 110, POWER MAX 130, POWER MAX 150 (accessory): For models POWER MAX 50 P DEP and POWER MAX 50 P:... -
Page 60: Troubleshooting
3.13 Troubleshooting FAULT CAUSE SOLUTION - Check the seal of the gaskets and the clo- Gas supply circuit There is a smell of gas sure of the pressure tapping points - Check the gasket seals Flue gas circuit - Make sure there are no obstructions Odour of unburnt gas - Check the combustion quality Burner gas pressure... -
Page 61: System Manager
( I ). ing the appliance's casing. These activities must be carried out only by Technical Assistance Centre or by professionally qualified personnel. The thermal module POWER MAX must be commissioned by Technical Assistance Centre , after which step the appliance may operate automatically. -
Page 62: Temporary Or Short-Term Shut-Down
SYSTEM MANAGER 4.2 Temporary or short-term shut-down 4.4 Cleaning In the event of temporary or short-term shut-down (e.g. due to holi- Use a cloth damped in soapy water to clean the boiler’s external cas- days), proceed as follows: ing. To remove stubborn marks, use a cloth damped in a 50% mix of wa- - Disconnect the power supply by positioning the thermal mod- ter and denatured alcohol or a suitable cleaning product. -
Page 63: Useful Information
SYSTEM MANAGER 4.6 Useful information Seller: ...................... Installer: ....................Mr.: ......................Mr.: ......................Address: ....................Address: ....................Tel.: ......................Tel.: ......................Technical Assistance Centre: .............. Mr.: ......................Address: ....................Tel.: ......................Date Work done Fuel oil supplier: ..................Mr.: ......................Address: .................... -
Page 64: Recycling And Disposal
SYSTEM MANAGER RECYCLING AND DISPOSAL The appliance is manufactured using various materials, such as metal, plastics, and electric and electronic components. At the end of the life cycle, safely remove the components and dispose of them in a responsible manner, in compliance with the installation country's applicable environmental legislation. - Page 65 SYSTEM MANAGER...
- Page 66 SYSTEM MANAGER...
- Page 67 SYSTEM MANAGER...
- Page 68 Via Risorgimento, 23 A 23900 - Lecco (LC), Italy www.berettaboilers.com The manufacturer strives to continuously improve all products. Appearance, dimensions, technical specifications, standard equipment and accessories are therefore liable to modification without notice.
Need help?
Do you have a question about the POWER MAX and is the answer not in the manual?
Questions and answers