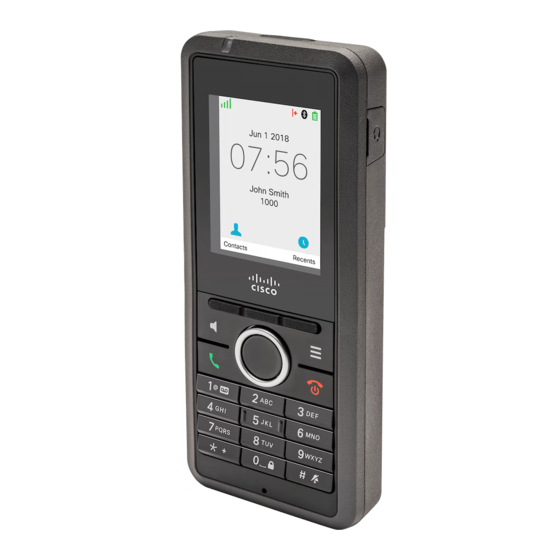
Cisco DECT 6823 User Manual
Hide thumbs
Also See for DECT 6823:
- User manual (112 pages) ,
- Quick start manual (2 pages) ,
- User manual (7 pages)
Table of Contents
Advertisement
Quick Links
Advertisement
Table of Contents

Summary of Contents for Cisco DECT 6823
- Page 1 SMARTVOICE CISCO DECT 6823 & 6825 USER GUIDE Last Updated: October 2021...
-
Page 2: Table Of Contents
Overview.....................................1 Install The Batte ry in the Handse t ........................1 Buttons and Hardware ..............................3 Navigation ..................................6 Supported Characters..............................6 Screen Features ................................7 Header Icons..................................7 Make Calls..................................9 Create an N-Way Conference Call ........................... 12 Transfer A Call ................................13 Ring Volu me Settings.............................. 13 Directorie s..................................14... -
Page 3: Overview
Overview Learn about the features of your Cisco DECT 6823 and 6825 Handset so you can initiate calls, transfer calls and much more. Install The Battery in the Handset The handset battery is shipped inside the handset but there’s a plastic tab over the battery contacts. - Page 4 Remove the plastic over the contacts. Step 3 Place the battery under the clip and drop it into the compart ment. Step 4 The battery contacts are on the top left edge of the battery and the top left edge of the battery compartment . Ensure that the contacts meet and that the battery is seated in the compart ment .
-
Page 5: Buttons And Hardware
Buttons and Hardware Your handset has many buttons and hardware features that you’ll use regularly. Use the following figure and table to identify the important button and hardware features. The figure above the 6823 Handset and 6825 Handset. The 6825 Ruggedized Handset is similar to 6825 Handset in appearance. - Page 6 Item Name or Description Grouping Indicator Light Indicator light to identify states. You can configure the event (LED) that triggers the red, yellow or green LED. Headset Port Headset port with cover Remove the protective cover and plug in headset or ear buds (3.5 mm audio jack). Softkeys, handset Softkeys Activate the option...
- Page 7 Grouping Keypad Dial numbers and enter letter. Use the keys 2 through 9 to enter letters and numbers. • Enter “1” when you dial a number • Access voicemail by pressing and holding to automatically dial the voicemail system. • Enter these special text characters: .
-
Page 8: Navigation
Navigation Use the outer ring of the Navigation cluster to scroll through menus and to move between fields. Use the inner Select button of the Navigation cluster to select menu items. Supported Characters When you input information, the handsets support the following characters: Tip: You can press the centre softkey in the 6823 Handset to access the special characters. -
Page 9: Screen Features
Screen Features The screen shows information about your handset such as directory number, date and time, and softkeys. The screen is made up of three sections: the header row, the middle section, and the footer row. Menu items on the screen may vary based on service provider configuration. - Page 10 Bluetooth Icons Only the 6825 Handset supports Bluetooth. The feature may not be supported with certain wireless headsets. Icon DND Mode Icon Description Bluetooth® is connected. Bluetooth® is disconnected. Network Icons Icon DND Mode Icon Description No network connection. Weak network connection. Good network connection.
-
Page 11: Make Calls
Call Related Icons Icon DND Mode Icon Description Answered call. Dialed call. Do not disturb is enabled. Phone is forwarded. Voicemail message waiting. Missed call. Make Calls Your handset works just like a regular phone, but the features make it easier for you to make calls. - Page 12 Make a Call with the Speakerphone When your handset is idle, enter the phone number with the keypad. To start the number with plus (+), press and hold Asterisk Step 1 until the + displays on the screen. Step 2 Press Speakerpho n e Step 3 Press Answer/Send.
- Page 13 Hold and Resume a Call You can put a call on hold and then resume it. From an active call, press Hold. Step 1 Step 2 Press Resume to pick the call back up. Swap Between Active and Held Calls When you have an active call and a held call, you can easily swap the calls.
-
Page 14: Create An N-Way Conference Call
Create an N-Way Conference Call You can add another person into an active call to create a three-way conference call. From an active call, • 6825 Handset: Press Conf. then the Hold softkey. Step 1 • 6823 Handset: Press More > Conference > Hold. User A now calls User B and the call connects. -
Page 15: Transfer A Call
Transfer A Call You can transfer a call to a coworker. You can transfer the call without waiting for the coworker to answer, or talk with the coworker before you transfer the call. Blind Call Transfer Press More > Select Transfer, dial the number > Press Transfer 6823 Handset again. -
Page 16: Directories
Set The Ringtone for Different Call Types You can set different ring tones for these types of calls: • Normal call • Normal message • Urgent message • Emergency High, Medium, and Low • Alert Step 1 Press Menu Step 2 Select Settings >... - Page 17 For customer care and technical support, contact 1-877-742-9249.


Need help?
Do you have a question about the DECT 6823 and is the answer not in the manual?
Questions and answers