Advertisement
Quick Links
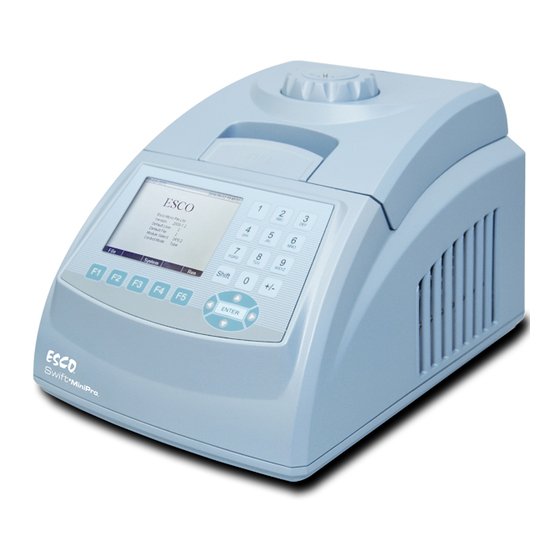
All manuals and user guides at all-guides.com
Thank you for purchasing the Esco Aeris Thermal Cycler.
Please read this manual thoroughly to familiarize yourself with
the many unique features and exciting innovations we have
built into cycler. You can view this manual online at
www.escoglobal.com, where you can find many other
resources to help you enjoy many years of productive and
safe use of your Esco equipment.
Service Manual
Aeris
Thermal Cycler
Version 1.0 Publication Time August, 2009Copyright © 2013 Esco Micro Pte.Ltd. All rights reserved.
Advertisement

Related Manuals for Esco AERIS-BG096


Summary of Contents for Esco AERIS-BG096
- Page 1 Esco equipment. Service Manual Aeris Thermal Cycler Version 1.0 Publication Time August, 2009Copyright © 2013 Esco Micro Pte.Ltd. All rights reserved.
-
Page 2: Chapter 1. Introduction
All manuals and user guides at all-guides.com Chapter 1. Introduction 1.1 Products covered This manual is applicable and specific to the following ESCO products:- Aeris Thermal Cycler Aeris-MB with following blocks Rated voltage (V) 96 wells 30 x 0.5ml + 384 wells 48 x 0.2ml x2... - Page 3 All manuals and user guides at all-guides.com Name Description Note Five interchangeable blocks With hot lid, heat sink and heating& Block are available for different cooling system. requirements. Display protocol, conditions and LCD Screen other information during setting and 6.5'' Color LCD Touch Screen running.
- Page 4 All manuals and user guides at all-guides.com upgrades cyclers can be connected and controlled by normal computer through RJ45 interface. Power Switch Turn the equipment ON/OFF. Power Socket Connect power supply. The fuse specifications are as follows: 250V 8A, 5×20. Fuse Install fuse in the socket to protect Fuse Socket should be replaced by one...
- Page 5 All manuals and user guides at all-guides.com 1.2.3 Technical specification summary table General Specifications, Aeris Thermal Cycler Block Code AERIS-BG086 AERIS-B4830 AERIS- AERIS-BG384 AERIS-B4076 BG384 Sample Capacity 48 × 0.2ml + 30 48 × 0.2ml + 48 96 × 0.2ml 384 wells 4 slides ×...
- Page 6 All manuals and user guides at all-guides.com Guidance Pay attention on the following before hand. Investigate :- Situation of the equipment as operating Previous maintenance record Symptom of the failure Hardware environment Structure of the equipment Years of the equipment be used Check power supply.
-
Page 7: Chapter 2 Service Procedures
All manuals and user guides at all-guides.com Besides, a multi-channel temperature acquisition device is needed for temperature uniformity and accuracy testing. Chapter 2 Service Procedures 2.1 Assemble and disassemble the main body 2.1.1 Assemble procedure Assemble the PCB board, power supply and fan with the stainless steel stand. •... - Page 8 All manuals and user guides at all-guides.com Fig 4 Unplug all the connectors. Remove the screws in the interface (connector) board. • As Fig.4 and 5 Remove the screws as Fig 5, and take out the old fan and replace a new fan •...
- Page 9 All manuals and user guides at all-guides.com LCD contrast adjustable screw Fig.7 Note: A small brass screw on the resistor. Rotating the knob clockwise will brighten the display. Rotating the knob anti-clockwise will darken the display. Remove the screws as Fig.8, and then remove the CPU control board. Fig.8 Remove the screws and get the LCD and LCD control board which are combined into one part.
- Page 10 All manuals and user guides at all-guides.com Fig.11 Replace the key pad and reconnect all wires back. Fig.12 2.4 Hot Lid adjust knob repair and replacement Use a tweezers to remove the small hot lid lock device. As Fig.13 Lock device Fig.13 The cover will be removed together with the lock device.
- Page 11 All manuals and user guides at all-guides.com Fig.14 Remove the small rotate metal ring. As Fig. 15 Fig.15 Remove the adjustable knob, and see the inner part .As Fig. 16 Fig.16 Note: Most of the time, the hot lid adjustable knob looses because the contact between the four small gears and the big gear is broken.
- Page 12 All manuals and user guides at all-guides.com Fig.17 Measure the resistance, as Fig.18. If the value is out of range, need to open the hot lid cover and repair. Hot lid sensor, Resistance should be around 10K Heating film, Resistance should be <10 Fig.18 Refer to Chapter 6.4, remove the hot lid knob.
- Page 13 All manuals and user guides at all-guides.com Fig.20 Remove the solder and replace heat film, fuse or sensor. Solder the new fuse or sensor, and make sure the fuse contact the hot lid surface well after fixed. 2.6 Heating and Cooling parts Replacement Remove the screws as Fig.21 to remove the heat sink.
- Page 14 All manuals and user guides at all-guides.com Heat Sink sensor Block sensor Fuse Fig. 23 Fuse and Heat sink sensor can be replaced but the block sensor can be only replaced by manufacturer. Replace the peltier (TE) and install back the heat sink by using Torque screwdriver Φ3 and the torque for four screws are 2.5KG.
-
Page 15: Chapter 3 Troubleshooting
All manuals and user guides at all-guides.com Reconnect all plugs and sockets. Run the instrument. If no problem, add Thermosol to connector. Chapter 3 Troubleshooting Possible PROBLEM Corrective Action Causes • Check if there is power at the wall/building socket. Power •... - Page 16 All manuals and user guides at all-guides.com • The beep sound is as normal and you can hear the noise of the fan. • Remove the top cover; remove all the wires, as 1-8. • Connect a new LCD to the LCD port on main board. •...
- Page 17 All manuals and user guides at all-guides.com Note: The power supply and power supply drive board are combined into one part, need to replace the whole part.When replacing power supply driver board board, please re-connect all the wires back correctly. Any wrong wiring may result in damage.
- Page 18 • Exchange with a new block, if the problem is solved, Defective the original block is damaged. connector • Send back the block to Esco for repair. Connector 1-14 • If the problem still exists after exchange the block, check the Defective connector of the main body.
- Page 19 • Then you need to use torque screw drive to install the heat sink back to the block. • It is not recommended doing it locally and better sending back to Esco for repair if the heat sink sensor is damaged. During the run, the screen shows: "Please check error"...
- Page 20 All manuals and user guides at all-guides.com Hot lid sensor resistance should be around 10K 1-21 1-22 Ventilation Clear the blockage Blocked Open the instrument; Check all the connectors are connection connected properly. • Measure the resistance of the peltier, refer to Chapter 2.9.If resistance is beyond the range, •...
- Page 21 All manuals and user guides at all-guides.com 1-27 • Measure the resistance of the peltier. Refer to Chapter • If resistance is beyond the range, replace Peltier, as Chapter 2.7 Note: It is not recommended that distributor replace the peltier, because it is very difficult to control the temperature accuracy and uniformity.
- Page 22 All manuals and user guides at all-guides.com Fuse resistanc e should be 0 Resistance should be <10 1-29 1-30 • Measure the heating film, refer to 1-31. Damaged • The resistance should be around 6 heating film • If resistance is infinite or zero, replace the heating film. Heating film resistance...
- Page 23 All manuals and user guides at all-guides.com 1-35 Bad quality Change tubes tubes • If the bottom part of the tube is melt, measure the Damaged/ temperature of the block loose block • If actual temperature is higher than display temperature, temperature please contact manufacturer and send the block back for sensor...
- Page 24 All manuals and user guides at all-guides.com Damaged Replace the display LCD part lamp in LCD The LCD can not show light 1-39 The chip in control board which controls Replace CPU control Board the time is damaged. Refer to 1-41 System can not time when temperature of the block reach the...
-
Page 25: Appendix 1 Printed Circuit Board Layout
All manuals and user guides at all-guides.com Appendix 1 Printed Circuit Board Layout Power Supply Drive Board P ower supply input voltage: 36VDC : : P ower supply output for TE: Voltage: 12 VDC M icro switch Port : P ower supply output for CPU control board. Voltage: 12V DC :... - Page 26 All manuals and user guides at all-guides.com CPU Control Board : K ey board port U SB port : D isplay port : Interface (Connect) Board port : A mbient temperature sensor : : P ort to Power supply Drive board port P ower supply port Voltage: 12 VDC :...
- Page 27 All manuals and user guides at all-guides.com Interface (Connect) Board P ower supply drive board port : M icro switch port : P ort connected to power supply drive board for block recognize : B lock connector : : T E power supply drive port :...
-
Page 28: Appendix 2 Wiring Diagram
All manuals and user guides at all-guides.com Appendix 2 Wiring Diagram (This diagram is regarded only as a reference, and it is a subject to change without prior notice. We apologize for any inconvenience caused.) - Page 29 All manuals and user guides at all-guides.com Appendix3. Spare part list Part Number Description Pictures ESC/SWT-MXP-SPS Power Supply Drive board ESC/SWT-MXP-MB CPU control Board Interface (Connector) ESC/SWT-MXP-IB Board ESC/SWT-MXP-KB Key Board ESC/ SWT-MXP-PFS Power filter socket ESC/SWT-MXP-DISP LCD Display Part ESC/ SWT-MXP-MSW Power Micro Switch...
- Page 30 All manuals and user guides at all-guides.com ESC/SWT-MXP-RJ45 RJ 45 interface ESC/SWT-MXP-HTLG Hot lid part ESC/SWT-MXP-FANS ESC/SWT-MXP-PLTR Peltier...
Need help?
Do you have a question about the AERIS-BG096 and is the answer not in the manual?
Questions and answers