Table of Contents
Advertisement
Available languages
Available languages
Quick Links
Advertisement
Chapters
Table of Contents

Related Manuals for Elo TouchSystems Entuitive ESY1525L


Summary of Contents for Elo TouchSystems Entuitive ESY1525L
-
Page 2: User Guide
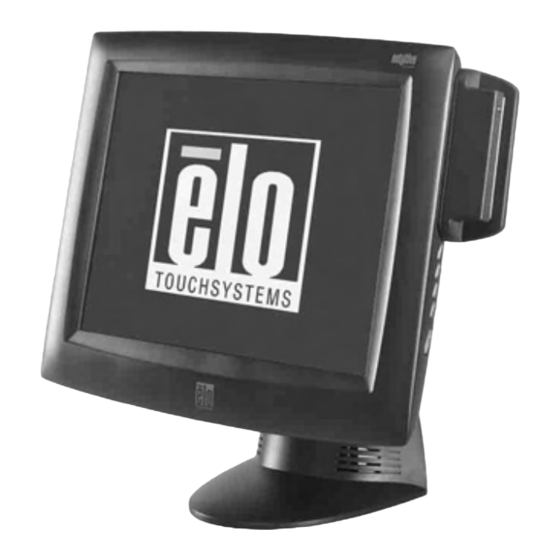
Elo Entuitive Touchmonitor User Guide 15" LCD Desktop Touchcomputer ESY1525L/ESY1527L Touchcomputer Series Revision D P/N 008594 Elo TouchSystems, Inc. 1-800-ELOTOUCH www.elotouch.com... - Page 3 Elo TouchSystems. Disclaimer The information in this document is subject to change without notice. Elo TouchSystems makes no representations or warranties with respect to the contents hereof, and specifically disclaims any implied warranties of merchantability or fitness for a particular purpose. Elo TouchSystems reserves the right to revise this publication and to make changes from time to time in the content hereof without obligation of Elo TouchSystems to notify any person of such revisions or changes.
-
Page 4: Table Of Contents
Table of Contents Chapter 1 Introduction Precautions ....1 About the Product ....1 Operating System . - Page 5 Altitude ..... 35 Warranty Index 39...
-
Page 6: Introduction
Congratulations on your purchase of an Elo TouchSystems Entuitive Touchcomputer. This manual is to help you operate and maintain the Touchcomputer. Precautions Follow all warnings, precautions and maintenance as recommended in this user’s manual to maximize the life of your unit. See Appendix B for more information on touchmonitor safety. -
Page 7: Operating System
mouse and an on screen keyboard to take the place of an external keyboard. The Touchcomputer provides the following options. Operating System A selection of operating systems can be made between Windows CE.Net Ver4.2, Windows XP Pro or Windows 2000 Pro. Windows XP Pro and 2000 Pro When Windows XP Pro and Windows 2000 Pro are selected, the Touchcomputer will have a 20 GB or greater hard drive and 256 MB of SDRAM. -
Page 8: External Connections And Upgrades
External Connections and Upgrades The following drawing shows the Touchcomputer External connector panel. This panel of connectors is used by the user to make external connections to the Touchcomputer. No external connections, other than power, are needed for the Touchcomputer to operate. External Connections Using these external connections, the following capabilities can be provided to the Touchcomputer by the user:... -
Page 9: Keyboard
Keyboard A keyboard can be added using the keyboard port. • Upgrades and Changes A laptop type hard drive (2.5") can be added internally to the CE version of the Touchcomputer. SDRAM can be increased from the standard 256 M to 512 M •... - Page 10 • US Power Cable • European Power Cable • Power Brick • Applicable Operating System CD • Windows 2000 Pro • Windows XP Pro • No CD is provided for Windows CE.Net Ver4.2 (but the image is on the Touchcomputer CD.) •...
-
Page 11: Models
C48832-000 A84590-000 F83851-000 E l o E n t u i t i v e T o u c h m o n i t o r U s e r G u i d e ESY1525L-7UWA-1-CE ESY1525L-7UWA-1-CE-C1 ESY1525L-8UWA-1-CE ESY1525L-8UWA-1-CE-M3... - Page 12 PIP Description Key ESY = Elo System 15 = 15 Inch Display 25 = Desktop cabinetry (In grey plastics only) L = LCD 7 = AccuTouch 8 = IntelliTouch S = Serial controller U = USB controller W = Worldwide agencies A = Revision number 1 = Antiglare glass Mx = MSR unit...
- Page 13 E l o E n t u i t i v e T o u c h m o n i t o r U s e r G u i d e...
-
Page 14: Initial Turn On And Software Registration
H A P T E R Touchcomputer S ETUP HAPTER Initial Turn On and Software Registration Touchcomputer Operating System Setup The initial setup of the Windows operating system takes approximately 5-10 minutes. Additional time may be needed depending on computers hardware configuration and connected devices. -
Page 15: Computer Reboots
Computer Reboots • Wait for computer to reboot and finally boot up to the desktop. Testing Pre-installed Devices Touchcomputer come pre installed with several different hardware options. To test these options, click on the following icons on the Windows toolbar on the bottom right of the computer. -
Page 16: Power
Touchcomputer Controls Switch 1 Switch 2 Switch 3 Switch 4 Switch 5 Power To turn power off, press and hold switch 5. To turn on press and hold switch 5 then shut down. To do a hard shutdown, press and hold switch 5. To turn power on, press the power button once. -
Page 17: Power And Osd Lock Out
Power and OSD Lock Out Normally the 5 switches on the side of the monitor depicted in the figure in the controls section control power, brightness and volume. The power switch can be made not to operate by activating the power lockout function. The brightness and volume adjustment can be made not to operate by activing the OSD lockout function. -
Page 18: Safety/Servicing The Touchcomputer
AFETY ERVICING THE HAPTER When servicing the computer perform the following: • Perform an orderly shutdown using the operating system menu. • Shut down the Touchcomputer and remove all external cables. • When opening the Touchcomputer, periodically touch any metal parts of the Touchcomputer, such as metal portions of the case or connector shells on the monitor. - Page 19 3-14 E l o E n t u i t i v e T o u c h m o n i t o r U s e r G u i d e...
-
Page 20: Technical Description
Block Diagram The block diagram of the Touchcomputer is shown below: Inveter CN10 Serial Port Optional ECHNICAL HAPTER Elo Touchcomputer Block Diagram Speakers Optional Optional Switch Hard Drive Compact Flash panel CN11 Mother board Internal Internal +5 VDC Serial +5/+12vdc Port @1 amp Port... - Page 21 Mother Board Block Diagram MEMORY PC133/SDR VIA VT8606 TWISTER VIA EDEN NORTHBRIDGE ESP 600 MHZ GRAPHICS CORE AND PROCESSOR MEMORY CONTROLLER DISPLAY E l o E n t u i t i v e T o u c h m o n i t o r U s e r G u i d e 4-16 RTL8100C FAST BOOT ROM...
- Page 22 Connectors on Mother Board The connectors on mother board allows you to connect external devices such as keyboard, floppy disk drives, hard disk drives, printers, etc. The following table lists the connectors on mother board and their respective functions. Connector Locations on Mother Board Connectors on Mother Board CN1, CN2: COM4 and COM3 Connectors CN3: +5V Connector...
- Page 23 CN1, CN2: COM4 and COM3 Connectors Pin # Signal Name CN3: +5V Connector Pin # Signal Name Ground CN4: +5V AND +12V Connector Pin # Signal Name Ground +12V CN6, CN9: USB Pin Header Pin # Signal Name Ground USB- USB+ CN10: Panel Inverter Power Connector Pin #...
- Page 24 J7: Primary IDE Connectors Signal Name Reset IDE Host data 7 Host data 6 Host data 5 Host data 4 Host data 3 Host data 2 Host data 1 Host data 0 Ground DRQ0 Host IOW Host IOR IOCHRDY DACK0 IRQ14 ASDRAMess 1 ASDRAMess 0...
- Page 25 USB1, USB2: USB Connectors Pin # J9: System Fan Power Connector J9 is a 3-pin header for an optional fan. The fan must be a 12V fan. Pin # Signal Name Rotation detection J11: 24-bit LVDS Connector (DF13-20) Signal Name Pin # TX0- Ground...
- Page 26 J16: PS/2 Keyboard Connector Signal Name Keyboard data Keyboard clock J17: PS/2 Mouse Connector Signal Name Mouse data Mouse clock N.C. N.C. N.C. N.C. 4-21...
-
Page 27: Computer Specifications
Computer Specifications Processor • VIA Eden 600MHz low power CPU or equivalent Memory • RAM- 256 MB expandable to 512 MB Green Function • APM 1.2 compliant Audio Function • Stereo one watt capability per channel Operating System • Support for WinCE.Net Ver4.2 •... -
Page 28: Real Time Clock
• One Compact Flash Socket (CN5) • One hard drive socket located on the bottom of the board (J7) Real Time Clock • Battery backed up real time clock that features a multi-century calendar. • Lithium battery with socket. • On Screen Display Volume Control •... -
Page 29: Display
Display The LCD display consists of an LCD, inverter, and OSD switch module. The performance of the LCD display will be: Display Size Native Resolution Display Color Number Display Type Typical Contrast Ratio Typical/Min Brightness Typical Display Speed Typical Vertical Viewing Angle Typical Horizontal Viewing Angle... -
Page 30: Touchscreen Assembly
Chromaticity Values TABLE 1. Symbol Chromaticity of White Chromaticity of Chromaticity of Green Chromaticity of Blue Touchscreen Assembly The touchscreen assembly consists of a touchscreen and a controller. AccuTouch or IntelliTouch touchscreens will be provided as options and use one of the USB ports on the mother board . External 12 VDC Power Supply The Touchcomputer shall be powered by 12 VDC from a universal type power supply brick with the following characteristics:... -
Page 31: Customer Display
Customer Display The Customer Display is a twenty character two line vacuum fluorescent display (VFD). It consists of a VFD and VFD controller. There is a serial version controller and a USB controller. The actual VFD is common to the serial and USB versions. -
Page 32: Specifications
Specifications Reference Standards Conform to applicable standards Power Input Message Format Card Speed MTBF Operating Current Suspend current Length Width International Standards Organization, American National Standards Institute, California Drivers License, American Association of Motor Vehicle Administrators From USB port ACCII 3 to 50 IPS Electronics 125,000 hrs;... - Page 33 4-28 E l o E n t u i t i v e T o u c h m o n i t o r U s e r G u i d e...
-
Page 34: Touchcomputer Component Layout
H A P T E R Touchcomputer C OMPONENT AYOUT HAPTER The figures below show the complete Touchcomputer identifying the major components discussed in Chapter 1. 5-29... -
Page 35: Touchcomputer Assembly
Touchcomputer Assembly 5-30 E l o E n t u i t i v e T o u c h m o n i t o r U s e r G u i d e... -
Page 36: Touchcomputer Exploded View
Touchcomputer Exploded View HAPTER 5-31... - Page 37 5-32 E l o E n t u i t i v e T o u c h m o n i t o r U s e r G u i d e...
-
Page 38: Components
External 12 VDC Power Supply The Touchcomputer is powered by 12 VDC from a universal type power supply brick. The power supply shall provide the following capability: • Input voltage 85 to 263 vac • Input frequency 47 to 63 hz •... -
Page 39: Cables
Cables External Cables The following cables will be included: • US power cable for the external power supply • European power cable for the external power supply • Power cable from the 12 VDC external supply to the Touchcomputer. All cables are 6 feet long. 6-34 E l o E n t u i t i v e T o u c h m o n i t o r U s e r G u i d e... -
Page 40: Temperature Ranges
Temperature Ranges Operating Temperature (Independent of altitude) Non-Operating Temperature (Independent of altitude) Humidity Operating (non-condensing) Non-Operating (38.7°C max. wet bulb temperature) Altitude Operating 0 to + 12,000 feet [3,658m]. Non-Operating 0 to + 40,000 feet [12,192m]. NVIRONMENTAL HAPTER Equivalent to 14.7 to 10.1 psia. Equivalent to 14.7 to 4.4 psia. - Page 41 7-36 E l o E n t u i t i v e T o u c h m o n i t o r U s e r G u i d e...
- Page 42 EGULATORY HAPTER I. Electrical Safety Information: A) Compliance is required with respect to the voltage, frequency, and current requirements indicated on the manufacturer’s label. Connection to a different power source than those specified herein will likely result in improper operation, damage to the equipment or pose a fire hazard if the limitations are not followed.
- Page 43 D) General Information to all Users: This equipment generates, uses and can radi- ate radio frequency energy. If not installed and used according to this manual the equipment may cause interference with radio and television communications. There is, however, no guarantee that interference will not occur in any particular installation due to site-specific factors.
- Page 44 "The application of this monitor is restricted to special controlled luminous environments. The screen surface trend to reflect annoying light of lamps and sunlight. To avoid these reflections the monitor should not be positioned in front of a window or directed to luminaries.
- Page 45 E l o E n t u i t i v e T o u c h m o n i t o r U s e r G u i d e...
- Page 46 ARRANTY HAPTER Except as otherwise stated herein or in an order acknowledgment delivered to Buyer, Seller warrants to Buyer that the Product shall be free of defects in materials and workmanship. The warranty for the touchcomputer and components of the product is 1 year. Seller makes no warranty regarding the model life of components.
- Page 47 THESE REMEDIES SHALL BE THE BUYER’S EXCLUSIVE REMEDIES FOR BREACH OF WARRANTY. EXCEPT FOR THE EXPRESS WARRANTY SET FORTH ABOVE, SELLER GRANTS NO OTHER WARRANTIES, EXPRESS OR IMPLIED BY STATUTE OR OTHERWISE, REGARDING THE PRODUCTS, THEIR FITNESS FOR ANY PURPOSE, THEIR QUALITY, THEIR MERCHANTABILITY, THEIR NONINFRINGEMENT, OR OTHERWISE.
-
Page 48: Chapter 2 Touchcomputer Setup
About the Product, 1 Accessory Kit, 4 Altitude, 35 Audio Function, 22 Block Diagram, 15 Cables, 28 CD/DVD Drives, 3 Chromaticity, 18 Computer Reboots, 10 Computer Specifications, 22 Controls, 10 Customer Display, 2, 26 Customer Display Testing, 10 Display, 24 Display Color Number, 24 Display Size, 24 Display Type, 24... - Page 49 Testing Pre-installed Devices, 10 Touch Tool CD, 4 Touchscreen, 2 Touchscreen Assembly, 25 Typical Contrast Ratio, 24 Typical Display Speed, 24 Typical/Min Brightness, 24 Upgrades and Changes, 4 USB Card Reader Testing, 10 USB MSR, 26 Using the Phone, Technical Assistance, 12 Using the Touchcomputer, Technical Assistance, 12 Using the Web, Technical Assistance, 12 Vertical Viewing Angle, 18...
-
Page 50: Product Information
To find out more about Elo’s extensive range of touch solutions, visit our Web site at www.elotouch.com or simply call the office nearest you: USA & Headquarters Germany Elo TouchSystems, Inc. Elo TouchSystems GmbH & Co. KG 301 Constitution Drive, Haidgraben 6 Menlo Park, CA 94025. D-85521 Ottobrunn... - Page 51 Elo Entuitive Touchcomputer Benutzerhandbuch 15"-LCD-Desktop-Touchcomputer Touchcomputer-Serie ESY1525L/ESY1527L Revision D Teile-Nr. 008594 Elo TouchSystems, Inc. 1-800-ELOTOUCH www.elotouch.com...
- Page 53 Elo TouchSystems behält sich jegliche Erklärung und Garantie bezüglich der vorliegenden Inhalte vor. Dies gilt insbesondere für eine etwaige implizierte Garantie der Marktgängigkeit oder der Eignung für einen bestimmten Zweck. Elo TouchSystems behält sich das Recht vor, diese Veröffentlichung zu überarbeiten und nach eigenem Ermessen Änderungen am vorliegenden Inhalt vorzunehmen, ohne irgendeine Person hiervon in Kenntnis zu setzen.
- Page 55 Inhaltsverzeichnis Kapitel 1 Einführung Vorsichtsmaßnahmen ....3 Hinweise zum Produkt....3 Betriebssystem ....4 Windows XP Pro und 2000 Pro .
- Page 56 Kapitel 7 Umgebungsanforderungen Temperatur ....39 Feuchtigkeit ....39 Höhe.
-
Page 57: Einführung
Wir beglückwünschen Sie zum Kauf eines Elo TouchSystems Entuitive- Touchcomputers. Dieses Handbuch soll Ihnen beim Bedienen und Warten des Touchcomputers behilflich sein. Vorsichtsmaßnahmen Befolgen Sie alle Warnungen, Sicherheitshinweise und Wartungsempfehlungen in diesem Handbuch, um eine möglichst lange Lebensdauer des Geräts zu gewährleisten. -
Page 58: Betriebssystem
Tastatur kann die auf dem Bildschirm angezeigte Tastatur verwendet werden. Im Folgenden werden die Optionen des Touchcomputers erläutert. Betriebssystem Es kann zwischen den Betriebssystemen Windows CE.Net Version 4.2, Windows XP Pro und Windows 2000 Pro ausgewählt werden. Windows XP Pro und 2000 Pro Bei Verwendung des Betriebssystems Windows XP Pro oder Windows 2000 Pro verfügt der Touchcomputer über eine Festplatte mit 20 GB oder mehr sowie 256 MB SDRAM. -
Page 59: Treiber
Treiber Jedem System sind entsprechende Treiber und Testprogramme beigefügt, die das Funktionieren aller gewählten Optionen gewährleisten. Externe Verbindungen und Upgrades In der nachstehenden Abbildung ist die externe Anschlussblende des Touchcomputers dargestellt. An der Anschlussblende stellt der Benutzer die äußeren Verbindungen des Touchcomputers her. Die Spannungsversorgung ist die einzige externe Verbindung, die für den Betrieb des Touchcomputers erforderlich ist. -
Page 60: Festplatte Für Version Ce
Festplatte für Version CE Eine zusätzliche Festplatte für Touchcomputer der Version CE kann entweder am USB-Eingang angeschlossen oder im Gerät eingebaut werden. Maus Für den Anschluss einer Maus steht ein eigener Anschluss zur Verfügung. Tastatur • Für den Anschluss einer Tastatur steht ein eigener Anschluss zur Verfügung. -
Page 61: Zubehör-Kit
Zubehör-Kit Jeder Monitor wird mit einem Zubehör-Kit geliefert. Zum Umfang des Zubehör-Kits gehört Folgendes: • CD „Touchtool“ - Diese enthält die Treiber und das Handbuch für Touchscreen-Produkte von EloTouch. Die Touchscreen-Treiber sind auf dem Touchcomputer bereits vorinstalliert. Die Treiber auf der CD-ROM sind für eine eventuelle Neuinstallation des Betriebssystems vorgesehen. -
Page 62: Modelle
E l o E n t u i t i v e T o u c h m o n i t o r B e n u t z e r h a n d b u c h ESY1525L-7UWA-1-CE... - Page 63 Schlüssel PIP-Schlüssel (Beschreibung) ESY = Elo-System 15 = 15-Zoll-Bildschirm 25 = Desktop-Kabinett (nur bei grauem Kunststoffgehäuse) L = LCD 7 = AccuTouch 8 = IntelliTouch S = Serieller Controller U = USB-Controller W = Vertretungen weltweit A = Revisionsnummer 1 = Entspiegeltes Glas Mx = Magnetstreifenleser (MSR) x = 2 = USB-HID für Magnetstreifenleser x = 3 = USB-Tastaturemulation für Magnetstreifenleser...
- Page 64 E l o E n t u i t i v e T o u c h m o n i t o r B e n u t z e r h a n d b u c h...
-
Page 65: Einrichten Des Touchcomputers
INRICHTEN DES HAPTER Inbetriebnahme und Software-Registrierung Einrichten des Betriebssystems Das erste Einrichten des Windows-Betriebssystems dauert ca. fünf bis zehn Minuten. Abhängig von der Konfiguration der Computerhardware und den angeschlossenen Geräten ist mit einem zusätzlichen Zeitaufwand zu rechnen. Um das Windows-Betriebssystem auf ihrem Computer einzurichten, müssen Sie den Computer einschalten und den Anweisungen auf dem Bildschirm folgen. -
Page 66: Netzwerkeinstellungen
Symbole klicken. Sie können auch die Symbole auf dem Desktop verwenden. Testen des Kunden-Displays • Klicken Sie auf das Symbol „CD“. • Auf dem Kunden-Display wird nun der Text „Elo TouchSystems Customer Display“ eingeblendet. Testen des Tastatur-Kartenlesers • Klicken Sie auf das Symbol „KCR“. -
Page 67: Bedienelemente
Bedienelemente Für die Bedienung des Touchcomputers stehen zwei Bedienelemente zur Verfügung. Es gibt einen Helligkeitsregler und einen Lautstärkeregler. Um die Helligkeit zu erhöhen, drücken Sie Schalter 3. Wenn Sie die Helligkeit verringern möchten, drücken Sie Schalter 4. Um die Lautstärke anzuheben, drücken Sie Schalter 1. -
Page 68: Netzschalter- Und Osd-Sperre
Netzschalter- und OSD-Sperre Normalerweise dienen die fünf Schalter an der Seite des Monitors (s. Abbil- dung unter „Bedienelemente“) zum Ein- und Ausschalten des Geräts sowie zum Regeln der Helligkeit und Lautstärke. Durch Aktivieren der Netzschal- ter-Sperrfunktion lässt sich der Netzschalter außer Kraft setzen. Durch Aktivie- ren der OSD-Sperrfunktion lässt sich die Helligkeits- und Lautstärkeregelung außer Kraft setzen. -
Page 69: Über Das Internet
Über das Internet www.elotouch.com/support/default.asp Über das Telefon Die Nummer der Kundenunterstützung lautet +1-800-557-1458. Ihr Anruf ist kostenfrei. - Page 70 E l o E n t u i t i v e T o u c h m o n i t o r B e n u t z e r h a n d b u c h...
-
Page 71: Sicherheits- Und Wartungshinweise
ICHERHEITS HAPTER Bei der Wartung des Computers sind folgende Schritte durchzuführen: • Fahren Sie das Gerät ordnungsgemäß über das Menü des Betriebssystems herunter. • Schalten Sie den Touchcomputer aus, und entfernen Sie alle externen Kabel. • Wenn Sie den Touchcomputer öffnen, sollten Sie diesen hin und wieder an irgendwelchen metallischen Oberflächen wie z. - Page 72 E l o E n t u i t i v e T o u c h m o n i t o r B e n u t z e r h a n d b u c h...
-
Page 73: Technische Beschreibung
A P I T E L ECHNISCHE ESCHREIBUNG HAPTER Blockdiagramm Nachstehend ist der Touchcomputer in einem Blockdiagramm dargestellt: Elo Touchcomputer - Blockdiagramm... - Page 74 Motherboard - Blockdiagramm E l o E n t u i t i v e T o u c h m o n i t o r B e n u t z e r h a n d b u c h...
-
Page 75: Motherboard - Anschlüsse
Motherboard - Anschlüsse An den Anschlüssen des Motherboards können Sie externe Geräte wie Tastatur, Disketten- und Plattenlaufwerke, Drucker usw. anschließen. In der folgenden Tabelle sind diese Anschlüsse mit ihren jeweiligen Funktionen aufgeführt. Lage der Anschlüsse auf dem Motherboard Motherboard - Anschlüsse CN1, CN2: Anschlüsse COM4 und COM3 CN3: 5-V-Anschluss (+) CN4: 5-V- und +12-V-Anschluss (+) - Page 76 CN1, CN2: Anschlüsse COM4 und COM3 Pin-Nr. CN3: 5-V-Anschluss (+) Pin-Nr. CN4: 5-V- und +12-V-Anschluss (+) Pin-Nr. CN6, CN9: USB-Stiftsockel Pin-Nr. CN10 Vcc: Stecksockel Inverter-Spannungsversorgung (Anschlussleiste) Pin-Nr. Helligk.-Einst. Hintergrundbel. Ein E l o E n t u i t i v e T o u c h m o n i t o r B e n u t z e r h a n d b u c h Belegung Belegung +5 V...
- Page 77 CN11: OSD-Stecksockel (Anschlussleiste) Pin-Nr. J7: IDE-Hauptanschlüsse Belegung IDE-Reset Host-Daten 7 Host-Daten 6 Host-Daten 5 Host-Daten 4 Host-Daten 3 Host-Daten 2 Host-Daten 1 Host-Daten 0 Masse DRQ0 Host IOW Host IOR IOCHRDY DACK0 IRQ14 ASDRAMess 1 ASDRAMess 0 Chip-Auswahl 0 Aktivität Masse CN13, CN147: Serielle Anschlüsse COM1 und COM2 Belegung...
- Page 78 FDD1: Anschluss für Diskettenlaufwerk FDD1 ist ein schmaler, 26-poliger Sockel, der Diskettenlaufwerke mit bis zu 2,88 MB unterstützt. Belegung DINST USB1, USB2: USB-Anschlüsse Pin-Nr. J9: Spannungsversorgung für Systemlüfter J9 ist ein 3-poliger Stiftsockel für ein Zusatzgebläse. Als Gebläse ist ein 12-Volt-Lüfter zu verwenden.
- Page 79 J11: 24-Bit-LVDS-Anschluss (DF13-20) Belegung TX0- Masse TX1- 5 V/3,3 V TX3- TX2- Masse TXC- 5 V/3,3 V 12 V (+) J13: VGA-Monitoranschluss J13 ist ein 8-poliger Sockel für einen optionalen externen („weiblichen“) VGA-Monitoranschluss. Belegung Grün Blau nicht belegt Masse Masse Masse Masse J14: Spannungsversorgung für Systemlüfter...
- Page 80 J16: PS/2-Tastaturanschluss Pin-Nr. J17: PS/2-Mausanschluss Pin-Nr. E l o E n t u i t i v e T o u c h m o n i t o r B e n u t z e r h a n d b u c h Belegung Tastaturdaten nicht belegt...
-
Page 81: Computerspezifische Angaben
Computerspezifische Angaben Prozessor • CPU - VIA Eden, 600 MHz Niederspannung oder gleichwertig Hauptspeicher • RAM - 256 MB, erweiterbar auf 512 MB Energiesparfunktion • APM 1.2-konform Audiofunktion • Stereo, Leistung 1 Watt pro Kanal Betriebssystem • Unterstützung für WinCE.Net Version 4.2 •... -
Page 82: Echtzeituhr
• PS2-Tastatur (J16) • PS2-Maus (J17) • Eine Compact Flash-Buchse (CN5) • Ein Festplattensockel an der Unterseite der Platine (J7) Echtzeituhr • Batteriegesicherte Echtzeituhr mit jahrhundertübergreifender Kalenderfunktion. • Lithiumbatterie mit Fassung. • OSD (On Screen Display) • Lautstärkeregler • Hintergrund-Helligkeit Board Support Package für Windows CE.Net Version 4.2 Zur Unterstützung des Benutzers mit individuellen Software-Entwicklungen... -
Page 83: Anzeige
• PS2-Tastaturanschluss (ohne Tastatur) • PS2-Mausanschluss (ohne Maus) • Netzspannungsversorgung • PCMCIA-Steckplatz mit Auswurftaste • Compact Flash Anzeige Der LCD-Bildschirm besteht aus einer Einheit mit LCD-Anzeige, Inverter und OSD-Schalter. Performance des LCD-Displays: Anzeigegröße Systemeigene Auflösung Farbauflösung Anzeigeart Kontrastverhältnis typisch Helligkeit typisch/minimal Reaktionszeit typisch... -
Page 84: Touchscreen-Einheit
Farbort Weiß Farbort Rot Farbort Grün Farbort Blau Touchscreen-Einheit Die Touchscreen-Einheit besteht aus dem Tastbildschirm und einem Controller. AccuTouch- und IntelliTouch-Tastbildschirme sind als Zubehör erhältlich und werden an den USB-Anschlüssen des Motherboards angeschlossen. Externes Netzteil (12 VDC) Die Spannungsversorgung des Touchcomputers (12 VDC) erfolgt über ein universelles externes Netzteil mit folgenden Merkmalen: •... -
Page 85: Kunden-Display
Kunden-Display Das Kunden-Display ist ein VFD (Vacuum Fluorescent Display) mit zwanzig Stellen in zwei Zeilen. Es besteht aus der VFD-Einheit und dem VFD-Controller. Neben dem seriellen Versions-Controller steht ein USB-Controller zur Verfügung. Das eigentliche VFD ist sowohl auf die serielle als auch auf die USB-Version abgestimmt. -
Page 86: Technische Daten
Technische Daten Referenz-Standards Gemäß zutreffenden Standards Spannungsversorgung Nachrichtenformat Kartengeschwindigkeit MTBF Betriebsstrom Ruhestrom Länge Breite E l o E n t u i t i v e T o u c h m o n i t o r B e n u t z e r h a n d b u c h ISO (International Standards Organization), ANSI (American National Standards Institute), California Drivers License, American Association of Motor... -
Page 87: Anordnung Der Komponenten
A P I T E L NORDNUNG DER OMPONENTEN HAPTER Nachstehend finden Sie eine grafische Gesamtansicht des Touchcomputers mit den wesentlichen in Kapitel 1 beschriebenen Bauteilen. -
Page 88: Aufbau Des Touchcomputers
Aufbau des Touchcomputers E l o E n t u i t i v e T o u c h m o n i t o r B e n u t z e r h a n d b u c h... -
Page 89: Explosionsansicht
Explosionsansicht... - Page 90 E l o E n t u i t i v e T o u c h m o n i t o r B e n u t z e r h a n d b u c h...
-
Page 91: Komponenten
Externes Netzteil (12 VDC) Die Spannungsversorgung (12 VDC) erfolgt über ein universelles externes Netzteil. Leistungsvoraussetzungen: • Eingangsspannung 85 bis 263 VAC • Eingangsfrequenz 47 bis 63 Hz • Ausgangsspannung 12 VDC • Ausgangstoleranz +/- 2 % Hauptspeicher- und Festplattenoptionen Windows 2000 Pro und Windows XP Pro •... -
Page 92: Netzkabel
Netzkabel Externe Kabel Folgende Kabel sind im Lieferumfang enthalten: • Netzkabel (USA) für externe Spannungsversorgung • Netzkabel (Europa) für externe Spannungsversorgung • Verbindungskabel vom externen Netzteil (12 VDC) zum Touchcomputer. Alle Kabel sind ca. 2 Meter lang. E l o E n t u i t i v e T o u c h m o n i t o r B e n u t z e r h a n d b u c h... - Page 93 Temperatur Betriebstemperatur (höhenunabhängig) Im Ruhezustand (höhenunabhängig) Feuchtigkeit Im Betrieb (nicht kondensierend) Im Ruhezustand 5 bis 95 % (bei einer Messtemperatur von max. 38,7 °C) Höhe Im Betrieb 0 bis 3.658 m Im Ruhezustand 0 bis 12.192 m MGEBUNGSANFORDERUNGEN HAPTER (entspricht 14,7 bis 10,1 psi.a.) (entspricht 14,7 bis 4.4 psi.a.) A P I T E L 0 bis +40 °C...
- Page 94 E l o E n t u i t i v e T o u c h m o n i t o r B e n u t z e r h a n d b u c h...
- Page 95 INWEISE ZUR HAPTER I. Sicherheitshinweise zur Elektrik: A) Die auf dem Etikett des Herstellers angegebenen Anforderungen bezüglich Spannung, Frequenz und Stromstärke müssen erfüllt sein. Bei Nichtbeachtung der in dieser Dokumentation genannten Anforderungen und Einschränkungen hinsich- tlich der zu verwendenden Spannungsquelle ist mit einem fehlerhaften Betrieb oder einer Beschädigung der Gerätschaften bis hin zur Brandauslösung zu rechnen.
- Page 96 E l o E n t u i t i v e T o u c h m o n i t o r B e n u t z e r h a n d b u c h Dieses Gerät ist als ITE (Information Technology Equipment) eingestuft und muss auf dem Etikett des Herstellers mit dem CE-Zeichen versehen sein, um darauf hinzuweisen, dass es gemäß...
- Page 97 “The application of this monitor is restricted to special controlled luminous environments. The screen surface trend to reflect annoying light of lamps and sunlight. To avoid these reflections the monitor should not be positioned in front of a window or directed to luminaries. The monitor is in compliance with Reflection Class III according to ISO 13406-2”...
- Page 98 E l o E n t u i t i v e T o u c h m o n i t o r B e n u t z e r h a n d b u c h...
- Page 99 ARANTIE HAPTER Der Verkäufer garantiert dem Käufer, dass das Produkt frei von jeglichen Fehlern hinsichtlich des Materials und der Verarbeitung ist, sofern nicht in diesem Dokument oder in einer Auftragsbestätigung an den Käufer explizit auf derartige Fehler hingewiesen wird. Der Garantiezeitraum für den Touchcomputer und dessen Komponenten beträgt ein Jahr.
- Page 100 DIE HIER AUFGEFÜHRTEN RECHTSMITTEL SIND AUSSCHLIESSLICHE RECHTSMITTEL DES KÄUFERS FÜR DEN FALL EINER VERLETZUNG DER GARANTIERECHTE. DER VERKÄUFER GEWÄHRT KEINE WEITEREN GARANTIELEISTUNGEN ALS DIE OBEN AUSDRÜCKLICH AUFGEFÜHRTEN, WEDER EXPLIZIT GEÄUSSERTE NOCH PER GESETZ ODER IN SONSTIGER FORM IMPLIZIERTE, IM HINBLICK AUF SEINE PRODUKTE, DEREN EIGNUNG FÜR IRGENDWELCHE ZWECKE SOWIE IHRE QUALITÄT, AUCH NICHT BEI ZUWIDERHANDLUNG ODER IN ANDEREN FÄLLEN.
- Page 101 NDEX Anordnung der Komponenten, 33 Blockdiagramm, 19 Garantie, 45 Hinweise zu Störsicherheit und Emission, 41 Hinweise zum Produkt, 3 Hinweise zur Handhabung, 41 Komponenten, 37 Sicherheitshinweise zur Elektrik , 41 Technische Beschreibung, 19 Troubleshooting, 19, 33, 37, 39 Umgebungsanforderungen, 39 Unpacking Your Touchmonitor, 11 Vorsichtsmaßnahmen, 3 I n d e x - 4 7...
- Page 102 I n d e x - 4 8...
Need help?
Do you have a question about the Entuitive ESY1525L and is the answer not in the manual?
Questions and answers