Table of Contents
Advertisement
Quick Links
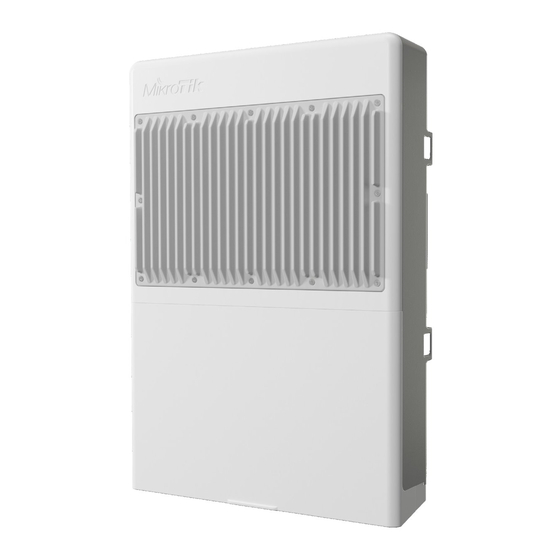
netPower 16P
netPower 16P (CRS318-16P-2S+OUT)
The netPower is a weatherproof switch with the capability of delivering PoE to your connected devices.
Safety Warnings
Before you work on any equipment, be aware of the hazards involved with electrical circuitry, and be familiar with standard practices for preventing
accidents.
Ultimate disposal of this product should be handled according to all national laws and regulations.
The Installation of the equipment must comply with local and national electrical codes.
This product is intended to be mounted outdoors on a pole. Please read the mounting instructions carefully before beginning installation. Failure to use the
correct hardware and configuration or to follow the correct procedures could result in a hazardous situation for people and damage to the system.
Use only the power supply and accessories approved by the manufacturer, and which can be found in the original packaging of this product.
Read the installation instructions before connecting the system to the power source.
We cannot guarantee that no accidents or damage will occur due to the improper use of the device. Please use this product with care and operate at your
own risk!
In the case of device failure, please disconnect it from power. The fastest way to do so is by unplugging the power plug from the power outlet.
It is the customer's responsibility to follow local country regulations, including operation within legal frequency channels, output power, cabling
requirements, and Dynamic Frequency Selection (DFS) requirements. All Mikrotik devices must be professionally installed.
Quickstart
Please follow these quick steps to set up your device:
Open the bottom lid (see "
Connect all served devices to Ethernet ports;
Connect the device to the power source (see "
Once connected to the same network, open
password by default;
Once connected configure the device, so it has an active Internet connection
Upgrade the RouterOS software to the latest version
Set up your router password in the bottom field of the QuickSet menu, to the right and repeat it, it will be used to login next time.
Expansion slots and ports
");
");
https://192.168.88.1
https://mt.lv/upgrade
in your web browser to start configuration, user name: a
https://mt.lv/configuration
;
dmin
and there is no
;
Advertisement
Table of Contents

Summary of Contents for MikroTik netPower 16P
- Page 1 In the case of device failure, please disconnect it from power. The fastest way to do so is by unplugging the power plug from the power outlet. It is the customer's responsibility to follow local country regulations, including operation within legal frequency channels, output power, cabling requirements, and Dynamic Frequency Selection (DFS) requirements. All Mikrotik devices must be professionally installed. Quickstart Please follow these quick steps to set up your device: Open the bottom lid (see "...
- Page 2 DC power connector 48 – 57 V. DC power connector 18 – 30 V. LED indicating a power state of the device. Reset button. Gigabit Ethernet, 8 - ports, delivering PoE out. Gigabit Ethernet, 8 - ports, delivering PoE out. Two - 10G SFP+ ports.
- Page 3 The device supports 802.3af/at PoE from Ethernet 1 - 16. You can power Mikrotik devices which supports powering through Ethernet. The power delivered through the PoE port will depend on the incoming to the device. Max PoE-out on low (<30 V) voltage 5.6 A (2.8 A per 8port group, max 1.1 A per port). ...
- Page 4 Mounting points: There are eight mounting points on the back of this device. Choose the most relevant ones. Middle points are designed for mounting on the mast, there are curves on the case for slim fitment. It's recommended to secure Ethernet cable to the pole using zip ties. With the distance from the device approximately 30 cm. The device must be mounted by UP arrow facing upwards.
- Page 5 Insert provided steel clamps into mounting spots. Attach the unit to the mast. Align the device and secure it by tightening steel clamps with a PH2 screwdriver. Guide Ethernet cables through the opening and connect to the Ethernet ports. Close bottom latch and secure with a screw. A –...
- Page 6 Use included a template to mark spots for drilling holes. Align accordingly, it will depend on how the device will be mounted finally. Insert dowels if needed, depends on wall structure and material. Insert screws and screw them by leaving approximately 1 cm out. Attach the unit to the position.
- Page 7 Информация о дате изготовления устройства указана в конце серийного номера на его наклейке через дробь. Первая цифра означает номер года (последняя цифра года), две последующие означают номер недели. Изготовитель: Mikrotikls SIA, Aizkraukles iela 23, Riga, LV-1006, Латвия, support@mikrotik.com. Сделано в Китае, Латвии или Литве. Cм. на упаковке.
- Page 8 Для получения подробных сведений о гарантийном обслуживании обратитесь к продавцу. Информация об импортерах продукции MikroTik в Российскую Федерацию: https://mikrotik.com/buy/europe/russia Продукты MikroTik, которые поставляются в Евразийский таможенный союз, оцениваются с учетом соответствующих требований и помечены знаком EAC, как показано ниже: Norma Oficial Mexicana EFICIENCIA ENERGETICA CUMPLE CON LA NOM-029-ENER-2017.


Need help?
Do you have a question about the netPower 16P and is the answer not in the manual?
Questions and answers