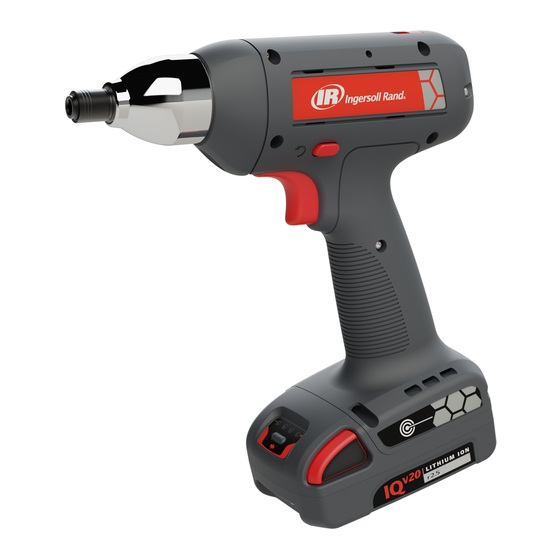
Ingersoll-Rand QX Connect Series User Manual
Hide thumbs
Also See for QX Connect Series:
- Product information (116 pages) ,
- User manual (29 pages) ,
- Maintenance information (24 pages)
Summary of Contents for Ingersoll-Rand QX Connect Series
- Page 1 TL-VP1T-UIM Edition 1 October 2021 QX Connect Series User Manual Save These Instructions...
-
Page 2: Intended Use
Intended Use: This manual provides instruction for programming the parameters of QX Connect Series handheld tools. How to Program • Program via ICS Software: A Windows-based tool that can be installed on a computer, with supplied USB cable. • Program via Back Cap Tool Display: The information contained in this document is a guide for how to program the handheld tool. - Page 3 1. Overview of Menu Screens FIRST USE SCREEN BASIC MODE SCREENS Power up QX Connect Series tool Power up QX Connect Series tool Change Selected Editable Target Screen First Use Screen Item Press "DOWN" or "ENTER" Run Screen Go to INSIGHT Connect App Pairing SCREEN...
- Page 4 2. Getting Started 2.1 Initial Screen Note: Displayed at the time of initial setup or after a factory reset. Select how to interface with the tool. The options are the INSIGHT Connect App via Bluetooth, INSIGHTqcx controller via wireless, PCM or Standalone (normal mode), or Standalone (basic mode). Press the arrow buttons to make the selection and then the button.
-
Page 5: Setting The Clock
2.1.4 Standalone Basic Mode - Limited menu for quick setting of torque or angle targets. To enable advance settings, switch to normal mode. 2.2 Switching between Basic and Normal Modes To switch between Basic and Normal Mode, press button to edit. Enter the password (default password is 0000). Press arrow button to get to edit screen and then arrow button. -
Page 6: Normal Mode
3.2 Torque or Angle Mode Press button to enter Edit mode. Move arrow button to move the arrow. Press button to save the changes. 4. Normal Mode 4.1 PSet Press button to enter Edit mode. Press arrow button to change the PSet selection and press button to save the change. - Page 7 4.1.3 Torque Low Limit To edit the Torque Low Limit press button to enter Edit mode and use the arrow buttons to change the values. Press button to accept. 4.1.4 Angle High Limit To edit the Angle High Limit, press button to enter Edit mode and use the arrow buttons to change the values.
-
Page 8: Drive Mode
4.1.12 Drive Mode Tool supports direct drive and 3 ETS tightening modes (ETS optional). ETS enable QX Connect Series handheld tools are equipped with a feature to reduce reaction during fastening cycles. The energy required for a specific fastening cycle is analyzed and transferred into a series of pulses. - Page 9 To change between direct drive and the ETS modes, press button to enter Edit mode and use arrow buttons. To change ETS mode, move pointer to ETS position and use arrow buttons to change the ETS Mode. Press button to accept. 4.1.13 Torque Units To edit the torque units, press button to enter Edit mode and use the...
-
Page 10: Fault Diagnostics
4.3 Secondary Limits The lower left section is the secondary low limit. The lower right section is the secondary high limit. The secondary limits will be torque values when using angle control or angle values when using torque control. 4.4 Run Screen The top section is the result of the last fastening. - Page 11 To edit communications, press arrow button, enter password, make selection by pressing arrow button to select using INSIGHT Connect App via Bluetooth, INSIGHTqcx controller via wireless, PCM, or Standalone then press button. For wireless modes, the tool will enter pairing mode. Standalone will unpair from connected device. Unpairing from INSIGHTqcx will automatically reset to the default settings and PSET.
- Page 12 Tool Fault Codes/Troubleshooting Tool fault codes can be found in tool display or event log. Fault Category Notes Actions/Solutions Code Insert battery and pull trigger to power-up the Motor Controller. Motor Controller Display did not communicate with the A-10 If alarm does not go away then there is a Timeout Motor Controller in the last 10 seconds.
- Page 13 Fault Code Category Notes Actions/Solutions Motor Controller Communication message E-0B, E-15 Try pulling the trigger again. Fault timeouts. Torque high limit is too low or the joint is too Motor Controller hard for the fastening settings. For a hard E-0C Over Torque limit.
-
Page 14: Parts And Maintenance
Fault Code Category Notes Actions/Solutions User configured alarm that PM Alarm Cycle occurs after the tool runs the 2-xx Reset alarm’s cycle count configuration. Fault number of configured cycles, where xx = 01 to 05. User configured alarm that PM Alarm Cycle 3-xx occurs after a specific time and Reset alarm’s time/date occurrence. - Page 15 Notes:...
- Page 16 ingersollrand.com © 2021 Ingersoll Rand...


Need help?
Do you have a question about the QX Connect Series and is the answer not in the manual?
Questions and answers