Table of Contents
Advertisement
Quick Links
I N S T A L L A T I O N
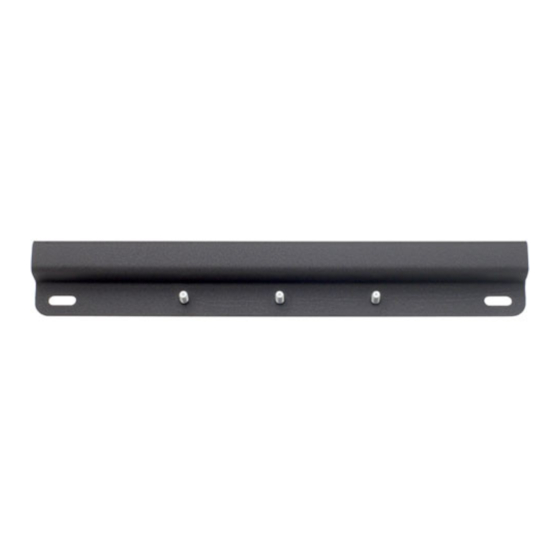
The CTA-111 Dual Stud Adapter provides a 16"-on-
center mounting solution for the following wall arm:
CTA-025 Single Stud Wall Arm
The CTA-111 has a maximum weight capacity of
300 lbs. (136.1 kg).
BEFORE YOU BEGIN
CAUTION: To prevent damage to your equipment, which could affect or void the Factory warranty,
thoroughly study all instructions and illustrations before you begin to install the CTA-111. Pay particular
attention to the Warnings and Cautions in this document.
If you have any questions about this installation, contact Chief Manufacturing at 1-800-582-6480 or 952-582-6480.
CTA-111
Dual Stud Adapter
CHIEF MANUFACTURING INC.
1-800-582-6480 952-894-6280 FAX 952-894-6918
8401 EAGLE CREEK PARKWAY, STE. 700
SAVAGE, MINNESOTA 55378 USA
I N S T R U C T I O N S
CTA-111 Dual Stud Adapter
8809-000024 (Rev. B)
2007 Chief Manufacturing
www.chiefmfg.com
03/07
Advertisement
Table of Contents

Subscribe to Our Youtube Channel
Related Manuals for CHIEF Dual Stud Adapter CTA-111


Summary of Contents for CHIEF Dual Stud Adapter CTA-111
-
Page 1: Before You Begin
CTA-111. Pay particular attention to the Warnings and Cautions in this document. If you have any questions about this installation, contact Chief Manufacturing at 1-800-582-6480 or 952-582-6480. CHIEF MANUFACTURING INC. - Page 2 Installation Instructions IMPORTANT WARNINGS and CAUTIONS! WARNING A WARNING alerts you to the possibility of serious injury or death if you do not follow the instructions. CAUTION A CAUTION alerts you to the possibility of damage or destruction of equipment if you do not follow the corresponding instructions.
- Page 3 Installation Instructions CONTENTS INSPECT THE UNIT BEFORE INSTALLING ... 3 PARTS ... 3 TOOLS REQUIRED FOR INSTALLATION... 4 INSTRUCTIONS... 4 Installing Top Stud Spanning Adapter to Wall ... 4 Attaching Stud Spanning Adapter to Wall Arm... 5 Attaching Wall Arm to Wall-Mounted Top Stud Spanning Adapter ...
-
Page 4: Tools Required For Installation
(10) must be mounted to wood studs that are 16” apart on center. 3. Using a stud sensor, locate the two wood studs where you will mount the top stud-spanning adapter (10). 4. Holding the top stud-spanning adapter (10) - Page 5 Installation Instructions Figure 3. Attach Chief Wall Arm to Bottom Stud Spanning Adapter Figure 4. Attach Wall Arm to Wall-Mounted Stud Spanning Adapter STEP 2 Attaching Stud Spanning Adapter to Wall Arm NOTE To minimize error, the wall arm is attached to the bottom stud-spanning adapter (10) before the wall arm and bottom stud-spanning adapter are secured to the wall.
- Page 6 Installation Instructions STEP 4 Attaching Bottom Stud Spanning Adapter to Wall 1. Using a 15/64” drill bit, drill two pilot holes for anchoring the bottom stud-spanning adapter (10) to the wall. See Figure 5. 2. Using two 5/16” lag bolts (20) and two 5/16” flat washers (30), attach the bottom stud-spanning adapter (10) to the wall.
Need help?
Do you have a question about the Dual Stud Adapter CTA-111 and is the answer not in the manual?
Questions and answers