Table of Contents
Advertisement
WARNING
1. Always perform automotive testing in a safe environment.
2. Do not connect or disconnect any test equipment while
the ignition is on or the engine is running.
3. DO NOT attempt to operate the tool while driving the
vehicle. Have second personal operate the tool. Any
distraction may cause an accident.
4. Before starting the engine, put the gear lever in the
Neutral position (for manual transmission) or in the Park
(for automatic transmission) position to avoid injury.
5. NEVER smoke or allow a spark or flame in vicinity of
battery or engine. Do not operate the tool in explosive
atmospheres, such as in the presence of flammable
liquids, gases, or heavy dust.
6. Keep a fire extinguisher suitable for gasoline/chemical/
electrical fires nearby.
7 . Wear an ANSI-approved eye shield when testing or
repairing vehicles.
8. Put blocks in front of the drive wheels and never leave
the vehicle unattended while testing.
9. Use extreme caution when working around the ignition
coil, distributor cap, ignition wires and spark plugs. These
components create hazardous voltage when the engine
is running.
10. To avoid damaging the tool or generating false data,
please make sure the vehicle battery is fully charged and
the connection to the vehicle DLC (Data Link Connector)
is clear and secure.
11. Automotive batteries contain sulfuric acid that is harmful
to skin. In operation, direct contact with the automotive
batteries should be avoided. Keep the ignition sources
away from the battery at all times.
12. Keep the tool dry, clean, free from oil, water or grease.
Use a mild detergent on a clean cloth to clear the outside
of the equipment when necessary.
13. Keep clothing, hair, hands, tools, test equipment, etc.
away from all moving or hot engine parts.
14. Store the tool and accessories in a locked area out of the
reach of children.
15. Do not use the tool while standing in water.
16. Do not expose the tool or power adapter to rain or wet
conditions. Water entering the tool or power adapter
increases the risk of electric shock.
17 . When an engine is operating, keep the service area well-
ventilated or attach a building exhaust removal system
to the engine exhaust system. Engines produce various
poisonous compounds (hydrocarbon, carbon monoxide,
nitrogen oxides, etc.) that cause slower reaction time and
result in death or serious personal injury.
MDMAXLITEA
I
Advertisement
Table of Contents

Related Manuals for Matco Tools MaxLiteA


Summary of Contents for Matco Tools MaxLiteA
- Page 1 MDMAXLITEA 10. To avoid damaging the tool or generating false data, WARNING please make sure the vehicle battery is fully charged and the connection to the vehicle DLC (Data Link Connector) 1. Always perform automotive testing in a safe environment. is clear and secure.
- Page 2 MDMAXLITEA FCC Warning INTENDED USE OF THE TOOL Any Changes or modifications not expressly approved by the party responsible for compliance could void the user’s Compatible with Passenger cars and commercial vehicles, authority to operate the equipment. the MDMAX4 diagnostic tool is exclusively intended for professional technicians.
- Page 3 MDMAXLITEA - Connect the equipment into an outlet on a circuit different from that to which the receiver is connected. - Consult the dealer or an experienced radio/TV technician for help. This equipment complies with FCC radiation exposure limits set forth for an uncontrolled environment. End user must follow the specific operating instructions for satisfying RF exposure compliance.
-
Page 4: Table Of Contents
2 Components & Controls ..........4 5.3 Maintenance Reset ............29 3 Preparations ..............6 5.3.1 Oil Reset Service ............29 3.1 Charging MaxLiteA ............6 5.3.2 Electronic Parking Brake Reset .......30 3.2 Power ON/OFF ..............6 5.3.3 Steering Angle Calibration ........30 3.3 Locator & Navigation Buttons ..........7 5.3.4 ABS Bleeding ............30... - Page 5 MDMAXLITEA 6 Toolbox ................41 6.1 Saved Reports ...............41 6.1.1 Health Report ............41 6.1.2 Recorded Data ............41 6.1.3 Data Samples ............42 6.1.4 Shared Data Samples ..........42 6.2 Feedback ...............42 6.3 Update ................42 6.3.1 Update Diagnostic Software & APP ......43 6.3.2 Set Frequently Used software ........43 6.4 Settings................43 6.4.1 General ..............44 6.4.2 VCI Management ............44...
-
Page 6: Introduction
• Flexible subscription: In addition to the basic diagnostic by covering a wide range of vehicles, featuring powerful functions, MaxLiteA enables user to extend itself to a functions, and providing precise test result. professional diagnostic tool which supports all systems Through the wired communication between the vehicle and and all functions by purchasing a “Full Diagnostic”... -
Page 7: Technical Specifications
MDMAXLITEA view the test report or resume from previous diagnostic 1.3 Technical Specifications session, without the necessity of starting from scratch. Item Description • Pre- and Post- Repair Result Comparison: By comparing the pre-repair and post-repair report, you can clearly Operating system Android determine which vehicle issues have been fixed and... -
Page 8: Accessory Checklist
(A piece of paper bearing envelope Product S/N and Activation Name Picture Code, which is required for your registration.) MaxLiteA tablet Diagnostic cable (To connect to vehicle’s DLC.) Power adapter & charging cable (To supply power to the tablet through connection... -
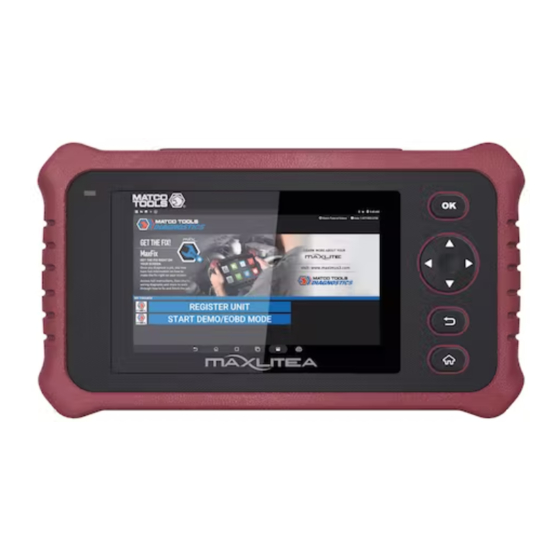
Page 9: Components & Controls
MDMAXLITEA 2 Components & Controls There are two main components to the MaxLiteA system: • MaxLiteA Tablet -- the central processor and monitor for the system (For details, please refer to Chapter 2.1.) Fig. 2-1 • Diagnostic Cable -- A cable for connecting the tablet to the vehicle’s DLC (For details, please refer to Chapter 2.2.) - Page 10 MDMAXLITEA Name & Descriptions Charging/Data I/O Port -- Connects the power adapter to the AC outlet to charge the tablet / DB-15 diagnostic connector -- To connect to vehicle's Connects to a PC to exchange data. DLC (Data Link Connector) via diagnostic cable. Power/Screen Lock Button -- To turn the tablet on/off with long press, or lock the screen with short press.
-
Page 11: Preparations
1. Insert one end of the included 4. After the batter y is charging cable into the power fully charged and the 3.1 Charging MaxLiteA ch a r g i n g c o m p l e t e adapter. symbol replaces 2. -
Page 12: Locator & Navigation Buttons
MDMAXLITEA 3.4 Desktop 1. Press and hold the POWER but- 2. To turn the tablet off, ton for about 3 seconds to turn press and hold the on the tablet. The system starts POWER button until Adjusting Screen Brightness initializing and then enters the a n o p t i o n m e n u home screen. -
Page 13: Changing Language
“Connected” status, then tap on “Forget” . 3.6 Wi-Fi Setup MaxLiteA has built-in Wi-Fi that can be used to get online. Once you’re online, you can register your tool, update diagnostic software & APK and send email on your network. -
Page 14: Initial Use
MDMAXLITEA step 2. 4 Initial Use B. “REGISTER FULL SOFTWARE” enables you to choose the coverage that works for you. 4.1 User Registration 2. Fill in your account information and device information and Users need to go through an sign-up process before using then tap on “ACTIVATE”... - Page 15 3. Tap on “RUN DIAGNOSTICS” to launch diagnostics. See On-screen Buttons: Fig. 4-4. Recover Current Device Activation: If you have already activated your MaxLiteA, tap on it to navigate to the following screen. Fig.4-3 On-screen Buttons: Input Serial number, Email address and Password, and then Sign Out: Tap on it to log out the system.
-
Page 16: Basic Operations On Diagnostic App
Note: If a red dot appears on upper right corner of the 4.2.1 Switch between different function modules Update logo, it indicates newer software is available. There are 2 function modules available on the MaxLiteA: Diagnostics and Toolbox. 5. Tap on “Update” to enter the update center. -
Page 17: How To Arrange Diagnostic Vehicle Software Icons
Once it is unlocked, the software icon will turn into orange. 4.3 Function Modules Fig. 4-7 There are 2 function modules available on the MaxLiteA: Swipe in from the left/right edge of the screen to switch Diagnostics and Toolbox. between function modules. -
Page 18: Toolbox
W h e n a v e h i c l e d i a g n o s i s i s To update vehicle diagnostic software Update performed, MaxLiteA records the and APK. detailed diagnostic information. This Quickly retrieve more detailed... -
Page 19: Start Diagnostics
MDMAXLITEA 5 Start Diagnostics 5.1 Connections Follow the steps mentioned below to connect the vehicle: 1. Turn OFF the ignition key. Fig. 5-2 3. Plug one end of the diagnostic cable to DB-15 connector of the tablet, and tighten the captive screws. Connect the other end to the vehicle’s OBD II DLC (Note: Make sure that Vehicle battery voltage range should be 11.4-14V). -
Page 20: Start Diagnostics
5.2.1 Max VIN (VIN SCAN) Fig. 5-4 When the MaxLiteA tablet is properly connected to 2. Government regulations mandate that all OBD II compliant the vehicle’s DLC, you can easily get the VIN (Vehicle vehicles must have a “common” 16-pin Data Link Identification Number) information of the currently identified Connector (DLC). - Page 21 MDMAXLITEA selection). The vehicle information page lists all historical diagnostic records of the vehicle, which lets the technician have a total command of the vehicle faults. In addition, a quick dial to manual diagnosis and diagnostic function are also available on this page for reducing the roundabout time and increasing productivity.
- Page 22 MDMAXLITEA directly go to the function selection screen. Choose server database, the following screen displays: the desired one to start a new diagnostic session. B. If the tablet failed to obtain the vehicle VIN, the following screen will appear: Fig. 5-10 •...
-
Page 23: Manual Diagnosis
MDMAXLITEA diagnostic report. • To perform other functions, tap on “Quick access” to directly go to the function selection screen. Choose the desired one to start a new diagnostic session. 2). If the scanned or entered VIN can not be retrieved from the server database, the following pop-up message displays: Fig. - Page 24 MDMAXLITEA systems functioning normally are displayed in white. On-screen Buttons: : Tap on it to view detailed Diagnostic Trouble Codes (DTCs) information. Tap on to hide it. Note: Diagnostic Trouble Codes or Fault Codes can be used to identify which engine systems or components that are malfunctioning.
- Page 25 MDMAXLITEA Google Search: Highlight the desired DTC, and tap on it to • Tap on “Symptom” , select the fault symptom information search in the Google engine for more detailed information from the list and tap on “OK” to confirm. about the selected DTC.
Need help?
Do you have a question about the MaxLiteA and is the answer not in the manual?
Questions and answers
maxlite storage clean up. I can't update because scanner says storage must be cleared
How to bleed the abs
Does the maxlite have the capability to recalibrate a front facing camera that controls lane departure and front collision?