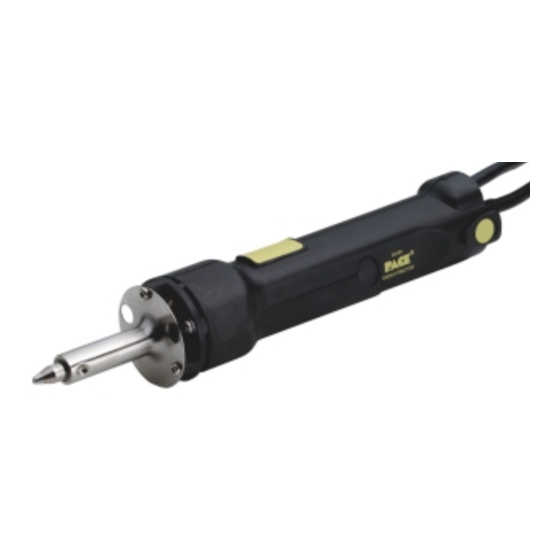
Pace SX-80 Operation & Maintenance Instructions Manual
Sodr-x-tractor handpiece
Hide thumbs
Also See for SX-80:
- Operation and maintenance manual (11 pages) ,
- Operation and maintenance manual (11 pages)
Table of Contents
Advertisement
Quick Links
Advertisement
Table of Contents

Subscribe to Our Youtube Channel
Summary of Contents for Pace SX-80
- Page 1 SX-80 SX-80 SX-80 SX-80 SX-80 SX-80 Sodr-X-Tractor Handpiece Operation & Maintenance Instructions Operation & Maintenance Instructions Operation & Maintenance Instructions Operation & Maintenance Instructions Operation & Maintenance Instructions...
- Page 2 Contact your local authorized PACE Distributor or PACE Incorporated to obtain the latest specifications. The following are registered trademarks and/or servicemarks of PACE Incorporated, Laurel Maryland U.S.A. and may only be used to identify genuine PACE products or services: ARM-EVAC, FLO-D-SODR, MINI-WAVE, PACE, SENSATEMP, SNAP-VAC,...
- Page 3 The SX-80 Sodr-X-Tractor handpiece provides thermally enhanced through-hole desoldering on extra heavy multilayer assemblies at safer, lower temperatures, even during continuous use. It features a large, easy to replace solder trap. The SX-80 also provides safe removal of TQFP (Thin Quad FlatPack) and TSOP (Thin Small Outline Package) surface mount components and continuous removal of old solder from surface mount lands.
-
Page 4: Handpiece Setup
If you have a PACE system incorporating only one handpiece, attach the air hose to the SX-80 power cable using the supplied Hose Clamps (P/N 1321-0085-01). Space them evenly along the length of the power cable starting at a point 6 inches from the ends of the handpiece. - Page 5 When removing any air hose, turn and pull. Do not attempt to pull hose directly off. Damage to or breakage of fitting or VisiFilter may occur. Use your SX-80 Sodr-X- Tractor with a clean VisiFilter element. Otherwise a deterioration in performance or...
-
Page 6: Tip Selection
When removing TQFPs or TSOPs, the Pik-Tip should be sized so that the tip blades make proper contact with all the lead/land connections simultaneously. NOTE The SX-80 Sodr-X-Tractor will only use the new Endura line of desoldering tips. Tip Installation For maximum productivity and proper fit, install tips into your SX-80 Sodr-X-Tractor when the heater is hot and the Flux/Sodr trap and door are installed. -
Page 7: Temperature Setting
SX-80 Temperature Setting To save tip life and reduce the possibility of damage to the PCB, PACE recommends using the lowest possible tip temperature that will provide rapid yet controllable melt of the entire solder joint. Begin with an operating temperature of 316°C (600°F) and adjust as necessary. - Page 8 As the Sodr-X-Tractor is used, solder and flux build-up will begin to impede the airflow and decrease system performance. The SX-80 utilizes a disposable chamber which makes maintenance of the SX-80 a quick and simple process. Regular replacement of the Sodr-Flux Trap will keep the Sodr-X-Tractor operating at peak performance.
-
Page 9: Heater Replacement
SX-80 SX-80 SX-80 SX-80 SX-80 Heater Replacement NOTE Confirm that the heater assembly of your handpiece is defective by referring to the Corrective Maintenance section of the manual. -
Page 10: Corrective Maintenance
SX-80 Corrective Maintenance Your SX-80 requires no special maintenance other than being kept clean. The heater bore and the heater assembly set screw which secures the tip must be kept free of oxidation and debris in order to maintain the proper tip-to-ground resistance. -
Page 11: Replacement Parts
SX-80 SX-80 SX-80 SX-80 SX-80 Replacement Parts 11 9 SX-80 Exploded Diagram Ref # Description Part # Flux/Sodr Trap 1309-0054-P100 1309-0054-P1000 Handle Assembly 6010-0115-P1 Door Assembly 1119-0141-P1 Heater Assembly 6010-0107-P1 Plunger Shaft 1261-0154-P1 Plunger Lock 1500-0063-P1 Front Seal 1213-0087-P1 Rear Seal 1213-0086-P1 “C”...


Need help?
Do you have a question about the SX-80 and is the answer not in the manual?
Questions and answers