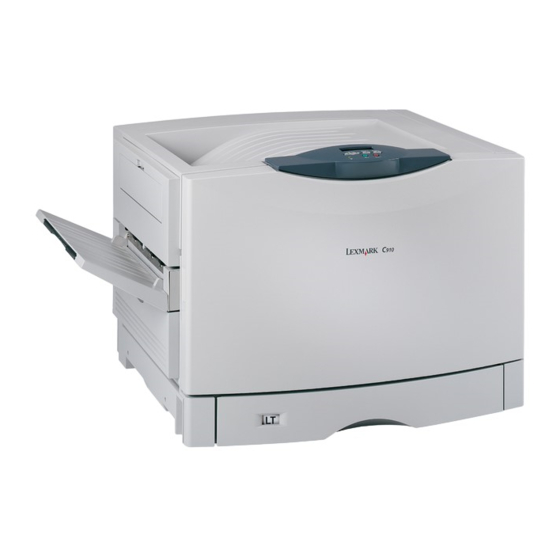
Lexmark C910 Instructions Manual
Clearing paper jams
Hide thumbs
Also See for C910:
- Reference manual (475 pages) ,
- Service manual (474 pages) ,
- User reference manual (323 pages)
Advertisement
Quick Links
Printing
Using color
Paper handling
Maintenance
Troubleshooting
Administration
Index
By carefully selecting print media and loading them properly, you should be able to avoid
most paper jams. If jams do occur, follow the steps outlined in this section.
To resolve the paper jam messages, you must clear the jammed area and then press
clear the message and resume printing. The printer prints a new copy of the page that
jammed if Jam Recovery is set to On or Auto; however, the Auto setting does not guarantee
the page will print.
Identifying paper jam areas
See the diagram
on page 2
areas where jams may occur. The path varies depending on the paper source and output bin.
www.lexmark.com
for the path the paper travels through the printer and options, and
Lexmark C910
Clearing paper jams
1
to
Go
Advertisement

Related Manuals for Lexmark C910


Summary of Contents for Lexmark C910
- Page 1 See the diagram on page 2 for the path the paper travels through the printer and options, and Maintenance areas where jams may occur. The path varies depending on the paper source and output bin. Troubleshooting Administration Index www.lexmark.com Lexmark C910...
- Page 2 200 Paper Jam Paper handling Check Area F 200 Paper Jam 249 Paper Jam Check Area D Maintenance Troubleshooting 241 Paper Jam Administration 200 Paper Jam Check Area E 242 Paper Jam 243 Paper Jam Index 244 Paper Jam www.lexmark.com Lexmark C910...
- Page 3 Note: If there is a paper jam when you turn the printer on, the second line of the Administration 200 Paper Jam message will be blank. To resolve the message, you must clear all paper from the paper path. Index www.lexmark.com Lexmark C910...
- Page 4 This message indicates a paper jam in the transfer belt, fuser, or output roller area. To clear areas A–B: Complete the steps to open the top cover. Paper handling Note: If you need instructions on how to open the top cover, see Opening the cover. Maintenance Photodeveloper Troubleshooting Administration Index www.lexmark.com Lexmark C910...
- Page 5 If the paper source was the multipurpose feeder, check the area between the multipurpose feeder and the transfer belt. Maintenance Troubleshooting Administration Transfer belt Index Warning: Do not use any pointed objects to remove the paper. This could cause permanent damage to the transfer belt. www.lexmark.com Lexmark C910...
- Page 6 . If a jam is present, continue with step Using color Note: If you need instructions on how to close the top cover, see Closing the cover. Paper handling Lift the fuser pressure release lever. Maintenance Troubleshooting Administration Index www.lexmark.com Lexmark C910...
- Page 7 Clearing paper jams Printing Slowly pull the paper out of the fuser toward the inside of the printer. Using color Paper handling Maintenance Troubleshooting Administration Index www.lexmark.com Lexmark C910...
- Page 8 Note: The top cover will not close until the lever is in the down position. Administration Check the top cover for additional jams. If there is no jam in the top cover, close the top cover and front door. If a jam is present, continue with step Index www.lexmark.com Lexmark C910...
- Page 9 Clearing paper jams Printing Note: If you need instructions on how to close the top cover, see Closing the cover. Using color Remove the jam from the top cover. Paper handling Maintenance Troubleshooting Administration Index www.lexmark.com Lexmark C910...
- Page 10 Close the top cover and the front door. Note: If you need instructions on how to close the top cover, see Closing the Using color cover. Open the jam access door on the left side of the printer. Paper handling Maintenance Troubleshooting Administration Index www.lexmark.com Lexmark C910...
- Page 11 Clearing paper jams Printing Remove any paper inside the printer. Using color Paper handling Maintenance Close the jam access door. To prevent additional paper jams, make sure both sides of the door are closed. Troubleshooting Administration Index Press www.lexmark.com Lexmark C910...
- Page 12 See Removing small size paper from the duplex unit. Open the duplex jam access door on the right side of the printer. Paper handling Maintenance Troubleshooting Administration Index www.lexmark.com Lexmark C910...
- Page 13 Clearing paper jams Printing Remove the jam. Using color Paper handling Maintenance Troubleshooting Press If the paper jam message continues, check and clear all paper from the paper path. Administration Index www.lexmark.com Lexmark C910...
- Page 14 Check Area D This message indicates a paper jam in the duplex unit area. To clear area D: Using color Open the duplex jam access door on the right side of the printer. Paper handling Maintenance Troubleshooting Administration Index www.lexmark.com Lexmark C910...
- Page 15 Clearing paper jams Printing Gently pull out the duplex unit. Using color Paper handling Maintenance Troubleshooting Administration Index www.lexmark.com Lexmark C910...
- Page 16 Turn the paper forwarding dial counterclockwise. If the paper advances out of the duplex unit, remove the jam and go to step 7. If the paper does not advance, go to step step Using color Paper handling Maintenance Troubleshooting Administration Index www.lexmark.com Lexmark C910...
- Page 17 Clearing paper jams Printing Open the duplex unit covers. Using color Paper handling Maintenance Troubleshooting Administration Index www.lexmark.com Lexmark C910...
- Page 18 Clearing paper jams Printing Remove the jam. Using color Paper handling Maintenance Troubleshooting Administration Index www.lexmark.com Lexmark C910...
- Page 19 Clearing paper jams Printing Close the duplex unit covers. Using color Paper handling Maintenance Troubleshooting Administration Index www.lexmark.com Lexmark C910...
- Page 20 Clearing paper jams Printing Push the duplex unit until it stops. Using color Paper handling Maintenance Troubleshooting Administration Index www.lexmark.com Lexmark C910...
- Page 21 Clearing paper jams Printing Close the access door. Using color Paper handling Maintenance Troubleshooting Press If the paper jam message continues, check and clear all paper from the paper path. Administration Index www.lexmark.com Lexmark C910...
- Page 22 When printing on both sides of A5 or other small size paper, you may need to partially remove the duplex unit to clear the jam. Using color Turn off the printer. Paper handling Maintenance Troubleshooting Administration Index www.lexmark.com Lexmark C910...
- Page 23 Clearing paper jams Printing Open the duplex unit door. Using color Paper handling Maintenance Troubleshooting Administration Index www.lexmark.com Lexmark C910...
- Page 24 Clearing paper jams Printing Loosen the two screws shown. Using color Paper handling Maintenance Troubleshooting Administration Index www.lexmark.com Lexmark C910...
- Page 25 Clearing paper jams Printing Pull out the duplex unit far enough to see the duplex unit inlet. Using color Paper handling Maintenance Troubleshooting Administration Index www.lexmark.com Lexmark C910...
- Page 26 Clearing paper jams Printing Remove jam from the duplex unit inlet. Using color Paper handling Maintenance Troubleshooting Administration Index www.lexmark.com Lexmark C910...
- Page 27 Clearing paper jams Printing Slide the duplex unit in. Using color Paper handling Maintenance Troubleshooting Administration Index www.lexmark.com Lexmark C910...
- Page 28 Clearing paper jams Printing Align the thumbscrews on the duplex unit with the holes in the printer. Tighten the thumbscrews to secure the duplex unit. Using color Close the duplex unit door. Paper handling Maintenance Troubleshooting Administration Index www.lexmark.com Lexmark C910...
- Page 29 This message indicates a jam in the top, middle, or bottom optional drawer paper path area. Using color Note: If you have a high capacity feeder, pull the feeder away from the printer. Open the jam access door on the top optional drawer. Paper handling Maintenance Troubleshooting Administration Index www.lexmark.com Lexmark C910...
- Page 30 Clearing paper jams Printing Remove the jam. Using color Paper handling Maintenance Troubleshooting Close the jam access door. Administration Index www.lexmark.com Lexmark C910...
- Page 31 Clearing paper jams Printing Open the jam access door on the middle optional drawer. Using color Paper handling Maintenance Troubleshooting Administration Index www.lexmark.com Lexmark C910...
- Page 32 Clearing paper jams Printing Remove the jam. Using color Paper handling Maintenance Troubleshooting Close the jam access door. Administration Index www.lexmark.com Lexmark C910...
- Page 33 Clearing paper jams Printing Open the jam access door on the bottom optional drawer. Using color Paper handling Maintenance Troubleshooting Administration Index www.lexmark.com Lexmark C910...
- Page 34 Clearing paper jams Printing Remove the jam. Using color Paper handling Maintenance Troubleshooting Close the jam access door. Press Administration If the paper jam message continues, check and clear all paper from the paper path. Index www.lexmark.com Lexmark C910...
- Page 35 Clearing paper jams Printing Check Area F Pull the high capacity feeder away from the printer. Using color Paper handling Maintenance Troubleshooting Administration Index www.lexmark.com Lexmark C910...
- Page 36 Clearing paper jams Printing Open the jam access door on the top optional drawer. Using color Paper handling Maintenance Troubleshooting Administration Index www.lexmark.com Lexmark C910...
- Page 37 Clearing paper jams Printing Remove any jams. Using color Paper handling Maintenance Troubleshooting Close the jam access door. Administration Index www.lexmark.com Lexmark C910...
- Page 38 Slide the high capacity feeder until the feeder locks to the docking frame. When the feeder is in the correct position, you hear a click. Using color Paper handling Maintenance Troubleshooting Press Administration If the paper jam message continues, check and clear all paper from the paper path. Index www.lexmark.com Lexmark C910...
- Page 39 Clearing paper jams Printing 240 Paper Jam Check MP Feeder Using color Slowly pull the jam straight out of the multipurpose feeder. If the paper will not come out, proceed with step 2. Paper handling Maintenance Troubleshooting Administration Index www.lexmark.com Lexmark C910...
- Page 40 Clearing paper jams Printing Open the top cover. Note: If you need instructions on how to open the top cover, see Opening the Using color cover. Remove the paper on the transfer belt. Paper handling Maintenance Troubleshooting Administration Index www.lexmark.com Lexmark C910...
- Page 41 Warning: Do not touch, drop, or place anything on the transfer belt. Touching the surface of the transfer belt or placing items on it may cause damage. Using color Paper handling Maintenance Troubleshooting Transfer belt Administration Index www.lexmark.com Lexmark C910...
- Page 42 Paper jam messages 241–244 indicate a jam has occurred in one of the paper trays. A 249 Paper Jam Check Tray <x> message indicates Troubleshooting a jam has occurred in the high capacity feeder. See Identifying paper jam areas for tray numbering. Administration Index www.lexmark.com Lexmark C910...
- Page 43 Clearing paper jams Printing 241-244 Paper Jam Pull out the tray indicated on the display. Using color Paper handling Maintenance Troubleshooting Administration Index www.lexmark.com Lexmark C910...
- Page 44 Clearing paper jams Printing Remove any wrinkled or creased paper. Using color Paper handling Maintenance Troubleshooting Administration Index www.lexmark.com Lexmark C910...
- Page 45 Clearing paper jams Printing Push down on the remaining paper in the tray until the bottom plate clicks into place. Using color Paper handling Maintenance Troubleshooting Administration Index www.lexmark.com Lexmark C910...
- Page 46 Clearing paper jams Printing Close the tray. Using color Paper handling Maintenance Troubleshooting Press If the paper jam message continues, check and clear all paper from the paper path. Administration Index www.lexmark.com Lexmark C910...
- Page 47 A 249 Paper Jam Check Tray <x> message indicates a jam has occurred in the high Using color capacity feeder. Note: If you have an optional printer cabinet, the high capacity feeder will be identified as tray 3. Paper handling Maintenance Troubleshooting Administration Index www.lexmark.com Lexmark C910...
- Page 48 Clearing paper jams Printing Open the top cover. Using color Paper handling Maintenance Troubleshooting Administration Index www.lexmark.com Lexmark C910...
- Page 49 Clearing paper jams Printing Remove the jam. Using color Paper handling Maintenance Troubleshooting Administration Index www.lexmark.com Lexmark C910...
- Page 50 Clearing paper jams Printing Close the top cover. Using color Paper handling Maintenance Troubleshooting Press Administration Index www.lexmark.com Lexmark C910...
Need help?
Do you have a question about the C910 and is the answer not in the manual?
Questions and answers