Table of Contents
Advertisement
Quick Links
Advertisement
Table of Contents

Subscribe to Our Youtube Channel
Related Manuals for Aqua HC 100 Series


Summary of Contents for Aqua HC 100 Series
- Page 1 OPERATING AND MAINTENANCE INSTRUCTIONS HC 100 For other languages please visit:...
-
Page 2: Table Of Contents
ENGLISH Sommario 1.0 GENERAL COMMENTS .......................... 3 1.1 Warnings ..............................3 1.1 Transport and handling ........................... 3 1.2 Design standard ............................3 2.0 TECHNICAL CHARACTERISTICS ......................4 2.1 General rules ............................4 2.2 Standard accessories supplied ......................... 4 2.3 Electrical characteristics ......................... 4 2.4 Electric connection.......................... - Page 3 Cod. ADSP7000177C Rev.0.0 (12/2020)
-
Page 4: General Comments
ENGLISH 1.0 GENERAL COMMENTS 1.1 Warnings The aim of HC100 pump manual is to provide you with all the necessary information for a proper installation and maintenance in order to give you optimum results whilst in operation. For this reason it is really important reading with attention the instructions given below since they furnish all the indications necessary for the sureness of the installation, use and maintenance ... -
Page 5: Technical Characteristics
ENGLISH The Producer declines all responsibility in reference with whatever intervention on the equipment from not skilled personnel! 2.0 TECHNICAL CHARACTERISTICS 2.1 General rules Install the pump: On an horizontal reinforcement (ex: stoking tank) or on the pump shelf (optional) so that the pump head stays always in vertical position +/-15°. -
Page 6: Hydraulic Connection
ENGLISH P- Metering Pump R- Relay I-Switcher or multi-pole security device E- Motor or generally inductive charge A- Supply voltage 2.5 Hydraulic connection After the exact installation of the pump (see generalities), proceed with the connection. Suction: connect the suction tube (PVC soft cristal) to the foot filter that is supplied and put it in the hose clamp, lock the tube closing the nut. -
Page 7: Operation
ENGLISH - Connect the pump to the plant always through the injection valve (1/2”Gm) supplied with the installation kit. - Connect the soft PVC tubing only in suction (on the foot filter side), instead connect the PE tubing in delivery by verifying that the cut of the tubing is clean and that lateral crushing is not caused;... -
Page 8: Maintenance
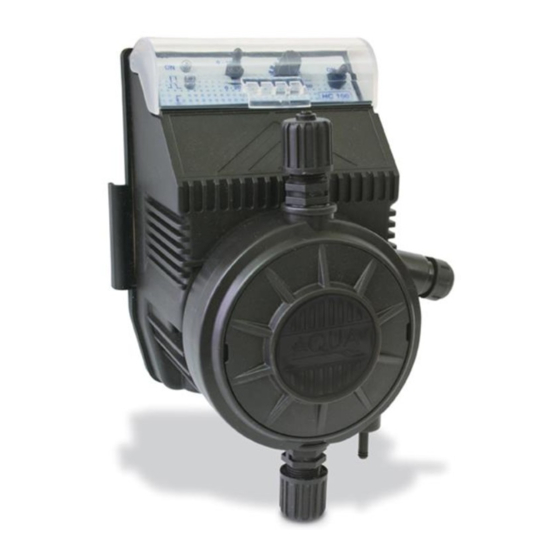
On the front panel there is an ON / OFF switch (E) that allows you to activate and stop the pump. There are also 2 LEDs, one GREEN (B) which signals the status of the pump on, the other intermittent RED (A) which signals every single pulse. In the version with predisposition for level alarm, under the LED (A) there is also an ORANGE LED which indicates that the product to be dosed is finished. -
Page 9: Basic Maintenance Procedures
ENGLISH strongly recommend operating it for at least 30 minutes with the foot filter immersed in clean water to flush the pump. 3.3 Basic maintenance procedures Before doing any maintenance read with attention the technical and safety characteristic of the dosing chemicals and follow the next procedures: 1 Turn off the pump and immerse the foot filter and the injection tube in clean water. -
Page 10: Commonly Reported Problems
ENGLISH 4. By hand, or with pliers if necessary unscrew the diaphragm, and replace with the new one. Hand tight only. Before screwing the diaphragm into place, add a small quantity of Loctite® 222 onto the thread. 5. Refit the dosing head, tightening the head bolts sequentially and carefully to ensure an even airtight seal. -
Page 11: Warranty
ENGLISH beyond our control and/or knowledge. For this reason and for other reasons we will not be held liable thereof and we expressly waive obligations of claim for damages or relating to the information contained herein. Product Formula Ceram. PVDF Hastel. - Page 12 Within the above stated period the producer will supply free of charge any part that upon examination by the producer or by an authorised dealer, is disclosed to have been defective in work manship or material, or at its option, it will repair the parts directly or through authorised workshops It remains anyway excluded from whatever responsibility and obligation for others costs, damages and direct or indirect losses that come from the use or the not use availability, either total or partial.
-
Page 13: Allegati Ed Esplosi - Attachments And Exploded Views
ALLEGATI ED ESPLOSI - ATTACHMENTS AND EXPLODED VIEWS Fig. 1 SERIE “HC 100” A MURO / WALL MOUNTING Fig. 2 SERIE “HC 100” CON BASE / BASE MOUNTING Cod. ADSP7000177C Rev.0.0 (12/2020) - Page 14 VALVOLE A SFERA / BALL VALVES VALVOLE A LABBRO / LIP VALVES Fig. 3 COLLEGAMENTI TUBI SUL CORPO POMPA - PUMP HEAD TUBING CONNECTIONS Fig. 4 SPURGO MANUALE / MANUAL PURGE EPURGE MANUELLE Cod. ADSP7000177C Rev.0.0 (12/2020)
- Page 15 Fig. 5 - ESPLOSO HC100 – EXPLODED VIEW Cod. ADSP7000177C Rev.0.0 (12/2020)
- Page 16 COVER IN PP-NERO PER CORPO POMPA AQUA PERSONALIZZABILE / BLACK COVER ADSP6000748 VITE M 2,9 X 13 UNI 6955 (AF-TSTC) INOX A2 / SCREW M 2,9 X 13 UNI 6955 TARGHETTA GIALLA CON LOGO AQUA PER CORPO POMPA 2-15LT-20LT / YELLOW LABEL WITH AQUA ADSP6000556 LOGO...
- Page 17 Fig. 6 – ESPLOSO CORPO POMPA – BODY PUMP EXPLODED VIEW Cod. ADSP7000177C Rev.0.0 (12/2020)
- Page 18 DESCRIZIONE ADSP6000137N CORPO POMPA 2-15L PP / PUMP HEAD 2-15L PP ADSP6000137P CORPO POMPA 2-15L PVDF / PUMP HEAD 2-15L PVDF ADSP6000018 CORPO POMPA 1L PP / PUMP HEAD 1L PP ADSP6000022 CORPO POMPA 2-15L 4-20BAR PVC / PUMP HEAD 2-15L 4-20BAR PVC ADSP6000021 CORPO POMPA 20L PP / PUMP HEAD 20L PP ADSP6000021P...
- Page 19 By recycling, reusing the material or other forms of utilising old devices, you are making an important contribution to protecting our environment. AQUA S.p.A. Via Crotti 1 – 42018 San Martino in Rio (RE) – ITALY Ph.
Need help?
Do you have a question about the HC 100 Series and is the answer not in the manual?
Questions and answers