Table of Contents
Advertisement
Advertisement
Table of Contents

Related Manuals for WEISS WAS.handling


Summary of Contents for WEISS WAS.handling
- Page 2 We reserve the right to make alterations to the content of this documentation (even without prior notification). WEISS GmbH is not liable for any technical or printing errors in this document. We also accept no liability for damages directly or indirectly related to the provision, service, or use of this documentation.
-
Page 3: Table Of Contents
5.5 Teach positions and create drive sequences..................43 6 Quick start ..............................48 7 Frequently Asked Questions (FAQs) ......................50 8 Troubleshooting ............................51 8.1 Common problems and error messages: ....................51 8.2 How to proceed in case of errors ......................53 WAS.handling Windows – Programm... -
Page 4: Safety Warnings
1.2 Safety and utilization notes Validity: This is the software documentation for WEISS controls for Pick & Place HP140 with B&R ACOPOS Servo Drives. It is complete only together with the mechanical and electrical documentation. Depending on the interface to the supervisory control system, please observe the interface description. -
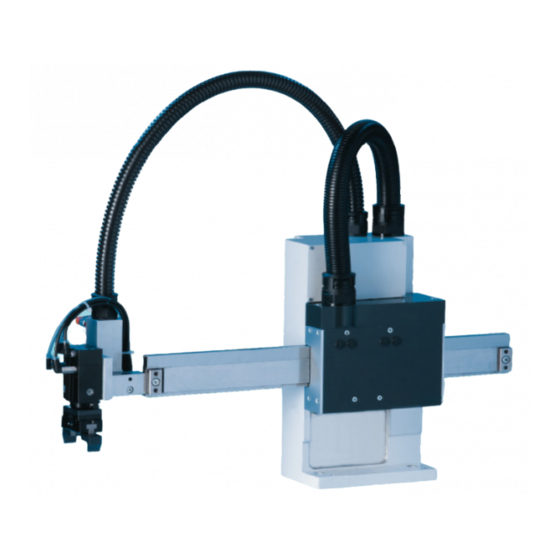
Page 5: Product Description
Customer interface each with 16 - Profibus or inputs and - CAN / DeviceNet outputs Customer interface: Ethernet digital inputs Motor line blue Parameterizing via RS232 or Ethernet Encoder line blue Motor line red Encoder line red WAS.handling Windows Program... -
Page 6: Software Structure
The PVI driver is the interface between the Windows program and the control computer. It is supplied by the manufacturer of the drive (Bernecker & Rainer). The PVI driver runs for two hours without a license. After two hours a reminder is displayed. After starting WAS.handling again, the program can be operated for another two hours. -
Page 7: Installation
The installation of the Windows program is done in two parts: Installation of the PVI driver for communication between control system and the Windows computer • Installation of the program "WAS.Handling“ • 3.1 Installing the PVI driver: Run the "AS2523103_PviRT_Eng.exe" file in the "PVI_Eng" directory from the supplied CD. -
Page 8: Installing The Windows Program
3.2 Installing the Windows program: From the CD, run the "setup.exe" file in the “Win_Prog“ directory. WAS.handling Windows – Program... -
Page 9: Program Operation
• All parameters are stored on the slot-CPU. In most cases, the data is immediately transferred there after input. With position data and sequences, the transfer must be started manually. Menu bar Tool bar (When the pointer is moved over the icons, a tooltip is displayed.) Status bar Connection Interface status Drive status WAS.handling Windows Program... -
Page 10: File Menu
The connection number can also be called the station address of the PC/laptop. The INA node number refers to the station address of the drive control. By activating Simulation, the software can be operated without being connected to the control system. Thus you can load and read saved parameter files. WAS.handling Windows – Program... - Page 11 Devices in a network can be searched and managed. 4.1.2 Load and save parameters After a connection has been established, all parameters that can be set with this program can be saved and recalled. When loading parameters, you can select which parameters are actually applied. WAS.handling Windows Program...
-
Page 12: Program Menu
Optionally you can set the values by using the right mouse button – Set position. You can also enter the values manually and confirm by pressing ENTER. Speed: Enter the maximum speed to be used on the way to the position in the central area of the input table. WAS.handling Windows – Program... - Page 13 After the positions have been stored in the PLC, they can be reached using Jog to Pos. Then the axes will move to the position highlighted by the blue cursor. The Jog to Pos button must be pressed until the position has been reached. Upon releasing the button, the axes stop immediately. WAS.handling Windows Program...
- Page 14 It must be terminated explicitly with STOP. The dialog to edit the demo sequence can also be opened using Program -> Sequences. This dialog holds all important functions to operate the HP140. The demo sequence was mainly designed for presentations. WAS.handling Windows – Program...
- Page 15 "var_a" < ... jump 1 line if "var_b" < ... jump 1 line if "var_c" < ... jump 1 line if "var_d" < ... jump 1 line generate alarm start stopwatch stop stopwatch part Counter + 1 WAS.handling Windows Program...
- Page 16 HIGH. The number in the "Option“ column gives the timeout in milliseconds. If the input is not HIGH, after this time has passed, the sequence is aborted and an error message is generated. The maximum waiting period is 32 seconds. (Use it, e.g. for gripper open/close) WAS.handling Windows – Program...
- Page 17 Counter + 1 The command counter is incremented by one. The value will be displayed in the Tools – Parameters dialog. End of drive sequence. Do not forget to save the drive sequence by pressing the "PC PLC" button. WAS.handling Windows Program...
- Page 18 Ackn: Acknowledge error. Save: Save this demo sequence to PC harddrive. Load: Load this demo sequence from PC harddisk. (It must then be transferred to the control system using "PC PLC"). Delete: Deletes all entered commands. WAS.handling Windows – Program...
-
Page 19: Options Menu
“Manual lubrication” button or set an appropriate input signal. - If a central lubrication system is selected, appropriate inputs and outputs must be wired. The exact wiring can be seen from the corresponding documentation. WAS.handling Windows Program... - Page 20 Setting up the digital inputs and outputs is described in the following. For parameterizing and functionality of the fieldbus system, freeASCII and TCP/UDP, please refer to the respective interface documentation. The Ethernet interface of the slot PLC can be configured on the “Ethernet” tab. WAS.handling Windows – Program...
- Page 21 It is sufficient to enter, e.g. “1.1“ + ENTER. You do not have to enter the “I“. In English the inputs are “I” and the outputs “Q”. Caution: In the windows program, the numeration of the bits is starting with “1”. WAS.handling Windows Program...
- Page 22 A rising edge triggers the sequence selected using Bit A through Bit G. Demo sequence: A rising edge triggers start of the demo sequence. Unlike the normal sequences, the demo sequence runs in an infinite loop. Terminate with “Stop”. WAS.handling Windows – Program...
- Page 23 “Parameter set 2 active.” Alarm reset: A rising edge (> 20msec) acknowledges all existing error messages. Alternatively, errors can be acknowledged using the Windows program. Input_1 .. 8: Freely usable inputs that can be accessed within sequences. WAS.handling Windows Program...
- Page 24 Seq. Place: Sequence no. 2 is called up. This was preset by the manufacturer and the HP 140 can be operated after teaching the Pick and Place Positions. Identical to “Start sequence no. 2“. Clear PCM: reserved WAS.handling Windows – Program...
- Page 25 Bit A .. G: After a “Move to Pos” or “Sequence” command has been started, the binary encoded number of the position or the sequence is shown using these outputs (cf. inputs Bit A … G). WAS.handling Windows Program...
- Page 26 Subnet mask: Use these parameters to address the device unambiguously in a network. Standard Gateway: The IP address of the server that can be used to communicate with other networks outside the subnet. Input here is optional. WAS.handling Windows – Program...
- Page 27 Error number 210 signifies an ACOPOS error of the Y axis; error number 310 signifies an error of the Z axis. The values in brackets give a more detailed error description. If you encounter any problems, please pass these values on to the WEISS service. WAS.handling Windows Program...
- Page 28 Using this dialog field, the values can be set in the more familiar decimal system. The right area shows the inputs of the drive. So you can check, whether e.g. (Hardware -) Enable is present. WAS.handling Windows – Program...
- Page 29 • Log The log is a cyclic buffer where the last 1,000 commands are stored. This helps, for example, to detect errors in drive sequences. This log can also be sent as a file to WEISS service. WAS.handling Windows Program...
- Page 30 Limits. The parameters in the field Motion are adjusted as well. Group motion: speed: Maximum speed of the linear motor. accel: Starting ramp decel: Stop ramp. Usually equal to start ramp WAS.handling Windows – Program...
- Page 31 The dead load of the axes is already stored in the software and does not need to be added here. It is sufficient to enter the load for one axis. The value is automatically used for the other axes. WAS.handling Windows Program...
- Page 32 Part 2: Here the control parameters are set. These parameters must only be changed by a WEISS service technician. WAS.handling Windows – Program...
- Page 33 The speed of the reference drive. Only for methods with reference switch. accel: The start ramp tr_s_block, tr_s_rel, sw_edge, trigger_dir: Only relevant for methods with reference switch. start_dir: This determines whether the reference drive is going to the front or back stop. WAS.handling Windows Program...
- Page 34 If the numbers are the same, these axes are referenced simultaneously. motor torque: Gives the power with which the motor presses against the end point (mechanical stop) during the reference drive. The value is given in percentage of the maximum power. WAS.handling Windows – Program...
- Page 35 Part 4: In part 4 important parameters for mechanical and electrical configuration are set. Most parameters are only of interest to a WEISS service technician. For customer-specific applications, the parameters QuickStop_Input and Stop_Input are important. If an HP140 with shortened horizontal stroke is used, check the Length parameter of the Y axis.
- Page 36 Monitors, whether all 3 power phases are available to the drive. If only one phase is connected, deactivate this monitoring. Group find motor phase: method: Method for determining the commutation angle. Parameter must only be changed by WEISS service technician. current: Power used for inphasing. Group motor: motor type: The motor type is pre-set and must not be changed.
- Page 37 Use the Tools – Options dialog to change the language of the user interface. Furthermore, you can switch to another user level allowing further parameterization. The following languages are available: • English • German • French • Spanish • Italian WAS.handling Windows Program...
-
Page 38: Test Menu
All axes: Current position Reference drive for all axes Set current position as machine zero point Activation / deactivation of axes (software enable) Speed override Step mode for each axis WAS.handling Windows – Program... - Page 39 Axis Y..Z: Determination of com- mutation angle. Prerequisite: - Hardware enable: HIGH - Software enable: LOW Preset a new target position WAS.handling Windows Program...
- Page 40 The Test – Scope menu opens a dialog for recording and displaying motion parameters such as speed or power. These functions are used for diagnostic purposes by a WEISS service technician, but they can also be of interest to the operator. Parameterizing should be self-explanatory to an expert, which is why we won’t go into greater detail here.
-
Page 41: Example Project
• Start Windows program WAS.handling and parameterize PC interface using the File – Connection menu. Select the interface used, COM1...8, and confirm with OK. • This needs to be done only once. The settings are saved and the next time you start WAS.handling the connection is immediately established. -
Page 42: Configuration Of Axes
HIGH or LOW active. If an HP140 with shortened horizontal axis is used, check the Length parameter of the Y axis in part 4. The parameters for Load and Stop / Quickstop are automatically entered for the Z axis. WAS.handling Windows – Program... -
Page 43: Parameterizing The Interface To The Customer Plc
Level switch for automatic lubrication Lubr.PumpPressure: Monitoring the lube function Parameter 2: Switch to parameter set 2 for set-up mode. Alarm reset: Acknowledge error message. Input 1: Input sensor “Gripper open” Input 2: Input sensor “Gripper closed” WAS.handling Windows Program... - Page 44 Output to switch the pneumatic valve for the gripper. Cam 1: The output shows whether the axis is in the basic position. Requ. Lubrication: Start the lubrication cycle Paramset_2 active: Parameter set 2 is active (Set-up mode) WAS.handling Windows – Program...
-
Page 45: Drive To Reference Points And Set Machine Zero Point
With this, the position of the gripper is set. To avoid mechanical stress, the axes can be released when the gripper is closed (disable). This way the optimum position is set automatically. Set machine zero point Display enable / disable WAS.handling Windows Program... -
Page 46: Teach Positions And Create Drive Sequences
The basic position drive must be carried out after the reference drive and after a malfunction. A “software cam” will determine, whether both axes are in the basic position. Basic Position Pos4 Pos3 Machine Pos2 Pos1 zero pos Place Workpiece Pick Workpiece (front) (back) WAS.handling Windows – Program... - Page 47 This procedure can be applied to all 4 positions. After entering the values, transfer these to the target system by pressing the PC PLC button. WAS.handling Windows Program...
- Page 48 5.5.2 Set cam for output basic position Open the Tools - Cam dialog. Check Enable and enter a position window around the position that has been defined as the basic position. WAS.handling Windows – Program...
- Page 49 Wait Input2 = ON (msec) Wait for input “Gripper closed“. After 500ms the sequence is aborted and an error message generated. Move to Pos abs axis Z Drive Z axis to position 3. Terminate sequence. WAS.handling Windows Program...
- Page 50 After entering the commands, transfer the sequence to the target system by pressing the PC button. Before starting the Pick or Place Sequence, check via output “Cam 1", whether the axes are in the basic position. The sequences can be tested using the I/O Monitor with Force-Inputs. WAS.handling Windows – Program...
-
Page 51: Quick Start
You’ll find the parameter QuickStop_Input in the Tools – Y axis menu Part 4. It can be set to • HIGH active or LOW active. After the parameter has been changed, the slot CPU must be restarted. WAS.handling Windows Program... - Page 52 WAS.handling Windows – Program...
-
Page 53: Frequently Asked Questions (Faqs)
Error messages are displayed in the status bar, in the manual mode dialog and in the error list in Tools – Error list. They can be acknowledged in the respective dialog boxes. The corresponding button is only displayed if an error is queued. WAS.handling Windows Program... -
Page 54: Troubleshooting
Sequences are selected using the inputs Bit A – Bit G. These signals must be set before starting the sequences. By shifts in the cycle time of the PLC, wrong codes can occur when all signals are set simultaneously. Therefore, insert a short waiting time between setting the code and starting the sequence. WAS.handling Windows – Program... - Page 55 HP140 are not assembled correctly, the pins are pushed back Motor error or encoder error internally. => Switch off system, unscrew cables on motor and check, whether the pins are pushed back (especially those of the encoder plug). - Encoder is actually damaged. WAS.handling Windows Program...
-
Page 56: How To Proceed In Case Of Errors
Respective error message, partially with additional information. For problems of the drives (error no. 210, 310), the error number of the drive software is displayed additionally. If you cannot rectify the fault yourself, please report both error numbers to the WEISS service. WAS.handling Windows – Program... - Page 57 8.2.3 Error messages to the WEISS service If you cannot operate the HP140 with the above help, prepare an email to the WEISS service as follows: • Save all parameters using the File – Save parameters menu. • If your device has worked before and the failure occurs during operation, save the log entry right after the failure occurred using the Tools –...
- Page 58 WAS.handling Windows – Program...
Need help?
Do you have a question about the WAS.handling and is the answer not in the manual?
Questions and answers