Table of Contents
Advertisement
Quick Links
Advertisement
Table of Contents

Related Manuals for Erreka PREMIS 200

Summary of Contents for Erreka PREMIS 200
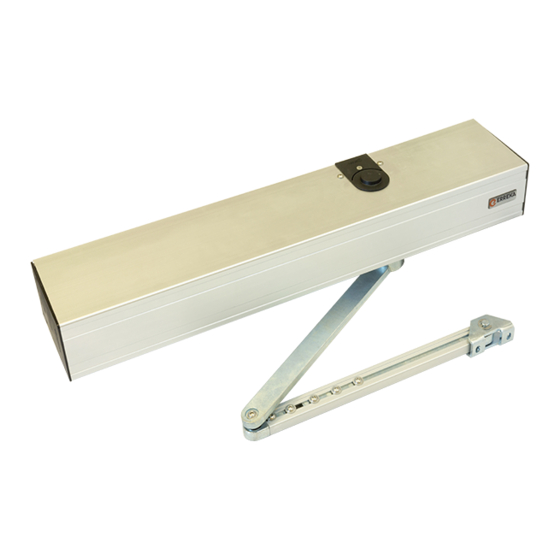
- Page 1 PREMIS 200 AUTOMATIC SWING DOOR INSTALLATION GUIDE www.erreka.com...
-
Page 3: Table Of Contents
Single swing door __________________________________________ 37 Double swing door _________________________________________ 37 Interlock __________________________________________________ 38 User menu ________________________________________________ 39 Tech. support menu ________________________________________ 40 Troubleshooting ____________________________________________ 52 Warnings / errors ___________________________________________ 53 Annexes Maintenance_______________________________________________ 56 Warranty __________________________________________________ 56 Automatic swing door PREMIS 200... -
Page 4: General Safety Instructions
GENERAL SAFETY INSTRUCTIONS CAUTIONS This actuator together with a swing door WARNING: Important safety instructions. It is constitute a machine which can be used by important for the safety of people to follow children, the elderly and people with reduced these instructions. - Page 5 It is forbidden to dispose of this disposed of. It is necessary to find out about device together with household the recycling and disposal systems provided by waste. Carry out selective collection the local regulations in force. according to local regulations. Automatic swing door PREMIS 200...
-
Page 6: Symbols Used In This Guide
For further information, see “Fig. 1 Elements of the The safety of the complete installation depends on complete installation” on page 7". all the elements installed. Install only Erreka components order guarantee proper operation. -
Page 7: Operator Description
Fig. 1 Elements of the complete installation OPERATOR CHARACTERISTICS Erreka swing operators are built to automate swing Speed, position and pushing force are controlled at all pedestrian doors. Their multiple functions make them times, ensuring compliance with the requirements of ideal for automating any type of door: normal, Standard EN 16005. - Page 8 OPERATOR DESCRIPTION General characteristics • Work mode: • Emergency input. – Full Energy (Normal or Fire Door) • Adjustable standby time. – Low Energy • Master / Slave: Swing door synchronisation. • Control of open/close by way of encoder. • Arms: Rigid and Articulated. •...
-
Page 9: Operator Parts
Side switch Limit micro switch Reduction unit Motor 10 Side plastic cover 11 Side reset button Pull slide arm (APR01) Shaft coupling Rigid arm Guide profile Guide block Limit switch Side trim Guide block shaft Spacer Automatic swing door PREMIS 200... - Page 10 OPERATOR DESCRIPTION Special Pull slide arm (APR09) With the rigid arm and the door set back more than 100 mm, the door can be automated using these special arms up to a maximum recess of 250 mm. Shaft coupling Acoplamiento eje Special arms Brazos especiales Track profile...
-
Page 11: Installation
2 Check the contents of the package (see figure Discard the packaging in an environmentally friendly below). manner, using recycling containers. CONTENTS Swing operator Packing box Protectors Installation guide / user guide Screw set Erreka Sticker Automatic swing door PREMIS 200... -
Page 12: Operator Installation
INSTALLATION OPERATOR INSTALLATION Check the installation space 10 mm of space from the top of the operator. The operator's fastening structure must be solid and must not have significant deformation. If the wall where the operator is to be secured is not strong and reliable, a drilled metal plate can be provided on request to Disassemble the operator's bracket profile 1 Remove the screws from the cover and extract it. - Page 13 Y = 100 ÷ 250mm OPENING DIRECTION (APR09) Max. angle 95º CHARACTERISTICS SWING Distance between shafts (hinge / arm) 205 mm EN Class 4 - 6 Opening angle 100º O P E N I N G DIRECTION Automatic swing door PREMIS 200...
- Page 14 INSTALLATION Pull slide arm (APR01) - operator on the lintel - side opposite the hinges OPENING DIRECTION HEIGHT SPACE INSTALLATION MEASUREMENTS DOOR RETRACTION DOOR - OPERATOR DOOR - OPERATOR X=2mm (Standard) X=27mm (Standard+APR03) Y = 0 ÷ 90mm X=52mm (APR01) (Standard+APR04) X=77mm (Standard+APR03+APR04)
- Page 15 OPENING DIRECTION (Standard) X=30mm (Standard+APR03) Y = 0 ÷ 35mm X=55mm (APR01) (Standard+APR04) X=80mm (Standard+APR03+APR04) CHARACTERISTICS SWING Distance between shafts (hinge / arm) 205 mm EN Class 4 - 6 Opening angle 90º OPENING DIRECTION Automatic swing door PREMIS 200...
- Page 16 INSTALLATION Pull slide arm (APR01) - operator on the door - side opposite the hinges OPENING DIRECTION HEIGHT SPACE INSTALLATION MEASUREMENTS DOOR RETRACTION DOOR - OPERATOR DOOR - OPERATOR OPENING DIRECTION X=25mm (Standard) X=50mm (Standard+APR03) Y = 0 ÷ 35mm X=75mm (APR01) (Standard+APR04)
- Page 17 (Standard) X=27mm (Standard+APR03) Y = 0 ÷ 210mm X=52mm (APR02) (Standard+APR04) X=77mm (Standard+APR03+APR04) OPENING DIRECTION CHARACTERISTICS SWING Distance between shafts (hinge / arm) 205 mm EN Class 4 - 6 Opening angle 100º OPENING DIRECTION Automatic swing door PREMIS 200...
- Page 18 INSTALLATION Push articulated arm (APR02) - operator on the door - hinges side OPENING DIRECTION HEIGHT SPACE INSTALLATION MEASUREMENTS DOOR RETRACTION DOOR - OPERATOR DOOR - OPERATOR X=5mm (Standard) OPENING DIRECTION X=30mm (Standard+APR03) Y = 0 ÷ 165mm X=55mm (APR02) (Standard+APR04) X=80mm (Standard+APR03+APR04)
- Page 19 X=25mm (Standard) X=50mm (Standard+APR03) Y = 100 ÷ 250mm X=75mm Max. angle 95º (Standard+APR04) X=100mm OPENING (Standard+APR03+APR04) DIRECTION CHARACTERISTICS SWING Distance between shafts (hinge / arm) 205 mm EN Class 4 - 6 Opening angle Automatic swing door PREMIS 200...
- Page 20 INSTALLATION Intermediate cover (APR05) for double swing doors X: Distance between operators Operator 1 cover Operator 2 cover Intermediate cover (APR05) Intermediate cover subassembly Parts: Intermediate cover Bracket profile Side covers Cover fastening point Cover fastening screw Cutting: • Disassemble the unit. •...
-
Page 21: Operator Assembly On Bracket Profile
4 Fit the side covers. 5 Fit the decorative caps. The location of the guide profile is defined in the previous section. The guide profile must be: well fastened, clean (no chips) and level. Automatic swing door PREMIS 200... - Page 22 INSTALLATION Installing the pull arm 1 Release the arm together with the coupling. 2 Open the door and fasten the arm in the position it will be in with the door closed. 3 Turn the arm in the door's OPENING DIRECTION and lock the geared motor with the locking piece.
-
Page 23: Push Articulated Arm (Apr02) Installation
4 Fasten the arm to the telescopic arm. 5 Open the door and remove the locking piece from the geared motor. When installing the arm, ensure it exerts enough tension to keep the door closed in closed position. Automatic swing door PREMIS 200... -
Page 24: Operator Adjustments - Door Close Mode
INSTALLATION OPERATOR ADJUSTMENTS - DOOR CLOSE MODE Motor brake When the operator works as a door closer (manually), the motor must brakes in closing direction in order to prevent the door from gathering speed due to the force of the spring. The following must be regulated: 1 Braking direction: Position the electronic plate's switch (2) so braking is in closing. -
Page 25: Cables - Cover
Exterior cover Once the cables are in place in accordance with the section above, position the cover. Fasten the cover to the gearbox with two screws. Finally, fit the plastic decorative pieces. Automatic swing door PREMIS 200... -
Page 26: Installation - Electrical
INSTALLATION - ELECTRICAL ELECTRONIC PLATE Power plate FUSE 4A (5X20) MAINS POWER SWITCH (230V / 115V) TRANSFORMER SWITCH PRIMARY ON / OFF TRANSFORMER SECONDARY OUTPUT, ELECTRONIC PLATE Control plate INPUT OUTPUT INPUT. KI / KA SIS / SIO KB / KC RESET ELECTRO - LOCK EMERGENCY... -
Page 27: Vista General De La Placa De Control
INSTALLATION - ELECTRICAL GENERAL VIEW OF THE CONTROL BOARD EXTERIOR INTERIOR SENSOR SENSOR Automatic swing door PREMIS 200... -
Page 28: Operator Side Switch And Side Reset Button
INSTALLATION - ELECTRICAL OPERATOR SIDE SWITCH AND SIDE RESET BUTTON Manual Mode Automatic Mode or Selector Door open Programmable Mode Door closed DIGITAL SELECTOR Door open Door closed Automatic One direction Manual mode Winter (Double swing doors) Reset: Simultaneously pressing: &... -
Page 29: Rotary Selector
It is not possible to configure any door LED: parameters with the rotary selector. - Normal operation: flashing 1 sec. - Failure: fast flashing. Automatic swing door PREMIS 200... -
Page 30: Accessory Connections
INSTALLATION - ELECTRICAL ACCESSORY CONNECTIONS Activators The following types of devices can be installed: radar motion sensors, passive infrared motion sensors, push buttons, switches, radio, IR receivers, access control systems, telephone and intercom systems, etc. Minimum requirements: • Service voltage supplied by the drive unit: 24V DC ±5% •... - Page 31 KC input activation will take the door from its current position to closed. Act on KB or opening impulse to leave this mode. Reset button Connections diagram Enabling the signal directly resets the electronic plate's microprocessor. RESET Automatic swing door PREMIS 200...
- Page 32 INSTALLATION - ELECTRICAL Locking devices Connections diagram Four parameters must be specified when configuring a ELECTRO LOCK - POWER DOOP SWING locking device: 1 Type of device Specific power supply device configuration (intercom) Continuous power supply device configuration 2 Voltage 12 VDC 24 VDC 3 Opening delay...
- Page 33 “Operator side switch and side reset button” on page 11): • Door Open • Door Closed To use the switch as a mode selector, programmable inputs 3 and 4 must be configured with the Disabled option. Automatic swing door PREMIS 200...
- Page 34 INSTALLATION - ELECTRICAL Passive brake The contact must be closed to enable the passive brake. Connections Connect as follows to install the microswitch to disable diagram the passive brake at the end of closing. Close the contact with a cable if the microswitch is NOT used.
- Page 35 In this case, the door is only kept open by the action of door open using the hold-open devices. the device; the motor is released. A programmable output (PO1 or PO2) must be configured to activate the electromagnet to hold the door open. Automatic swing door PREMIS 200...
- Page 36 INSTALLATION - ELECTRICAL Programmable input - Accessible Toilets The swing door for accessible toilet installations can be The following devices should be connected as configured. indicated: Connections diagram EXTERNAL BUTTON INSIDE BUTTON BUTTON BUTTON LOCK EMERGENCY GREEN GREEN LIGHT LIGHT LIGHT LIGHT OPENING...
-
Page 37: Installation - Door Configuration
In the guided set-up you have to specify if the doors that the master finishes its reset. are rebated doors or not. In the Winter mode only the Master door is working. Automatic swing door PREMIS 200... -
Page 38: Interlock
INSTALLATION - DOOR CONFIGURATION INTERLOCK Starting up T h e d o or s m u s t b e c o n n e c te d u s i n g C A N f o r interlocking. ... -
Page 39: User Menu
• Serial nº • Last Service Date • Versions HW Version SW Version 1.3.2.- Operator Info • Number of cycles • Commission Time Years Months Days Hours Minutes • Cycles Last Service • Last Notification code Automatic swing door PREMIS 200... -
Page 40: Tech. Support Menu
INSTALLATION - DOOR CONFIGURATION TECH. SUPPORT MENU ( SETUP SETUP The door performs a RESET and a normal movement: one opening and one closing. The door will switch to AUTOMATIC mode once the configuration is complete. Default Parameters All configured parameters are deleted and a guided CONFIGURATION starts in order to establish the door's default parameters. - Page 41 5, default value: 0) electrolock. Increasing the value increases impulse power in closing direction. Test Normally open signal with electrolock with no power. Normally closed signal with electrolock with no power. Disabled Electrolock with no test. (default value) Automatic swing door PREMIS 200...
- Page 42 INSTALLATION - DOOR CONFIGURATION Advanced functions Door syn- Select door To select the operator (M1 or S1) to be displayed in the chronisa- digital selector. tion Doors Synchronism Enable: To enable or disable synchronism between Master and 1- enabled; Slave. 2- disabled (default value) Synchronism dis-...
- Page 43 : the system has an MERGENCY OPENING FROM OUTSIDE emergency pushbutton so the door can be unlocked (...) from outside in the event of an emergency. Automatic swing door PREMIS 200...
- Page 44 INSTALLATION - DOOR CONFIGURATION Advanced functions Automat- Closing Closing with Motor The closing movement is carried out by the motor. ic Mode Closing with spring The closing movement is carried out by the spring. (cont.) (default value) Parameters can be configured to optimise closing (see "Curve parameters").
- Page 45 Lock Mode switches to closed and the electrolock, if fitted, is enabled. Resetting is required to leave this function. Lock toilet Specific input for "accessible toilets". (...) (...) (...) Unlock toilet Specific input for "accessible toilets". Automatic swing door PREMIS 200...
- Page 46 INSTALLATION - DOOR CONFIGURATION Advanced functions I n p u t s / Inputs Mode Disabled Mode (de- Input not configured (by default). Outputs (1,2,3,4) (cont.) fault value) (cont.) (cont.) Activa- Normally Open Input Signal. tion (default value) Normally Closed Input Signal. Outputs Mode Ding-Dong Mode...
- Page 47 Safety sensor in closing disabled. to MANUAL (default value) MODE in the Spring closing Disabled Safety sensor in closing disabled. event of test failure. Enabled Safety sensor in spring closing enabled in modes: (default value) Automatic and Egress Only. Automatic swing door PREMIS 200...
- Page 48 INSTALLATION - DOOR CONFIGURATION Sensors Opening safety Configuration The door stops if the safety device is enabled during opening. If disabled, the sensors (SIO) door opens completely at slow speed or until a new safety activation. The door continues to close if the opening safety device is enabled during ...
- Page 49 SAT information Technical support information. Installation ID Identification for the facility. Installation date Date of installation. Latest warnings List of latest warnings. Latest maintenance List of maintenance carried out. Sensor status Sensor status in real time. Automatic swing door PREMIS 200...
- Page 50 INSTALLATION - DOOR CONFIGURATION Maintenance Next maintenance Definition of the time interval to display the maintenance required warning. Self-check Records the date maintenance was carried out on. Disables the maintenance required warning. Password Change password Changes the password for the Technical Menu. Reset password Resets the password to 00000.
- Page 51 INSTALLATION - DOOR CONFIGURATION Power diagram Opening direction diagram RIGHT LEFT LEFT RIGHT Door closed Spring assistance Spring assistance position Start spring closing Final impulse Automatic swing door PREMIS 200...
-
Page 52: Troubleshooting
INSTALLATION - DOOR CONFIGURATION TROUBLESHOOTING Malfunctions Possible cause Possible solution Check that the arm is mounted correctly. When installing the arm, Arm assembled ensure it exerts enough tension to keep the door closed in closed incorrectly position. Door with SPRING Configure "Spring closing assistance parameters"... -
Page 53: Warnings / Errors
The output voltage of Make a reset to recover the proper functionality. If the failure the motor is out of range warning persists contact with the technical support, a replacement of the electronic board could be necessary. Automatic swing door PREMIS 200... - Page 54 INSTALLATION - DOOR CONFIGURATION Warning Description Possible cause Possible solution Type Warning Main voltage Input current wrong or Check if the power input is suitable. If it is correct check the failure power fuse failed power fuse. If both works properly, contact with the technical support, a replacement of the electronic board or power supply could be necessary.
- Page 55 The electrolock is Adjust the electrolock mechanically. release failure blocked Configure the help parameters for electrolocks: "Delay time" and "Reverse force". (*) These errors are only available when two boards are communicated by CAN protocol. Automatic swing door PREMIS 200...
-
Page 56: Annexes
• Check that the speed, times and safety functions are check ERREKA's catalogue. selected correctly. WARRANTY ERREKA PUERTAS AUTOMATICAS declares, under its This warranty does not include: sole responsibility, that the products supplied have a • Damage caused by incorrect installation or use of warranty lasting 12 months from the date of purchase the equipment. - Page 57 ERREKA AUTOMATIC DOORS (MATZ-ERREKA, S.COOP.) FACTORY AND MAIN OFFICES NATIONAL OFFICES INTERNATIONAL OFFICES Polig. Ind. San Juan - B. San Juan, 93 ERREKA NORTE ERREKA MEXICO 20570 Bergara (Gipuzkoa) Polig. Ind. San Juan - B. San Juan, 93 Av. 5 de Febrero 1325, int. 3-E, España - Spain...
- Page 58 Erreka Bº Ibarreta s/n 20577 Antzuola (Gipuzkoa) T. 943 786 150 F. 943 787 072 info@erreka.com MSY-002/03 www.erreka.com...
Need help?
Do you have a question about the PREMIS 200 and is the answer not in the manual?
Questions and answers