Table of Contents
Advertisement
Quick Links
Advertisement
Table of Contents

Related Manuals for CESVA SC160


Summary of Contents for CESVA SC160
- Page 1 SC160 Sound Level Meter Spectrum Analyser User’s Manual M_SC160_v1053_20170705_EN...
- Page 2 This version of the manual is valid for instruments with serial number from T224738...
-
Page 3: Table Of Contents
2.4.4 Stopping and pausing the measurement ...............23 2.4.5 Consulting the data measured................23 2.5 Overload and over range indicator ................23 2.6 The SC160 menu: Register management and settings ..........24 2.6.1 Accessing the menu ....................24 2.6.2 The SC160 menu ....................24 2.6.3 Register management ...................25... - Page 4 2.6.4 Printing ........................25 2.6.5 Settings .........................25 2.7 Turning the SC160 off ....................27 2.8 Precautions .........................27 2.9 Advice for carrying out measurements ................28 3. DATA REGISTRATION ....................29 3.1 Saving results ......................29 3.2 Making a recording ......................30 3.3 Kinds of recording .......................30 3.3.1 Recording in sound level meter mode ..............30...
- Page 5 7.3.4 Beginning a measurement ..................52 7.3.5 Stopping the measurement ...................54 7.3.6 Overload and Over range indicator ...............54 7.3.7 --- Indicator......................55 7.3.8 Turning the SC160 off ...................55 7.3.9 Menu of SC160 .....................55 7.4 Data register........................55 7.4.1 Saving results .......................55 7.4.2 View register ......................56 7.5 Technical Specifications ....................56...
- Page 6 8.1 Dosimeter module activation ..................59 8.2 Using the keyboard for the dosimeter mode ..............60 8.3 Using the SC160 ......................60 8.3.1 Switching on the SC160 ..................60 8.3.2 Accessing the Dosimeter mode ................61 8.3.3 Turning off the SC160 ...................61 8.3.4 SC160 Menu ......................61 8.4 Measuring in dosimeter mode ..................61...
-
Page 7: General Features
60651:94/A1:94/A2:01 and EN 60804:00. It also complies with ANSI S1.4:83/A1:01 and ANSI S1.43:97(A2:02). The SC160 is also a spectrum analyser measuring in real time and in octave bands*. It covers a frequency range from 22 Hz and 22,5 kHz with class 2 octave filters, which comply with IEC 61260:1995/A1:01 and ANSI S1.11:04 type 2. -
Page 8: Main Features Of The Sc160
The most important features of the SC160 are the following: The SC160 has a single user range; there is therefore no need to adjust the scale prior to beginning a measurement, whatever the sound event to be measured. ... -
Page 9: Description Of The Sc160
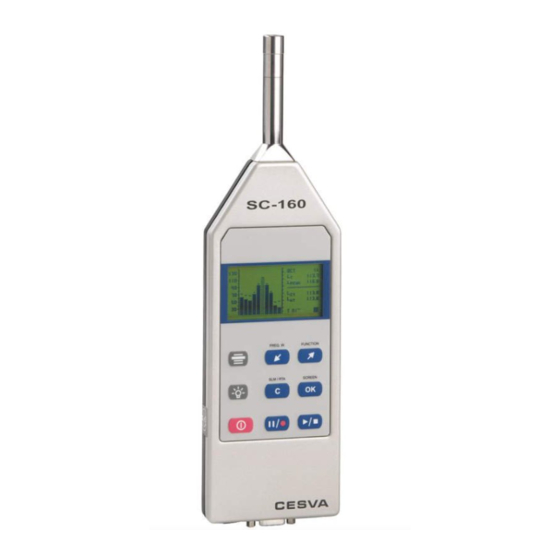
SC160 User’s Manual 1.3 Description of the SC160 The main components of the SC160 are listed below, the numbers corresponding to those in the outline drawing: 1. ½’’ condenser microphone. The SC160 works with the P-05 microphone. This kind of microphone is removable. To move it away from the SC160 body, use the CNR- ITV cable. -
Page 11: Screen
SC160 User’s Manual 1.4 Screen The SC160 mode in use is always indicated in the top right-hand corner of the screen: Sound Level meter mode Octave band Spectrum Analyser While the SC160 is measuring, the following information appears at the bottom right of the screen: ... - Page 12 Key to begin or terminate a measurement a) Key to temporarily interrupt a measurement (PAUSE) (while the SC160 is in b) To start recording data into memory (when SC160 is stopped i.e. Key to select the frequency weighting displayed on the...
-
Page 13: Using The Sc160
2.1.2 SC160 power supply Before turning the SC160 on, the first thing to do is connect it to a battery or other power supply. Note: The components referred to in the text are indicated the outline on page 7 and listed in parenthesis, e.g. -
Page 14: Connecting And Disconnecting The Microphone, Using The Extension Cable
The SC160 microphone is completely detachable. This allows it to be moved it away from the sound level meter and user. In this way the SC160 can be operated far from the place of measurement, thereby avoiding possible interference. To do this, use the CNR- ITV extension cable. -
Page 15: Beginning A Measurement
A few seconds later, the initial screen predetermined in the menu configuration option will appear. If the SC160 does not switch on, check that a fully charged battery is fitted or that it is connected to a suitable power supply. -
Page 16: Checking The Sc160
2.2.3 Checking the SC160 It is advisable to check the SC160 before beginning a measurement, adjust its sensitivity (if necessary), and check it again once the measurement has terminated. To check the SC160 use the model CB004 or CB006 sound calibrator as follows:... -
Page 17: Measuring In Sound Level Meter Mode
SC160 User’s Manual If the results of checking the SC160 show a deviation of more than 0.3 dB, adjust the sensitivity as follows: 1) Press the key to terminate the measurement process. 2) Do not switch the calibrator off; keep it in the calibration position. - Page 18 This integration is carried out in consecutive T-second intervals. To set these parameters, access the SETTINGS MEASURING SOUND LEVEL METER option on the SC160 menu (2.6.2). When the above screen appears, select the function to be set, F1, F2, F3 or T, by using the...
-
Page 19: Beginning A Measurement
First of all, check that there is no measurement in progress ( ). If there is, ( ), press to stop it. Next, switch the SC160 to sound level meter mode and select the screen to be displayed (numeric, graphic or statistical sound level meter), either from the SC160 menu or by pressing the keys: Once the screen has been selected, press to start the measurement process. - Page 20 The main function (large digits) The secondary functions: except on the preferred screen, these are the maximum and minimum values of the main function (see table). Main Secondary Secondary function function 1 function 2 XFmax XFmin XSmax XSmin XImax XImin XTmax...
-
Page 21: Stopping And Pausing A Measurement
2.3.5 Consulting the data measured While the SC160 is stopped ( ) all the functions measured may be consulted. This is done the same way as described in section 2.3.3. on displaying data while a measurement is in progress. -
Page 22: Measuring In Spectrum Analyser Mode
(A, C and Z). The SC160 can also evaluate this spectrum by the NC (Noise Criterion) curves and NR (Noise Rating) curves. These are standardised curves for assessing room noise. -
Page 23: Function Display
SC160 User’s Manual Next, switch the SC160 to spectrum analyser mode and select the screen to be displayed (numerical, graphic or room noise analyser), either through the SC160 menu or using the keys: Once the desired screen has been selected, press to start the measurement process. - Page 24 A graph of the equivalent continuous sound pressure levels with T integration time ( bars) in real time for octave bands centred on the frequencies 31.5, 63, 125, 250, 500, 1,000, 2,000, 4,000, 8,000 and 16,000 Hz (without frequency weighting). ...
-
Page 25: Stopping And Pausing The Measurement
2.4.5 Consulting the data measured All the functions measured may be consulted while the SC160 is not measuring ( ). This is done in the same way as described in section 2.4.3 on displaying data while a measurement is in progress. -
Page 26: The Sc160 Menu: Register Management And Settings
To access the SC160 menu press The following screen will appear: This screen shows the main settings menu together with the date and time on the SC160 clock. Information is also available on the state of the memory, indicating the amount of memory occupied. -
Page 27: Register Management
2.6.5 Settings SETTINGS: This option allows several features of the SC160 to be set, such as definition of the initial screen, adjustment of the clock/calendar, of the language or of the sensitivity of the SC160. SETTINGS MEASURING SOUND LEVEL METER... - Page 28 This option allows the gain of this output to be adjusted: 0 dB or 40 dB. SETTINGS LANGUAGE This allows the language in which all the messages and menus of the SC160 will be displayed to be selected. ...
-
Page 29: Turning The Sc160 Off
SC160 User’s Manual 2.7 Turning the SC160 off To turn the SC160 off, make sure that no measurement is in progress ( ), then press: 2.8 Precautions Attach or detach the microphone manually only, never use tools. Never do this when the SC160 is operating. -
Page 30: Advice For Carrying Out Measurements
replaced immediately. Remove it from the slot in the battery compartment (see photo) and replace it with a new one or contact an official dealer. This equipment can only work with the accessories described in the accessories section. In the case of different accessories being used, resulting in a failure in the equipment, will accept no responsibility for this failure. -
Page 31: Data Registration
The values of the measured functions measured may be stored in the SC160 internal memory. When the unit is switched off, the data is saved and may be retrieved and displayed directly from the SC160 or transferred to a PC. The memory may be erased directly from the SC160. -
Page 32: Making A Recording
T= 1 hour 4 years 8 months F1, F2 and F3 are the acoustic functions selected by the user on the preferred screen. They may be any of the 54 different functions the SC160 measures in sound level meter mode. -
Page 33: Recording In Spectrum Analyser Mode
3.4 Viewing registers This option allows the final results of the registers stored in the SC160 memory to be displayed on the screen. To use the option, access VIEW REGISTER on the SC160 menu. -
Page 34: Data Transfer
The communications software supplied with the SC160 ( Capture Studio) allows the following operations to be carried out: Transmission to a PC, in real time, of data measured by the SC160. Downloading of the registers stored by the SC160. ... -
Page 35: The Ac Output: Recording Calibrated Measurements
The SC160 AC output also enables the user to listen to the signal being measured and to ascertain whether it is being influenced by noises other than those being measured. - Page 36 The spectrum analyser mode prints out, every T, the spectral and global values with frequency weightings A, C and Z: The serial printer must have 80 columns. The format for printing is the same as the one used for the data transference in section 4.1...
-
Page 37: Technical Specifications
SC160 User’s Manual 5. TECHNICAL SPECIFICATIONS 5.1 Measurement range and L functions Lower limit of the indicator: 0 dB Upper limit of the indicator: 137.0 dB Operating limits are modified by the sensitivity of the microphone. Starting point for linearity tests... -
Page 38: Detector - Functions L , L And L
Function peak Lower limit of the indicator: 0 dB Upper limit of the indicator: 140 dB Operating limits are modified by the sensitivity of the microphone. Linear measurement range with P-05 Upper limit 140 dB Lower limit 55.0 dB Note: For electrical noise tests, use the ADM0P05 adapter with the TP001 termination. 5.2 Detector - Functions L and L For electrical calibration, use the ADM0P05 adapter. -
Page 39: Display Update Rates
SC160 User’s Manual 5.4 Display update rates Display update rate When a measurement starts the value of the functions that depend on the integration time T will appear when the integration time T is finished. This value will be updated every second but the changes on the display will not show until the integration time T is finished. -
Page 40: Ac Output
5.7 AC output Frequency weighting: Linear Typical voltage at 137 dB and 1 kHz Gain: 0 dB: 38 Vrms Gain: 40 dB: 3.8 Vrms (max) Upper limit: 7 Vpeak 100 Output impedance: 0 or 40 dB 0.2 dB Gain Central pin ... -
Page 41: Measurement Range (Octave Band Spectrum Analyser)
SC160 User’s Manual 5.9 Measurement range (octave band spectrum analyser) Function for P-05: Measurement range (with linearity error lower than 0.4 dB): Octave bands with nominal central frequency Lower than 63 Hz: Upper limit: 137 dB Lower limit: 30 dB... -
Page 42: Directivity
0,07 2500 -0,01 0,10 3150 0,21 0,08 4000 0,30 0,04 5000 0,26 0,00 6300 0,28 0,00 8000 0,30 5.11 Directivity Sensitivity variation at 30°, 90° anf 150º Frequency (kHz) 30° (dB) 90° (dB) 150° (dB) 0.25 – 1 >1 – 2 >2 –... - Page 43 SC160 User’s Manual Effect of the outdoor kit TK-1000 1000 1995 3981 7943 15849 Effect of the TK-1000 windscreen 1000 1995 3981 7943 15849 Effect of the TK-1000 rain cover 1000 1995 3981 7943 15849 Effect of the TK-1000 Effect of the extension cables The extension cables do not influence into the measuring frequency band.
-
Page 44: Reference Conditions
5.13 Reference conditions Type of sound field: Free Reference direction Perpendicular to the microphone diaphragm 94 dB (referred to 20 Pa) Reference sound pressure level: Reference frequency: 1 kHz 61672 Reference temperature: 23 °C Reference relative humidity: 50 % Reference atmospheric pressure: 101’325 kPa 60651 / 60804 Reference temperature:... -
Page 45: Electromagnetic Compatibility
Classification group Influence of the Magnetic Fields In a magnetic field of 80 A/m (1 oersted) at 50 Hz or 60 Hz, the reading will be under 25 dB(A) Sound pressure level at which the SC160 74 dBA meets requirements radiated electromagnetic field. -
Page 46: Battery & External Supply
5.19 Battery & External supply Battery One 6LF22-type 9-volt battery Battery life with continuous use: Sound Level Meter 13 hours Spectrum Analyser 9 hours (The typical battery life with the display lighted can be reduced by 50% in respect of the above values) External Supply Voltage input range 9 -12 V DC... -
Page 47: Standards
Should your SC160 cease to comply with any of these specifications, contact your nearest official service technicians, who will gladly check, adjust and/or repair it for you. The SC160 should be calibrated and tested by a competent entity, at least, once a year. 5.24 Accessories Standard accessories Case (FNS-020) - Page 48 Optional accessories CB004 Class 2 acoustic calibrator Tripod (TR-40) and (TR050) Transport briefcase 48x37x16 cm (ML040) Transport briefcase 39x32x12 cm (ML-10) Special outdoors briefcase 51x38x15 cm (ML060) Mains feeder (A-200) DC converter/regulator (A-100) for external battery (car battery) Microphone extension cable 30 m (CNR-ITV) Tripod support (TR002) Serial-USB converter (CN-USB) AC output audio cable (CN-DAT)
-
Page 49: Function Summary Table
SC160 User’s Manual 6. APPENDIX A 6.1 Function summary table 6.1.1 Sound level meter mode functions Function Frequency Nomenclature Maximum Minimum weighting value value Sound pressure level with fast time AFmax AFmin weighting (Fast) CFmax CFmin ZFmax Zfmin Sound pressure level with slow... -
Page 50: Definition Of Functions
6.2 Definition of functions 6.2.1 Sound pressure level with fast and slow time weightings (Fast) RMS value with 125 ms fast exponential averaging, in decibels. (Slow) RMS with 1 s slow exponential averaging, in decibels. EXPONENTIAL AVERAGING p(t) ... = 125ms = 20Pa ... -
Page 51: Sound Pressure Peak Level
The L equivalent level is the equivalent level corresponding to integration time T (a programmable parameter). Every T interval the SC160 shows the equivalent level of the last T interval. 6.2.5 Sound exposure level (SEL) (SEL) Sound exposure level. -
Page 52: Percentile Levels
p(t): instantaneous sound pressure reference sound pressure (20 Pa) duration of the measurement 1 second Its relationship to the sound exposure level is as follows: 6.2.6 Percentile levels and L These are the levels that were exceeded during 99%, 95%, 90%, 50%, 10%, 5% and 1% of the analysis time, in decibels. -
Page 53: Appendix B: Reverberation Time Module
The RT measurement module is not included with the SC160. It is an optional module and it can be acquired when buying the SC160 or later. To incorporate it simply contact an official distributor and supply him with the serial number of the sound level meter. -
Page 54: Using The Sc160
A few seconds later, the initial screen predetermined in the menu setting option will appear. If the SC160 does not switch on, check that a fully charged battery is fitted or that it is connected to a suitable power supply. - Page 55 These values will stop oscillating and become fixed. The initial maximum levels to calculate the RT will be obtained from these values. From this instant, the SC160 will wait until the noise emission is interrupted. Stop the noise emission.
-
Page 56: Stopping The Measurement
The SC160 also measures the decay curves of the sound pressure level, but this can only be displayed by recording the final result of the measurement and downloading these data on to the computer using the CAPTURE Studio software application. -
Page 57: Indicator
The reverberation time cannot be calculated. 7.3.8 Turning the SC160 off To turn the SC160 off, first make sure that no measurement is in progress ( ), then press 7.3.9 Menu of SC160 While no measurement is in progress ( ) the SC160 menu can be accessed by pressing: All the options of the menu are available. -
Page 58: View Register
The SC160 may store a total of 100 final results in reverberation time mode. 7.4.2 View register This option enables the final results of the registers stored in the SC160 memory to be displayed on the screen. To use this option, access VIEW REGISTER on the SC160 menu. -
Page 59: Estimation Of The Slope Of The Decay Curve
SC160 User’s Manual 0.48 s to 11.4 s 0.24 s to 11.4 s 0.12 s to 11.4 s 0.12 s to 11.4 s 0.12 s to 11.4 s 0.12 s to 11.4 s 0.12 s to 11.4 s 7.5.2 Estimation of the slope of the decay curve The estimation of the slope of the decay curve is automatically achieved from the lineal regression by least square approximation of itself. -
Page 60: Definition Of Functions
7.7 Definition of functions 7.7.1 Decay curve Decay Curve Decay of the sound pressure level against time inside the room after the source is stopped. This decay can be measured after a real cut of the continuous emission of a sound source in the room that is being studied. -
Page 61: Appendix C: Dosimeter Module For The Assessment Of Noise In The Workplace
The dosimeter module for the assessment of noise in the workplace is not included with the SC160. It is an optional module and it can be acquired when buying the SC160 or later. To incorporate it, simply contact an official distributor and supply them with the serial number of the sound level meter and carry out the transaction. -
Page 62: Using The Keyboard For The Dosimeter Mode
A few seconds later, the initial screen predetermined in the settings menu option will appear. If the SC160 does not switch on, check that fully charged batteries are fitted or that it is connected to a suitable power supply. -
Page 63: Accessing The Dosimeter Mode
To turn off the SC160, check that no measurement is running ( ) and press: 8.3.4 SC160 Menu While there is no measurement running ( ) the SC160 menu can be accessed by pressing: All the menu options are available. -
Page 64: Beginning A Measurement
( ), press to stop it. Next, set the SC160 to dosimeter mode and choose the screen to be displayed (numeric, 1/1 Spectrum analyser or graphic), with the following keys: Once the screen has been selected, press to start the measurement process. -
Page 65: Function Display
SC160 User’s Manual 8.4.3 Function display The SC160 measures all functions simultaneously. Described below are the different ways of displaying the acoustic functions for the assessment of noise in the workplace while measurement is taking place. If the kind of display (screen) or the octave band selected (spectrum analyser screen) is changed, measurement will continue uninterrupted. -
Page 66: Interrupting The Measurement
T and frequency weighting A. Measurement time (t) and the elapsed integration time 8.4.4 Interrupting the measurement By pressing the measurement is temporarily interrupted. The state of measurement indicator will change from While the SC160 is paused ( ) the measured functions... -
Page 67: Consulting Measured Data
The SC160 can record in its internal memory the values of the functions measured. When switching on the equipment, the recorded data will not be lost and can be retrieved and displayed directly from the SC160 or transmitted to a PC. The memory can be erased directly from the SC160. -
Page 68: Making A Recording
The SC160 has capacity for up to 1000 final results. 8.5.2 Making a recording A recording consists of making a measurement and storing a series of functions in the memory with a defined periodicity. These functions and the periodicity are specified in the recording setting. -
Page 69: Viewing The Register
The storage times for each type of recording correspond to one single recording, until the memory is completely full. The SC160 has capacity for up to 1000 registers (final results or recordings) of any kind. When the built-in memory is full, no more recordings can be made and no more final results saved. -
Page 70: Technical Specifications
8.7 Technical specifications. The technical features of the measurement parameters are in accordance with chapter 5 of this manual. 8.7.1 Standards Standards IEC 61672 class 2, IEC 60804:00 type 2, IEC 60651:01 class 2 DIRECTIVE 2003/10/EC OF THE EUROPEAN PARLIAMENT AND OF THE COUNCIL, 6 February 2003 on the minimum health and safety requirements regarding the exposure of workers to the risks arising from physical agents (noise) 8.8 Functions definitions... - Page 72 Maracaibo, 6 – 08030 BARCELONA (ESPAÑA) Tel. (+34) 934 335 240 – FAX (+34) 933 479 310 e-mail: info@cesva.com www.cesva.com...
Need help?
Do you have a question about the SC160 and is the answer not in the manual?
Questions and answers