
Related Manuals for Stratasys ProBleacher


Summary of Contents for Stratasys ProBleacher
- Page 1 Stratasys ProBleacher Product Guide ProBleacher Photobleaching Chamber DOC-01010 Rev. C...
- Page 2 All names of product names and trademarks are the property of their respective owners. Liability Stratasys shall not be liable for errors contained herein or for incidental or consequential damages in connection with the furnishing, performance, or use of this material. Stratasys makes no warranty of any kind with regard to this material, including, but not limited to, the implied warranties of merchantability and fitness for a particular purpose.
-
Page 3: Table Of Contents
Specifications ................5 Unpacking ..................5 Setup..................... 6 Operation ..................6 Operation Modes ....................6 Run Screen ......................8 Care and Maintenance..............8 Spare Parts ................... 9 Storage and Transportation............9 Page 3 © Copyright 2021 Stratasys. All rights reserved. -
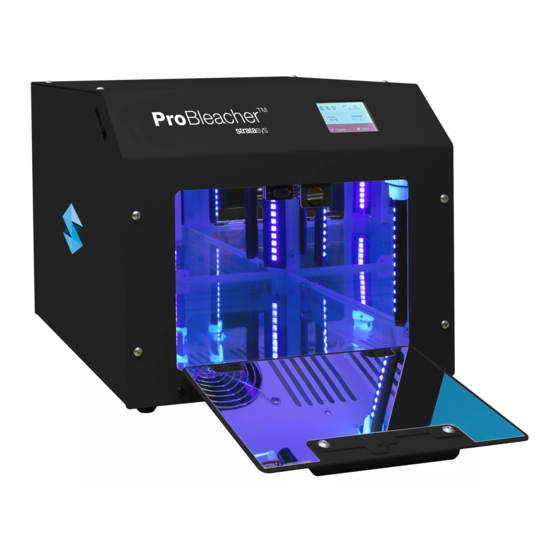
Page 4: Overview
Stratasys ProBleacher Product Guide Overview Overview ProBleacher is a photobleaching chamber. It uses LED light to provide an ideal environment suitable for photobleaching 3D PolyJet printed models. Warranty ProBleacher has a limited one-year warranty (or greater when required by local law) that covers everything except the LED lamps, which are considered consumable items. -
Page 5: Specifications
5. Open the inner box top flaps. There is an orange Important insert inside the inner box. Important: This insert contains important safety information and you must read it thoroughly prior to using this product. Page 5 © Copyright 2021 Stratasys. All rights reserved. -
Page 6: Setup
Custom mode - used for parts printed with PolyJet printers. To photobleach the parts: 1. Immediately after printing and cleaning, place the part(s) in ProBleacher. 2. Arrange the printed parts in the cabinet with enough distance between them to allow light to reach all sides of each part. - Page 7 For parts with a glossy finish, continue photobleaching up to 24 hours to achieve the desired results. If more time is needed, set the time and temperature again. When photobleaching is complete, the LEDs and heat turn off automatically. Page 7 © Copyright 2021 Stratasys. All rights reserved.
-
Page 8: Run Screen
When all surfaces are dry it is safe to reconnect the product to the electrical outlet. Do not use harsh solvents like acetone, MEK, Toluene, etc. They will damage the product. When in doubt, contact your regional service provider. Page 8 © Copyright 2021 Stratasys. All rights reserved. -
Page 9: Spare Parts
9. Close the top of the boxes using reinforced paper tape (preferred) or clear adhesive shipping tape (if you do not have access to reinforced paper tape). Tape all box seams. 10. Store and transport the product in the upright position. Page 9 © Copyright 2021 Stratasys. All rights reserved. - Page 10 _____ c-support@stratasys.com Copyright © 2021 Stratasys Ltd. All rights reserved. DOC-01010 Rev. C THE 3D PRINTING SOLUTIONS COMPANY...
Need help?
Do you have a question about the ProBleacher and is the answer not in the manual?
Questions and answers