Table of Contents
Advertisement
Quick Links
Advertisement
Table of Contents

Related Manuals for Aqua Lung GORSKI G2000SS


Summary of Contents for Aqua Lung GORSKI G2000SS
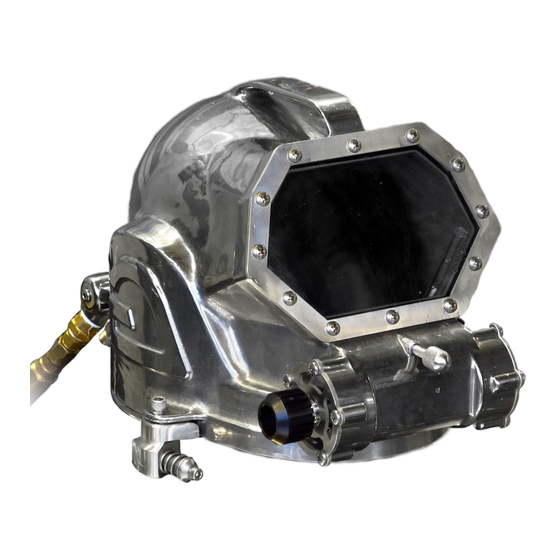
- Page 1 GORSKI G2000SS HELMET TECHNICAL MAINTENANCE MANUAL Rev. 8/12...
- Page 2 Aqua Lung America, Inc. It may not be distributed through the internet or computer bulletin board systems without prior consent in writing from Aqua Lung America.
-
Page 3: Table Of Contents
TABLE OF CONTENTS I. SAFETY INFORMATION ..............................5 II. WARRANTY INFORMATION .............................5 III. HELMET SET-UP AND OPERATION ..........................6 IV. HELMET MAINTENANCE AND PARTS LIST ........................7 V. STEP-BY-STEP ASSEMBLY INSTRUCTIONS .........................9 A. SECOND STAGE REGULATOR ..........................10 B. FREE FLOW / EXHAUST VALVE ..........................13 C. - Page 4 Gorski G2000SS Diving Helmet Technical Manual VII. CHECKLISTS ................................57 CHECKLIST 1: G2000SS DIVING HELMET DAILY CHECKLIST ................58 CHECKLIST 2: G2000SS DIVING HELMET PRE-DIVE CHECKLIST .................62 CHECKLIST 3: G2000SS DIVING HELMET IN-WATER CHECKLIST FOR SUPERVISOR ........65 CHECKLIST 4: G2000SS DIVING HELMET POST-DIVE CHECKLIST ...............67 CHECKLIST 5: G2000SS DIVING HELMET MONTHLY INSPECTION AND MAINTENANCE CHECKLIST .....70...
-
Page 5: Safety Information
The warranty becomes null and void if: The product has been modified without consent of Aqua Lung America, Inc. • The product has been misused, damaged, put into a situation or service for which the •... -
Page 6: Helmet Set-Up And Operation
Gorski G2000SS Diving Helmet Technical Manual III. HELMET SET-UP AND OPERATION SET-UP PROCEDURES Testing the Check Valves : The helmet is equipped with two check valves, one for main air and the other for emergency air. Each check valve should be checked prior to connecting a hose. To check each check valve, the free flow valve must be open and air must be pulled from the check valve to verify that it is closed. -
Page 7: Helmet Maintenance And Parts List
Aqua Lung Service and Repair Seminar. If you do not completely understand all of the procedures outlined in this manual, contact Aqua Lung to speak directly with a Technical Advisor before proceeding any further. - Page 8 Use only genuine Aqua Lung parts provided in the service kits. DO NOT attempt to substitute any part with another manufacturer's, regardless of any similarity in shape or size. Substitution with other manufacturer's parts constitutes an after-market modification of the product and renders all warranties null and void.
-
Page 9: Step-By-Step Assembly Instructions
V. STEP-BY-STEP ASSEMBLY INSTRUCTIONS NOTES ON DISASSEMBLY AND ASSEMBLY Disassembly procedures are the reverse of assembly. All components must be clean and fully serviceable prior to assembly. All o-rings must be lubricated prior to assembly. HELMET SUB-ASSEMBLIES IN THIS SECTION •... -
Page 10: Second Stage Regulator
Gorski G2000SS Diving Helmet Technical Manual SECOND STAGE REGULATOR Step 1: Place diaphragm (65) into Step 2: Diaphragm (65) in the Step 3: Install the purge button diaphragm housing (66). DO NOT diaphragm housing (66). (63a) onto the diaphragm cover (63). - Page 11 SECOND STAGE REGULATOR (continued) Step 14: Lubricate and install Step 12: Lubricate and install small Step 13: O-ring (67) installed on small o-ring (67) on LP valve o-ring (67) on main body (68). main body (68). assembly (69). Step 15: O-ring (67) installed on Step 16: Second stage regulator Step 17: Set the valve, rotate LP valve assembly (69).
- Page 12 Gorski G2000SS Diving Helmet Technical Manual SECOND STAGE REGULATOR (continued) Step 24: Insert lever into dia- Step 25: Diaphragm housing phragm tube, tighten by hand. installed on main body. NoTe: Maintenance procedures for the low pressure valve - circled in the photo below - are contained in the separate excerpt from Poseidon Cyclone 5000 Regulator Manual.
-
Page 13: Free Flow / Exhaust Valve
FREE FLOW / EXHAUST VALVE Step 1: Breakdown of free flow/ Step 2: Install small o-ring (53) Step 3: O-ring (53) installed on exhaust valve parts. onto valve body (52). valve body (52). Step 4: Install o-ring (54) onto the Step 5: Put exhaust flapper valve Step 6: Flapper valve (55) in- valve body (52) groove. - Page 14 Gorski G2000SS Diving Helmet Technical Manual FREE FLOW / EXHAUST VALVE (continued) Step 10: Thread in the valve seat Step 11: Place two copper wash- Step 12: Place o-ring (60) into (57) with valve stem (59). ers (58) into the valve body (52).
-
Page 15: Manifold
MANIFOLD Step 1: Break down of manifold Step 2: Insert screen (40) into the Step 3: Line up screen (40) with assembly. manifold body (37). Failure to in- the end of threads. stall may cause debris to block the flow of gas to the diver. Step 4: Install o-ring (39) onto man- Step 5: Tighten the manifold plug Step 6: Install o-ring (27) onto... -
Page 16: Defogger
Gorski G2000SS Diving Helmet Technical Manual DEFOGGER Step 1: Two parts of defogger, low- Step 2: Insert lower unit over the Step 3: Push lower unit until it er and upper unit. free flow/exhaust valve body. stops. Step 4: Line up upper unit with the Step 5: Slide upper unit over the lower unit. -
Page 17: Oral-Nasal Mask
ORAL-NASAL MASK CAUTION: The head liner of the oral-nasal mask must be used at all times when diving. The head liner ensures that the oral-nasal mask maintains a good fit on the diver’s face and reduces dead space in the helmet, this helps prevent CO2 build up. - Page 18 Gorski G2000SS Diving Helmet Technical Manual ORAL-NASAL MASK (continued) Step 10: Install oral-nasal mask (32) Step 11: Install nose clearing de- Step 12: Secure NCD knob (71) onto the regulator mouthpiece. vice (73) into the helmet shell (1). on the NCD shaft (73). Ensure that it is snug.
-
Page 19: Nose-Clearing Device (Ncd)
NOSE-CLEARING DEVICE (NCD) Step 1: Breakdown of nose clear- Step 2: Install two o-rings (72) into Step 3: O-rings (72) installed. ing device parts. the grooves using o-ring pick. Step 4: Place neoprene pad (75) over Step 5: Fold over and press the nose cleaning device (73) as shown. -
Page 20: Face Port Assembly
Gorski G2000SS Diving Helmet Technical Manual FACE PORT ASSEMBLY Step 1: Place o-ring (18) in the Step 2: O-ring (18) installed in Step 3: Place face port (19) into port groove. port groove. the helmet shell (1). Step 4: Face port (19) installed. -
Page 21: Communications
COMMUNICATIONS NoTe: The communications system is designed and built by Ocean Technology Systems (OTS) specifically for the G2000SS Diving Helmet. Comm Bulkhead 4-Wire Comm Post 2-Wire Step 1: Communications bulkhead Step 2: Breakdown of communica- Step 3: Securely install all termi- (23) with blank cap for use with tions assembly parts. -
Page 22: Head Liner
Gorski G2000SS Diving Helmet Technical Manual HEAD LINER CAUTION: The head liner and oral-nasal mask must be used at all times when diving. The head liner ensures that the oral-nasal mask maintains a good fit on the diver’s face and reduces dead space in the helmet, this helps to prevent CO2 build-up. -
Page 23: Neck Retainer And Locking System
NECK RETAINER AND LOCKING SYSTEM NoTe: This version (MOD1) of the neck retainer and locking system was introduced in 2011. For the original version refer to previous editions of the helmet Technical Manual. Step 1: Breakdown of locking sys- Step 2: Insert latch (left 8a or Step 3: Latch inserted in latch tem parts. - Page 24 Gorski G2000SS Diving Helmet Technical Manual NECK RETAINER AND LOCKING SYSTEM (continued) NoTe: This version (MOD1) of the neck retainer and locking system was introduced in 2011. For the original version refer to previous editions of the helmet Technical Manual. Step 10: Insert latch screw (4) and Step 11: Tighten latch screw (4)
-
Page 25: Helmet Final Assembly
HELMET FINAL ASSEMBLY Step 1: Installed free flow valve Step 2: Free flow valve in place. Step 3: Inside view of free flow assembly. valve. Step 4: Install second stage on Step 5: Inside view of second Step 6: Push mouthpiece opposite side. - Page 26 Gorski G2000SS Diving Helmet Technical Manual HELMET FINAL ASSEMBLY (continued) Step 10: Airway assembly (24). Step11: Stick open end of air- Step 12: Press airway assembly way assembly into swagelock (24) inside the helmet shell (1). connector (26). Step 13: Press bracket end of the...
- Page 27 HELMET FINAL ASSEMBLY (continued) Step 19: Tighten swagelock nut Step 20: Place regulator cover Step 21: Use a Phillips #3 screw- onto airway assembly (24) hand (17) as shown. driver to put the first exhaust tight, then an additional 1¼ of a valve cover screw (15) in place turn with a 11/16"...
- Page 28 Gorski G2000SS Diving Helmet Technical Manual HELMET FINAL ASSEMBLY (continued) Step 28: Place the free flow knob Step 29: Fit the spring (13) to the Step 30: Put the knob nut (12) (14) over the valve stem (59). free flow knob (14).
- Page 29 HELMET FINAL ASSEMBLY (continued) Step 37: Tighten short hex screw Step 38: Tighten short hex screw Step 39: Manifold installed. (43) onto the bottom of helmet using (43) onto the top of helmet using a a 3/16" hex key to 80 in.lbs (9 Nm). 3/16"...
-
Page 30: Neck Dam Assembly
Gorski G2000SS Diving Helmet Technical Manual NECK DAM ASSEMBLY Step 1: Place front portion of neck Step 2: Use neck retainer (5) to Step 3: Install neck dam. dam into the front of the helmet. push the back side of the neck dam in place. -
Page 31: Appendices
VI. APPENDICES IMPORTANT NOTE NoTe: All Gorski part numbers have been assigned Aqua Lung (AQA) part numbers – a cross-reference list is at the back of this manual. Appendix A Main Assemblies Appendix B Inner Components Appendix C Manifold Body Assembly Appendix D Free Flow Valve Assembly Appendix E Second Stage Regulator Assembly Appendix F Nose Clearing Device (NCD) Assembly Appendix G... -
Page 32: Appendix A: Main Assemblies
Gorski G2000SS Diving Helmet Technical Manual APPENDIX A – MAIN ASSEMBLIES SS Blank Plug 25 ft.lbs INNER COMPONENTS 90 in.lbs (10 Nm) INNER COMPONENTS (34 Nm) 140 in.lbs SEE APPENDIX B SEE APPENDIX B (16 Nm) MANIFOLD BODY ASM SEE APPENDIX C... -
Page 33: Appendix B: Inner Components
APPENDIX B – INNER COMPONENTS 45 in.lbs (5 Nm) REV. D ~ 05/10/06 ITEM AQA P/N GORSKI P/N DESCRIPTION 400138 AIRWAY ASSEMBLY 400021 1SS-0026 SWAGELOCK CONNECTOR 400022 1SS-0027 o-RING, SWAGeLoCK CoNN & PoRT PLUG (10 PK) 400023 1SS-0028 TRAIN, DEFOGGER 400024 1SS-0029 BARREL, FREE FLOW... -
Page 34: Appendix C: Manifold Body Assembly
Gorski G2000SS Diving Helmet Technical Manual APPENDIX C – MANIFOLD BODY ASSEMBLY 80 in.lbs (9 Nm) 80 in.lbs (9 Nm) 90 in.lbs (10 Nm) 45 in.lbs (5 Nm) Rev. C ~ 05/10/06 ITEM AQA P/N GORSKI P/N DESCRIPTION 400029 1SS-0037... -
Page 35: Appendix D: Free Flow Valve Assembly
APPENDIX D – FREE FLOW VALVE ASSEMBLY 35 ft.lbs (47 Nm) ITEM AQA P/N GORSKI P/N DESCRIPTION 400044 1SS-0052 BODY, FREE FLOW EXHAUST VALVE 400045 1SS-0053 o-RING, eXHAUST, SMALL (10 PK) 400046 1SS-0054 o-RING, eXHAUST, LARGe (10 PK) 400047 1SS-0055 VALVE, FLAPPER EXHAUST 400048 1SS-0056... -
Page 36: Appendix E: Second Stage Regulator Assembly
Gorski G2000SS Diving Helmet Technical Manual APPENDIX E – SECOND STAGE REGULATOR ASSEMBLY G2000SS, INC. SHEET 5 OF 7 REV. B ~ 05/10/06 ITEM AQA P/N GORSKI P/N DESCRIPTION 400055 1SS-0063 COVER, DIAPHRAGM 400056 1SS-0063 BUTTON, PURGE (5 PK) 400057... -
Page 37: Appendix F: Nose Clearing Device (Ncd) Assembly
APPENDIX F – NOSE CLEARING DEVICE (NCD) :ASSEMBLY ITEM AQA P/N GORSKI P/N DESCRIPTION 400073 1SS-0071 KNOB, NCD 400074 1SS-0072 o-RING, NoSe CLeARING DeVICe (NCD) (10 PK) 400140 NOSE CLEARING DEVICE (WELDED) 400077 1SS-0075 NOSE PAD, NEOPRENE (5 PK) Part numbers in BoLD ITALICS indicate standard overhaul replacement part. -
Page 38: Appendix G: Neck Dam Assembly
Gorski G2000SS Diving Helmet Technical Manual APPENDIX G – NECK DAM ASSEMBLY 20 in.lbs 20 in.lbs (2 Nm) (2 Nm) G2000SS, INC. SHEET 7 OF 7 REV. B ~ 05/11/06 ITEM AQA P/N GORSKI P/N DESCRIPTION 400078 1SS-0076 RING, QUAD... -
Page 39: Appendix H: Welding Shield Kit
APPENDIX H – WELDING SHIELD KIT 45 in.lbs (5 Nm) 45 in.lbs (5 Nm) 80 in.lbs (9 Nm) 45 in.lbs (5 Nm) G2000SS, INC. WELD SHIELD ACCESSORIES REV. A~06/03/04 ITEM AQA P/N GORSKI P/N DESCRIPTION 400087 1SS-0085 BODY, WELDING SHELL (SHIELD) 400088 1SS-0086 LENS, WELDING... -
Page 40: Appendix I: Welding Shield Assembly Installation Instructions
This procedure is to be performed only by personnel who have received appropriate training. If you do not completely understand all of the procedure, contact Aqua Lung / Gorski to speak directly with a Technical Advisor before proceeding any further. -
Page 41: Appendix J: Double Exhaust Kit
APPENDIX J– DOUBLE EXHAUST KIT REV. A~05/11/06 45 in.lbs (5 Nm) ITEM AQA P/N GORSKI P/N DESCRIPTION 400097 1SS-0095 BUSHING, DUAL EXHAUST 400098 1SS-0096 SEAT, DUAL EXHAUST 400099 1SS-0097 RING, SPACER (5 PK) 400015 1SS-0021 SCREW, RETAINER PORT (5 PK) 400047 1SS-0055 VALVE, FLAPPER EXHAUST... -
Page 42: Appendix K: Double Exhaust Kit Installation Instructions
This procedure is to be performed only by personnel who have received appropriate training. If you do not completely understand all of the procedure, contact Aqua Lung / Gorski to speak directly with a Technical Advisor before proceeding any further. - Page 43 DOUBLE EXHAUST KIT INSTALLATION INSTRUCTIONS (continued) Step 7: Dual exhaust bushing Step 8: Place dual exhaust Step 9: Place flapper exhaust (95) installed onto free flow valve seat (96) over the dual exhaust valve (55) onto the dual exhaust stem (59). bushing (95).
-
Page 44: Appendix L: Free Flow Plug Insert Kit Installation Instructions
This procedure is to be performed only by personnel who have received appropriate training. If you do not completely understand all of the procedure, contact Aqua Lung / Gorski to speak directly with a Technical Advisor before proceeding any further. - Page 45 FREE FLOW KIT PLUG INSTALLATION INSTRUCTIONS (continued) Step 7: Remove regulator. Step 8: Remove defogger train Step 9: Remove free flow barrel (28). (29). Step 10: Lubricate and install o-ring Step 11: Install free flow plug in Step 12: Replace regulator cover on outside of free flow plug.
-
Page 46: Appendix M: Camera / Light Bracket Installation Instructions
This procedure is to be performed only by personnel who have received appropriate training. If you do not completely understand all of the procedure, contact Aqua Lung / Gorski to speak directly with a Technical Advisor before proceeding any further. -
Page 47: Appendix N: Terminal Block Communications Kits
APPENDIX N – TERMINAL BLOCK COMMUNICATIONS KITS TERMINAL BLOCK HI-USE COMMUNICATIONS MODULE KIT (P/N 400150) Hand tight & 1¼ turn with wrench ITEM AQA P/N GORSKI P/N DESCRIPTION 400122 CAP & PLASTIC FERRULES, BULKHEAD ASSY 400133 TUBING PLASTIC, PRE-CUT (10PK) 400152 WIRE TERMINAL BLOCK 400126... -
Page 48: Appendix O: Twist-On Communications Kits
Gorski G2000SS Diving Helmet Technical Manual APPENDIX O – TWIST-ON COMMUNICATIONS KITS TWIST-ON HI-USE COMMUNICATIONS MODULE KIT (P/N 400144) Hand tight & 1¼ turn with wrench ITEM AQA P/N GORSKI P/N DESCRIPTION 400122 CAP & PLASTIC FERRULES, BULKHEAD ASSY 400146... -
Page 49: Appendix Pcommunications Kit Installation Instructions
This procedure is to be performed only by personnel who have received appropriate training. If you do not completely understand all of the procedure, contact Aqua Lung / Gorski to speak directly with a Technical Advisor before proceeding any further. - Page 50 Gorski G2000SS Diving Helmet Technical Manual Wiring Terminal Block for 4-Wire Communications 1. Install connector cable lug rings onto the termi- nal block (102) per the terminal block pin configura- tion (Fig. 5) and wiring diagram (Fig. 6). Install the speakers left / right and microphone lug rings onto the terminal block per the wiring diagram.
- Page 51 3. Install connector cable lug rings onto the com- munication posts (22) per the communication posts pin configuration (Fig. 9) and wiring diagram (Fig. 11). Install the speakers left / right lug rings onto the communication posts per wiring diagram. Securely tighten communication post hex nuts to communi- Figure 9 cation posts with a 3/8"...
- Page 52 Gorski G2000SS Diving Helmet Technical Manual Wiring Terminal Block for 2-Wire Communications 1. Install connector cable lug rings onto the terminal block (102) per the terminal block pin configuration (Fig. 14) and wiring diagram (Fig. 15). Install the speakers left / right and microphone lug rings onto the terminal block per the wiring diagram.
-
Page 53: Appendix Qtorque Specifications
APPENDIX Q TORQUE SPECIFICATIONS AQA PN # GORSKI DESCRIPTION / KEY ITEM # TORQUE (IN.LBS) NOTE PN # 400009 1SS-0015 Screw, Exhaust Valve Cover (15) 45 in.lbs (5 Nm) 400113 1SS-0099 Screw, Latch (4) 140 in.lbs (16 Nm) 400015 1SS-0021 Screw, Retainer Port (21) 45 in.lbs (5 Nm) 400021... -
Page 54: Appendix Rrecommended Cleaners And Lubricants
Gorski G2000SS Diving Helmet Technical Manual APPENDIX R RECOMMENDED CLEANERS AND LUBRICANTS LUBRICANT/CLEANER APPLICATION SOURCE Aqua Lung, PN 820466 (2 oz.) 820467 (16 oz.), or Christo-Lube MCG 111 Lubrication Technologies All o-rings 310 Morton Street Jackson, OH 45640 (800) 477-8704... -
Page 55: Appendix S: Cleaning And Lubricating
APPENDIX S CLEANING AND LUBRICATING Cleaning Brass and Stainless Steel Parts 1. If required, pre-clean in warm, soapy water* using a nylon bristle tooth brush. 2. Thoroughly clean parts in an ultrasonic cleaner filled with a solution of household white distilled vinegar (acetic acid) mixed with fresh water (max 50% vinegar). -
Page 56: Appendix T: Annual Service Kit
APPENDIX T ANNUAL SERVICE KIT (P/N 400108) All Gorski part numbers have been replaced with Aqua Lung (AQA) part numbers. The individual parts in the Annual Service Kit are labeled with AQA part numbers. The Key No. (column E) is provided to assist with correct parts identification and refers to the relevant Exploded Parts Diagram (Appendices A thru I). -
Page 57: Checklists
VII. CHECK LISTS Checklist 1 G2000SS Diving Helmet Daily Checklist Checklist 2 G2000SS Diving Helmet Pre-Dive Checklist Checklist 3 G2000SS Diving Helmet In-Water Checklist for Supervisor Checklist 4 G2000SS Diving Helmet Post-Dive Checklist Checklist 5 G2000SS Diving Helmet Monthly Inspection and Maintenance Checklist Checklist 6 G2000SS Diving Helmet Annual Inspection and Maintenance Checklist... -
Page 58: Checklist 1 G2000Ss Diving Helmet Daily Checklist
NoTe: The procedures in this checklist are to be performed only by personnel who have received appropriate training. WARNING: Aqua Lung America strongly recommends completion of this checklist and meeting the minimum requirements provided before using the G2000SS diving helmet. However, these requirements are not conclusive, as further steps may be required depending on the type of activity performed. - Page 59 DAILY CHECKLIST (continued) ACTION PROCEDURE INITIALS NECK RETAINER AND • Visually inspect the neck retainer assembly for signs of damage, such as bends. Confirm that LOCKING SYSTEM the retainer fits properly. (must be completed by diver/tender) • Make sure the locking system (both L and R) properly working and not deformed in any way.
- Page 60 Gorski G2000SS Diving Helmet Technical Manual DAILY CHECKLIST (continued) ACTION PROCEDURE INITIALS EGS INSPECTION • Visually inspect all EGS hoses for any signs of damage or defect. (must be completed by diver/tender) • Ensure that the bailout cylinder is within the VIP NoTe: Ensure that the EGS and the hydrostatic date.
- Page 61 DAILY CHECKLIST (continued) ACTION PROCEDURE INITIALS CHECK THE SECOND • Slowly depress the purge button to check for ex- cessive travel. The purge button should travel no STAGE REGULATOR less than 1/16" and no more than 1/8" (1.5 - 3.0 (must be completed by diver/tender) mm) before the regulator begins to flow gas.
-
Page 62: Checklist 2 G2000Ss Diving Helmet Pre-Dive Checklist
WARNING: Aqua Lung America strongly recommends completion of this checklist and meeting the minimum requirements provided before using the G2000SS diving helmet. However, these requirements are not conclusive, as further steps may be required depending on the type of activity performed. - Page 63 PRE-DIVE CHECKLIST (continued) ACTION PROCEDURE INITIALS SUPPLY GAS • Supervisor must ensure the diver has sufficient breathing gas pressure supplied to the helmet (must be completed by supervisor) for depth. BREATHING SYSTEM • Ensure proper functioning of free flow valve by opening and closing the valve.
- Page 64 Gorski G2000SS Diving Helmet Technical Manual PRE-DIVE CHECKLIST (continued) ACTION PROCEDURE INITIALS EGS FUNCTIONAL • Turn off the main breathing gas supply and breathe down the umbilical (free flow / exhaust CHECK valve may be used to assist). (must be completed by diver and witnessed by tender) •...
-
Page 65: Checklist 3 G2000Ss Diving Helmet In-Water Checklist For Supervisor
WHEN DIVING THE G2000SS DIVING HELMET, THE PROCEDURES IN THIS CHECKLIST MUST BE COMPLETED. WARNING: Aqua Lung America strongly recommends completion of this checklist and meeting the minimum requirements provided before using the G2000SS diving helmet. However, these requirements are not conclusive, as further steps may be required depending on the type of activity performed. - Page 66 Gorski G2000SS Diving Helmet Technical Manual IN-WATER CHECKLIST (continued) PROCEDURE INITIALS The diver must ensure the helmet is breathing and must report that breathing is satisfactory. The diver must ensure the helmet is watertight and if wearing a dry-suit, the diver must ensure no leakage occurs.
-
Page 67: Checklist 4 G2000Ss Diving Helmet Post-Dive Checklist
NoTe: The procedures in this checklist are to be performed only by personnel who have received appropriate training. WARNING: Aqua Lung America strongly recommends completion of this checklist and meeting the minimum requirements provided before using the G2000SS diving helmet. However, these requirements are not conclusive, as further steps may be required depending on the type of activity performed. - Page 68 Gorski G2000SS Diving Helmet Technical Manual POST DIVE CHECKLIST (continued) PROCEDURE INITIALS Secure and bleed down the breathing gas supply and the EGS hose. Disconnect all helmet gas connections and disconnect the communication wires / cable. Replace hose caps onto hose adapters after removing all water from the hose adapter.
- Page 69 POST DIVE CHECKLIST (continued) PROCEDURE INITIALS Remove the microphone from the oral-nasal mask. Wash the oral-nasal mask with soap and water, rinse with fresh water and allow to dry. Dry the inside of the helmet, including oral-nasal mask, by wiping. If required, wash with soap and water, rinse with fresh water and allow to dry.
-
Page 70: Checklist 5 G2000Ss Diving Helmet Monthly Inspection And Maintenance Checklist
NoTe: • The procedures in this checklist are to be performed only by personnel who have received factory authorized training through an Aqua Lung Service and Repair Seminar. • If you do not completely understand all of the procedures outlined in this checklist, contact Aqua Lung to speak with a technical advisor before proceeding any further. - Page 71 MONTHLY INSPECTION AND MAINTENANCE CHECKLIST (continued) All parts are to be visually inspected for damage or deterioration. Any damaged or defective parts must be replaced. Between annual overhauls certain consumable parts (e.g. o-rings) may be reused if no dam- age or deterioration is revealed by the inspection process. STEPS PROCEDURE INITIALS...
- Page 72 Gorski G2000SS Diving Helmet Technical Manual MONTHLY INSPECTION AND MAINTENANCE CHECKLIST (continued) STEPS PROCEDURE INITIALS COMMUNICATIONS • Without removing the comms system , check condi- tion of speakers and microphone by visual inspec- tion. If inspection reveals poor quality of sound, re- place with new speakers and/or microphone.
-
Page 73: Second Stage
MONTHLY INSPECTION AND MAINTENANCE CHECKLIST (continued) STEPS PROCEDURE INITIALS SECOND STAGE • Remove the second stage regulator from helmet. REGULATOR • Visually inspect the flapper valve for damage or deterioration. If damaged, replace flapper valve. • Separate the main assembly as follows: •... - Page 74 Gorski G2000SS Diving Helmet Technical Manual MONTHLY INSPECTION AND MAINTENANCE CHECKLIST (continued) STEPS PROCEDURE INITIALS FREE FLOW / EXHAUST • Remove the exhaust valve cover and without re- moving the free flow/exhaust valve from the hel- VALVE met, remove the snap ring and flapper valve.
-
Page 75: Checklist 6: G2000Ss Diving Helmet Annual Inspection And Maintenance Checklist
NoTe: • The procedures in this checklist are to be performed only by personnel who have received factory authorized training through an Aqua Lung Service and Repair Seminar. • If you do not completely understand all of the procedures outlined in this checklist, contact Aqua Lung to speak with a technical advisor before proceeding any further. - Page 76 Gorski G2000SS Diving Helmet Technical Manual ANNUAL INSPECTION AND MAINTENANCE CHECKLIST (continued) DISASSEMBLY - SEQUENCE OF EVENTS This sequence is for guidance. Maintenance instructions are in the subsequent checklist. Step Activity Tools Required Remove neck dam assembly. Remove neck retainer (5).
- Page 77 ANNUAL INSPECTION AND MAINTENANCE CHECKLIST (continued) COMPLETE THE FOLLOWING BOXES PRIOR TO THE CHECKLIST COMPLETE THE SIGNATURE, DATE AND COMMENTS AT THE END OF THE CHECKLIST Helmet Serial No: Date: Technician: (Print Name) STEPS PROCEDURE INITIALS NECK DAM ASSEMBLY NoTe: Refer to the technical manual, neck dam assembly section for guidance. CHIN STRAP •...
- Page 78 Gorski G2000SS Diving Helmet Technical Manual ANNUAL INSPECTION AND MAINTENANCE CHECKLIST (continued) STEPS PROCEDURE INITIALS NECK RETAINER AND LOCKING SYSTEM NoTe: Refer to the technical manual, neck retainer section for guidance. PULL PINS • Ensure the ease of movement and spring tension of both pull pins.
- Page 79 ANNUAL INSPECTION AND MAINTENANCE CHECKLIST (continued) STEPS PROCEDURE INITIALS ORAL-NASAL MASK NoTe: Refer to the technical manual, oral-nasal mask section for guidance. ORAL-NASAL • Remove oral-nasal mask (microphone must be remove prior to oral-nasal mask) and check for damage and/or deterioration. •...
- Page 80 Gorski G2000SS Diving Helmet Technical Manual ANNUAL INSPECTION AND MAINTENANCE CHECKLIST (continued) COMMUNICATIONS • Remove and visually inspect the 4-wire comms bulkhead connector and cable (if fitted) for damage. BULKHEAD • Replace the o-ring annually. NoTe: The ferrules are normally reused.
- Page 81 ANNUAL INSPECTION AND MAINTENANCE CHECKLIST (continued) EXHAUST FLAPPER • Visually inspect for cuts and damage. Wash with soap and water, rinse with fresh water and allow to VALVE dry. If necessary, replace exhaust flapper valve. NoTe: The exhaust flapper valve has a long service life and is not normally replaced annually.
- Page 82 Gorski G2000SS Diving Helmet Technical Manual ANNUAL INSPECTION AND MAINTENANCE CHECKLIST (continued) STEPS PROCEDURE INITIALS FREE FLOW VALVE • Check condition of the guide hole in the knob. It should be square and firm. If any deterioration or KNOB excess play is present, replace knob.
- Page 83 ANNUAL INSPECTION AND MAINTENANCE CHECKLIST (continued) STEPS PROCEDURE INITIALS FACE PORT ASSEMBLY NoTe: Refer to the technical manual, face port assembly section for guidance. PORT RETAINER • Visually inspect the port retainer and screws for damage. • Clean as required. O-RING (1) •...
-
Page 84: Spare Parts Cross-Reference List
Gorski G2000SS Diving Helmet Technical Manual VIII. SPARE PARTS CROSS-REFERENCE LIST All Gorski part numbers have been replaced with Aqua Lung (AQA) part numbers – please use this cross-reference list when ordering spare parts. NoTe: ALL PARTS SHoULD Be oRDeReD USING THe AQA P/N... - Page 85 Cap, Fitting, Brass 400043 1SS-0051 Body, Free Flow Exhaust Valve 400044 1SS-0052 O-ring, Exhaust (Small) (10 Pack) 400045 1SS-0053 O-ring, Exhaust (Large) (10 Pack) 400046 1SS-0054 Valve, Flapper Exhaust 400047 1SS-0055 Ring, Snap Flapper Valve 400048 1SS-0056 Seat, Free Flow Valve 400049 1SS-0057 Washer, Copper (5 pack)
- Page 86 Gorski G2000SS Diving Helmet Technical Manual Bracket, Lens Holding (2 Pack) 400089 1SS-0087 Gasket, Welding Lens 400090 1SS-0088 Hinge Block, Welding Lens (2 Pack) 400092 1SS-0090 Screw, Hinge Block Mounting (5 pack) 400093 1SS-0091 Screw, Hinge (5 Pack) 400094 1SS-0092...
-
Page 87: G2000Ss Diving Helmet Accessories
IX. G2000SS DIVING HELMET ACCESSORIES Standard Helmet Bag P/N 400804 Helmet Flotation Bag P/N 400805 Bailout Hose Assembly w/ (QD) P/N 400161 • Hose Assy, LP, 33", w/ QD, Yellow P/N 400167 Hose Assy, LP, 6", w/ QD, Yellow P/N 400168 •... -
Page 88: Maintenance Notes
Gorski G2000SS Diving Helmet Technical Manual X. MAINTENANCE NOTES... - Page 89 MAINTENANCE NOTES...
- Page 90 GORSKI G2000SS HELMET TECHNICAL MAINTENANCE MANUAL 2340 Cousteau Court • Vista, CA 92081 Phone (760) 597-5000 • Fax (760) 597-4900 www.aqualung.com/militaryandprofessional www.gorskihat.com Literature P/N 400143 Rev. 8/12 ©2012 Aqua Lung International...
Need help?
Do you have a question about the GORSKI G2000SS and is the answer not in the manual?
Questions and answers