Table of Contents
Advertisement
Quick Links
Advertisement
Table of Contents

Related Manuals for Axis P1455-LE-3


Summary of Contents for Axis P1455-LE-3
- Page 1 AXIS P1455–LE-3 License Plate Verifier Kit User Manual...
- Page 2 Verifier application, making it a kit for license plate recognition for slow-speed traffic, as well as automated vehicle entry and exit management. AXIS P1455-LE-3 uses a whitelist and a blacklist to verify access to controlled areas such as parking lots.
- Page 3 The mounting height for camera in a Free flow (slow traffic license plate recognition) scenario should be less than half of the distance of that between the vehicle and the camera. Access control capture distance: 2–7 m (6.6–23 ft). This example is based on the AXIS P3245–LVE-3 License Plate Verifier kit. Capture distance: (x) Mounting height (y) 2.0 m (6.6 ft)
- Page 4 AXIS P1455–LE-3 License Plate Verifier Kit Get started Capture distance (x) Mounting height (y) 7.0 m (23 ft) 3.0 m (9.8 ft) 10.0 m (33 ft) 4.0 m (13 ft) 15.0 m (49 ft) 6.0 m (19.5 ft) 20.0 m (65 ft) 10.0 m (33 ft)
- Page 5 AXIS P1455–LE-3 License Plate Verifier Kit Get started Horizontal tilt. Step-by-step guide When you first run the application, set up Free flow or Access control using the step-by-step guide. If you want to make changes later on, it can be found in the Settings tab under Configuration wizard.
- Page 6 AXIS P1455–LE-3 License Plate Verifier Kit Get started 10. In the Server URL field, type the server address and port in the following format: 127.0.0.1:8080 11. In the Device ID field, type the name of the device or leave as is.
- Page 7 How to access the product's webpage If you do not know the IP address of your product, use AXIS IP Utility or AXIS Device Manager to locate the product on the network. Both applications are free and can be downloaded from axis.com/support We recommend the following browsers: •...
- Page 8 Secure passwords Important Axis devices send the initially set password in clear text over the network. To protect your device after the first login, set up a secure and encrypted HTTPS connection and then change the password. The device password is the primary protection for your data and services. Axis devices do not impose a password policy as they may be used in various types of installations.
-
Page 9: Select Region
AXIS P1455–LE-3 License Plate Verifier Kit Get started Example with one area of interest. Note For performance reasons, keep the area of interest as small as possible. Select region 1. Go to Settings > Image. 2. In the Region drop-down list, select your region. - Page 10 • Camera physically installed and connected to the network. • AXIS License Plate Verifier up and running on the camera. 1. Go to Settings > Events. 2. Under Save events, select Allowlisted. 3. Under Delete events after, select 30 days.
- Page 11 AXIS P1455–LE-3 License Plate Verifier Kit Additional settings Additional settings Add detected license plate to list A license plate can be added directly to a list after being detected by the application. 1. Click the Event log tab 2. Go to Latest Event 3.
- Page 12 AXIS P1455–LE-3 License Plate Verifier Kit Additional settings 1. Go to Settings > Image. 2. Activate Text overlay. 3. Set Overlay duration to a value between 1 and 9 seconds. 4. Select either date, time and license plate (Datetime + LP), or just the license plate (LP).
- Page 13 Open a barrier for known vehicles using a relay module This example use case explains how to set up AXIS License Plate Verifier together with a relay module to open a barrier for a known vehicle driving through a specific region of interest (ROI) into, let’s say a parking area.
- Page 14 Open a barrier for known vehicles using the camera's I/O This example explains how to set up AXIS License Plate Verifier together with the camera’s I/O port to open a barrier for a known vehicle entering, for example, a parking area.
- Page 15 AXIS P1455–LE-3 License Plate Verifier Kit Vehicle entry and exit scenario 1. Go to the application’s webpage and select the Event log tab and add detected license plates to a list. See Add detected license plate to list on page 11 2.
- Page 16 Vehicle access control scenario In the scenario for vehicle access control, the application can be connected to an Axis network door controller to configure access rules, create schedules for access times, and handle vehicle access not only for employees, but also, for example, visitors and suppliers.
- Page 17 To watch this video, go to the web version of this document. www.axis.com/products/online-manual/70394#t10124729 This video shows how to get the application up and running with AXIS A1001 Door Controller. Hardware configuration in AXIS Entry Manager 1. Go to AXIS Entry Manager and start a new hardware configuration under Setup.
- Page 18 9. To add users to a group, drag and drop Users to the user group. 10. To give users access, drag and drop the Door to the user group. 11. To limit the access time, drag and drop a Schedule to the user group. Overview of AXIS Entry Manager user interface. Users Doors...
- Page 19 The camera must be physically installed and connected to the network. • AXIS License Plate Verifier must up and running on the camera. 1. Go to Integration > Push events. 2. In the Protocol drop-down list, select one of the following protocols: HTTP POST 3.
-
Page 20: Technical Issues, Clues And Solutions
Axis device. Check all cabling and reinstall the device. Possible IP address conflict The static IP address in the Axis device is used before the DHCP server sets a dynamic address. with another device on the... -
Page 21: Reset To Factory Default Settings
IP addresses obtained from a DHCP server are dynamic and may change. If the IP address has been changed by DHCP changed, use AXIS IP Utility or AXIS Device Manager to locate the device on the network. Identify the device using its model or serial number, or by the DNS name (if the name has been configured). -
Page 22: Upgrade The Firmware
5. Use the installation and management software tools to assign an IP address, set the password, and access the video stream. The installation and management software tools are available from the support pages on axis.com/support. It is also possible to reset parameters to factory default through the web interface. Go to Settings > System > Maintenance and click Default. - Page 23 Heavy network utilization due to poor infrastructure affects the bandwidth. • Viewing on poorly performing client computers lowers perceived performance and affects frame rate. • Running multiple AXIS Camera Application Platform (ACAP) applications simultaneously may affect the frame rate and the general performance.
-
Page 24: Product Overview
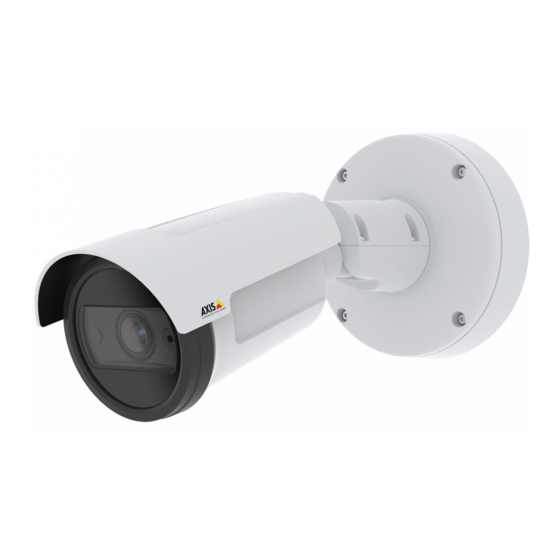
AXIS P1455–LE-3 License Plate Verifier Kit Specifications Specifications Product overview AXIS P1455-LE 9 mm Audio connector I/O connector microSD card slot Network connector Status LED indicator Part number (P/N) & Serial number (S/N) Control button LED indicators Status LED Indication Unlit Connection and normal operation. -
Page 25: Sd Card Slot
Resetting the product to factory default settings. See Reset to factory default settings on page 21. • Connecting to an AXIS Video Hosting System service. To connect, press and hold the button for about 3 seconds until the status LED flashes green. - Page 26 AXIS P1455–LE-3 License Plate Verifier Kit Specifications I/O connector Use the I/O connector with external devices in combination with, for example, motion detection, event triggering, and alarm notifications. In addition to the 0 V DC reference point and power (DC output), the I/O connector provides the interface to: Digital input - For connecting devices that can toggle between an open and closed circuit, for example PIR sensors, door/window contacts, and glass break detectors.
- Page 27 User Manual Ver. M4.2 AXIS P1455–LE-3 License Plate Verifier Kit Date: June 2021 © Axis Communications AB, 2021 Part No. T10167995...
Need help?
Do you have a question about the P1455-LE-3 and is the answer not in the manual?
Questions and answers