Table of Contents
Advertisement
Quick Links
BEFORE YOU BEGIN
• Please read these instructions carefully to familiarise
yourself with the required tools, materials, and
installation sequences. Follow the sections that
pertain to your particular installation. This will help
you avoid costly mistakes. In addition to proper
installation, read all operating and safety instructions.
• All information is based on the latest product
ROUGHING-IN & DIMENSIONS
A. BUBBLE MASSAGE BATH
Ordering Information
Product
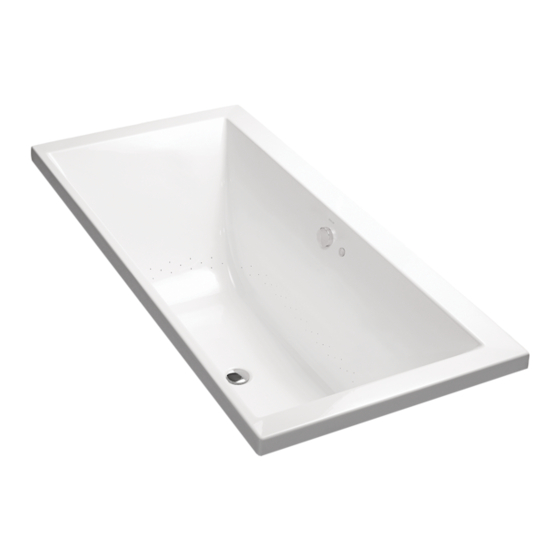
REGATTA drop in
EVOK RECT drop in
EVOK RECT freestanding
EVOK OVAL drop in
EVOK OVAL freestanding
OVE RECT drop in
ESCALE drop-In
ESCALE free Standing
B. Required Electrical Service
Dedicated branch circuit required, protected with Class
A Ground-Fault Circuit-Interrupt (GFCI):
Blower
220~240V, 10.A, 50Hz
Blower
Kohler AP300 - air switch
If supply cord or interconnection cord is damaged, it must be replaced by the manufacturer, its service agent or
similarly qualified persons in order to avoid a hazard.
C. Installation
Read the entire installation instructions before beginning
the installation.
D. Dimensions
Detached blowers are supplied with a 1.5m flexible coupling. This allows the blower to be positioned at the installers
discretion. For serviceability of the blower, an access panel of 450mm x 400mm must be fitted. If access to the
blower is not provided, then no warranty service will be provided.
Air switch
11303A-GAB-0
18263A-GAB-0
18344A-GAB-0
18346A-GAB-0
18348A-GAB-0
1709A-GAB-0
11343A-GAB-0
11344A-GAB-0
Part #
1128A-CP
BUBBLE MASSAGE BATH
information available at the time of publication.
Kohler NZ Ltd. reserves the right to make changes in
product characteristics, packaging, or availability at
any time without notice.
• These instructions contain important care, cleaning,
and warranty information-������ ����� �����
������������ ��� ��� ���������
Motor
Heater Voltage
300 W
180W
1
1128227-A01-D Date: 13/8/2010
INSTALLATION INSTRUCTIONS
Freq
Amperage
220~240 V 50-60Hz 2.2A
Advertisement
Table of Contents

Summary of Contents for Kohler REGATTA drop in 11303A-GAB-0
- Page 1 • Please read these instructions carefully to familiarise information available at the time of publication. yourself with the required tools, materials, and Kohler NZ Ltd. reserves the right to make changes in installation sequences. Follow the sections that product characteristics, packaging, or availability at pertain to your particular installation.
- Page 2 REGATTA BUBBLE MASSAGE 11303A-GAB-0 ���� ��� OVE BUBBLE MASSAGE 1709A-GAB-0 ���� ��� 1128227-A01-D Date: 13/8/2010...
- Page 3 EVOK BUBBLE MASSAGE 18263A-GAB-0 ���� ��� EVOK RECT FREESTANDING BUBBLE MASSAGE 18344A-GAB-0 408.5 837.5 1675 1128227-A01-D Date: 13/8/2010 +...
- Page 4 EVOK OVAL BUBBLE MASSAGE 18346A-GAB-0 1700 EVOK OVAL FREESTANDING BUBBLE MASSAGE 18348A-GAB-0 1700 1128227-A01-D Date: 13/8/2010...
- Page 5 ESCALE DROP-IN BUBBLE MASSAGE BATH 11343A-GAB-0 ���� ����� ���� ESCALE FREESTANDING BUBBLE MASSAGE BATH 11344A-GAB-0 ���� ����� ���� 1128227-A01-D Date: 13/8/2010...
-
Page 6: Product Notices
Circuit-Breaker (ELCB). could adversely affect the performance and safe WARNING: Risk of electrical shock. Disconnect operation of the bath with airjets. Kohler NZ shall ����� ������ ���������� not be liable under its warranty or otherwise for WARNING: Keep the area around the blower personal injury or damage caused by any such motor clean and free of debris. -
Page 7: Site Requirements
SITE REQUIREMENTS A. Prepare the Site CAUTION: Risk of product damage. Do not only support the bath by the rim. Bath Bath rim must be fully supported. NOTICE: Brick under the bath must provide for a minimum of 80 lbs./ Tile square foot (390kg./square metre) loading. - Page 8 Identify suitable blower installation and access positions before proceeding with installation. A suitable power outlet will also be required within 610mm of the blower. See section H. Blower Access* NOTE: NO MOTOR ACCESS NO WARRANTY SERVICE. Ventilation must be provided in order to allow heat from motor to dissipate.
- Page 9 B. Option Using Construction Adhesive • Apply a generous amount of high-quality construction Apply Construction adhesive to the bottom of the support blocks. adhesive to the • With help, carefully lift the bath into position. Support Blocks. • Insert the drain tailpiece into the trap. Make sure the bath is level and resting on all support blocks.
-
Page 10: Install The Plumbing
F. Install the Blower • Once connected find a suitable installation position for (For Detached Blower Versions Only ) the blower. • Secure the blower firmly using appropriate fixings so The detached blower can be installed up to 1.5m from that the blower can not vibrate free when in use the bath if desired. -
Page 11: Drop-In Installation
J. Wall Section Installation Detail REBATED INTO WALL PACKED OUT FROM WALL ��������� ��������� �������� �������� ������� ������� ������������ ������������ ���� ���� ������� ������� ����������� ����������� ����������� ����������� ������� ������� ������� ������� ����������� ����������� ����������� ����������� ������ ��������� ����� ������������� ����... -
Page 12: Clean-Up After Installation
M. Drilling And Cutting Acrylic N. Clean-Up After Installation DRILLING: Small holes can be drilled with a twist drill, • Clean the area around the blower motor of all dust but the cutting edge MUST be backed off with an oil and debris. -
Page 13: Regular Care And Maintenance
D. Confirm Air System Operation • Press the air switch once. • Observe that the blower motor starts • Observe that air is blowing through all of the airjets. • Press the air switch again to stop the blower motor. E. -
Page 14: Contact And Warranty Information
80mm Leveling Kit Set Air switch and blower 1128A-CP Flexible connection tube 1022891 CONTACT AND WARRANTY INFORMATION For warranty information, please visit our website Australia www.au.kohler.com New Zealand www.kohler.co.nz CALL US FOR HELP ��� ������� ��������� ������ �� ��� ������ ���...


Need help?
Do you have a question about the REGATTA drop in 11303A-GAB-0 and is the answer not in the manual?
Questions and answers