Advertisement
Table of Contents
- 1 To Assemble the BASE, You will Need These Pieces
- 2 To Assemble the CAGE, You will Need These Pieces
- 3 To Assemble the CAGE SIDES, You will Need These Pieces
- 4 To Install PLATFORMS and RAMPS, You will Need These Pieces
- 5 To Attach the ROOF, You will Need this Piece
- 6 To Finish Installation with the GRILLE and TRAY, You will Need These Pieces
- Download this manual
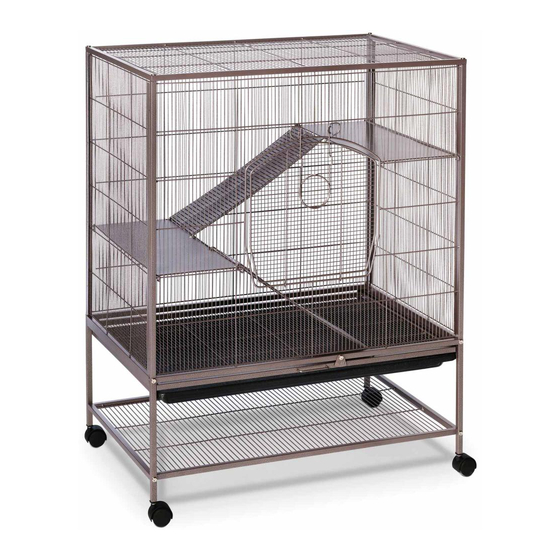
Critter Cage
Model: # 495
1
To assemble the BASE, you
will need these pieces:
2
To assemble the CAGE,
you will need these pieces:
3
To assemble the CAGE SIDES,
you will need these pieces:
495 — 03 / 15 — USL
read first
• TOOLS: Allen wrench (included).
Attach storage shelf to leg
frames. Windbell lock on front
leg frame faces out (fig. 1-1).
Slide back panel into
back leg frame (fig. 2-1).
Attach the grille/tray rails
following the orientation
shown in the detail (fig. 3-1).
Made in China for Prevue Pet Products, Inc., Chicago IL USA
REVIEW BEFORE ASSEMBLY
Needle nose pliers (not included)
may be useful. If using power
tools, be careful not to over-
tighten screws.
[ FIG. 1-1 ]
Slide front panel (with door) into front leg frame (fig. 2-1). If necessary,
hole slugs may be removed and extended vertical wires may be straight-
ened to align with holes in frame with needle nose pliers.
[ FIG. 3-1 ]
Slide side panels
into place.
www.prevuepet.com
For assistance or replacement
parts, please contact Prevue:
TOLL-FREE 800.243.3624
ONLINE
www.prevuepet.com
EMAIL
customerservice @ prevuepet.com
Flip unit over and fully insert
casters into frame legs.
[ FIG. 2-1 ]
@
800 243-3624
customerservice
prevuepet.com
Advertisement
Table of Contents

Related Manuals for Prevue Hendryx PREVUE PET PRODUCTS 495


Summary of Contents for Prevue Hendryx PREVUE PET PRODUCTS 495
- Page 1 Critter Cage read first REVIEW BEFORE ASSEMBLY Model: # 495 • TOOLS: Allen wrench (included). For assistance or replacement Needle nose pliers (not included) parts, please contact Prevue: may be useful. If using power TOLL-FREE 800.243.3624 tools, be careful not to over- ONLINE www.prevuepet.com tighten screws.
- Page 2 To install PLATFORMS and [ FIG. 4 -1 ] Hook the lower platform on Orient ramps with ridges facing RAMPS, you will need these second horizontal wire up from up, and ‘U’ hook ends at the top pieces: the bottom (fig. 4-1) (fig. 4-2). (fig.
Need help?
Do you have a question about the PREVUE PET PRODUCTS 495 and is the answer not in the manual?
Questions and answers