Emerson MRLDS-250 User Manual
Hide thumbs
Also See for MRLDS-250:
- Installation and operation manual (40 pages) ,
- Installation and operation manual (30 pages) ,
- Quick setup manual (4 pages)

Related Manuals for Emerson MRLDS-250


Summary of Contents for Emerson MRLDS-250
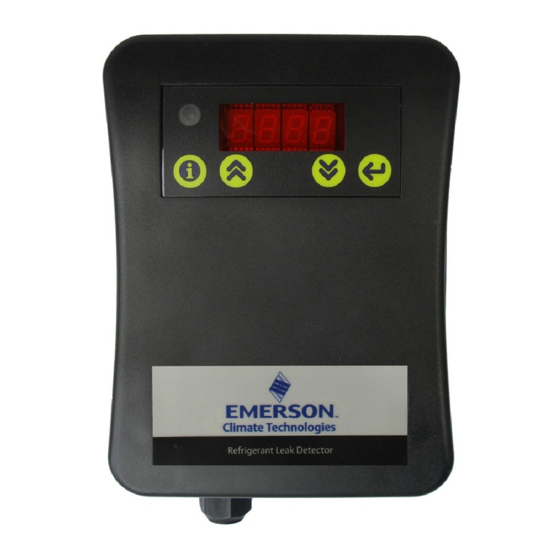
- Page 1 SUPPORT CENTER ADVISORY Local User’s Guide MRLDS – 250 to Multiflex I/O By Emerson Commercial and Residential Solutions...
-
Page 2: Table Of Contents
Basic Set Up ..................................3 A. Overview..................................3 B. How to Set Up Analog Output Type of MRLDS-250 ................... 3 C. How to Set Multiflex Input point for MRLDS - 250 ....................4 How to Set the Input Type on E2 Controller for MRLDS – 250 ................. 5 E. -
Page 3: Basic Set Up
Set the attributes as desired, and then press Enter to save the setting. B. How to Set Analog Output Type of MRLDS-250 1. For Address, look for P.-03 on the parameter list then press Enter button. 2. Set the desired type by pressing Up... -
Page 4: How To Set Multiflex Input Point For Mrlds - 250
SUPPORT CENTER ADVISORY C. How to Set Multiflex Input point for MRLDS - 250 1. An input point on a Multiflex board consists of two terminals. One of these terminals, labeled as “SIG” reads the signal from the sensor, while the other, labeled “0v” is where the sensor’s ground wire is connected. -
Page 5: How To Set The Input Type On E2 Controller For Mrlds - 250
SUPPORT CENTER ADVISORY D. How to Set the Input Type on E2 Controller for MRLDS – 250 1. Log in to E2 controller by pressing and type in your Log in credentials then press ... - Page 6 SUPPORT CENTER ADVISORY 3. Navigate to the Board and Point of the Input where the MRLDS – 250 is connected then press for Setup. Press for Analog Type. In this Example, Board 1 Point 1 is being used. 4.
- Page 7 SUPPORT CENTER ADVISORY 5. Press for Look Up and look for Linear and press to confirm. 6. Navigate down to Eng Units.
- Page 8 SUPPORT CENTER ADVISORY 7. Press for Look Up and look for PPM and press to confirm. 8. Set the Low-End Point and High-End Point depending on the range set on the MRLDS – 250 which is on P.-03 parameter. On this Example, we use the default which is the 1-5V.
- Page 9 SUPPORT CENTER ADVISORY 9. Set the Low End EU and High End EU. This will be the equivalent PPM reading of the Analog Output given out by the device. “0” will be the Low End EU and the High End EU will be what is set on P.-16 parameter.
-
Page 10: How To Associate The Mrlds - 250 On A Sensor Control
SUPPORT CENTER ADVISORY 11. Press button to save. E. How to Associate the MRLDS – 250 on a Sensor Control - 1. Add an Analog Sensor Application. Press Add Application. - Page 11 SUPPORT CENTER ADVISORY 2. Press for Look up, look for Analog Sensor Control and then press 3. For How many, type in 1 then press...
- Page 12 SUPPORT CENTER ADVISORY 4. Press for Yes to Edit the application. 5. Set the Name of the application to Leak Detection and the Eng Units to PPM.
- Page 13 SUPPORT CENTER ADVISORY to C2: Inputs then type in the board and point of the MRLDS – 250. 6. Press 7. To trigger an Output on this Sensor Control, indicate the required set point on C4: Set Points Tab.
- Page 14 SUPPORT CENTER ADVISORY 8. To set an Alarm, press twice to tab over to C7: Alarm/NTC Tab. Set the Alarm HI Limit to required PPM to generate an Alarm. Set it to 1000PPM. 9. Press button to save Note: If you want this sensor control to act at the same time with the actual MRLDS –...
-
Page 15: How To Disable E2 Applications When Mrlds - 250 Is In Alarm Condition
SUPPORT CENTER ADVISORY F. How to Disable E2 applications when MRLDS – 250 is in Alarm condition. 1. Add Digital Sensor Control • This will invert the value from the Analog Sensor control, for it to disable other applications during an Alarm. - ... - Page 16 SUPPORT CENTER ADVISORY c. Press for Yes to set up the application. d. Set the name of the application to Leak Disable and set the Invert Ctrl Val parameter to...
- Page 17 SUPPORT CENTER ADVISORY e. Press to tab over to C2: Inputs Tab. Set the Input to Area Ctrl: Application: Property type to associate the Output of the Leak Detection. Press for Edit. Choose Alternate I/O Formats then press ...
- Page 18 SUPPORT CENTER ADVISORY g. Press to select Area Ctrl: Application: Property. h. And the format of the Input will be changed. Press under Area Ctrl.
- Page 19 SUPPORT CENTER ADVISORY Press to select the controller. Press the Right arrow key to tab over to Application.
- Page 20 SUPPORT CENTER ADVISORY k. Press for Look up then choose Analog Sensor Ctrl (Leak Detection). Press Press the Right arrow key to tab over to Output.
-
Page 21: For Standard Circuit
SUPPORT CENTER ADVISORY m. Press for Look up then choose Command Out. Press n. Press button to save the changes. 2. For Standard Circuit a. Press to open Configured Applications b. Select 3. Circuits > select the Standard Circuit that requires the MRLDS 250 ... - Page 22 SUPPORT CENTER ADVISORY g. Press and select the controller. h. Press the right arrow key to go to Application and then press select the Digital Sensor Control Application (Leak Disable) Press to confirm...
- Page 23 COMMAND OUT. k. Press to confirm. Press button to save the changes. Note: Standard Circuits associated to Multiflex ESR will close the Valve to 0% whenever the Circuit was disabled due to leak detected by MRLDS-250.
-
Page 24: For Case Control Circuit
SUPPORT CENTER ADVISORY 3. For Case Control Circuit a. Press to open Configured Applications b. Select 3. Circuits > select the Case Control Circuit that requires the MRLDS 250 c. Press to confirm and open the application. ... - Page 25 SUPPORT CENTER ADVISORY g. Press to confirm. h. Press the right arrow key to go to Application and then press select the Digital Sensor Ctrl (Leak Disable). Press to confirm Press the right arrow key to go to Output and then press .
-
Page 26: For Xm Circuit
SUPPORT CENTER ADVISORY Press button to save the changes. 4. For XM Circuit a. Press to open Configured Applications b. Select 3. Circuits > select the XM Circuit that requires the MRLDS 250 c. Press to confirm and open the application. ... - Page 27 SUPPORT CENTER ADVISORY Press select the controller. g. Press to confirm. h. Press the right arrow key to go to Application and then press select the Digital Sensor Ctrl (Leak Disable). Press to confirm.
- Page 28 SUPPORT CENTER ADVISORY Press the right arrow key to go to Output and then Press select the Command Out. k. Press to confirm. Press button to save the changes.
-
Page 29: Maintenance Requirements
SUPPORT CENTER ADVISORY G. Maintenance Requirements 1. Bump Testing • A bump test exposes the gas detector to a gas. The operator then observes the gas detector’s response to the gas and it is mainly used to see if gas detector is reacting to the gas and to determine if all the detector’s outputs are working correctly. -
Page 30: Gas Detector Response Adjustment
SUPPORT CENTER ADVISORY c. Expose the gas detector to gas from the cylinder. Monitor the LED display reading and check the outputs functions. 2. Gas Detector Response Adjustment • Adjusting gas detector response exposes the gas detector to a calibration gas as well but additionally sets the actual gas detector response level to ensure that the gas detector activate on the specified gas concentration. -
Page 31: Troubleshooting
SUPPORT CENTER ADVISORY H. Troubleshooting 1. Fault Codes... -
Page 32: Diagnostic Attributes
SUPPORT CENTER ADVISORY 2. Diagnostic Attributes • Use this option to review the built-in diagnostic attributes. Access the parameter list and select P.-18. Press the Enter button to access the diagnostics, and then use the UP or DOWN button to select each attribute. The following information is available. -
Page 33: Device Reads Incorrect Ppm
SUPPORT CENTER ADVISORY 3. Device Reads Incorrect PPM a. Compare the reading on another sensor/detector. b. Try to calibrate to adjust the reading of the device but Subsequent manual zeros may be performed, provided the atmosphere around the gas detector is free of all background concentrations of refrigerant.
Need help?
Do you have a question about the MRLDS-250 and is the answer not in the manual?
Questions and answers