
Subscribe to Our Youtube Channel
Related Manuals for Emerson Micro Motion MVD Direct Connect


Summary of Contents for Emerson Micro Motion MVD Direct Connect
- Page 1 Installation Manual 20002273, Rev. AA July 2014 ® ™ ™ Micro Motion Direct Connect Meters...
- Page 2 Micro Motion Customer Service department. Micro Motion customer service Email: • Worldwide: flow.support@emerson.com • Asia-Pacific: APflow.support@emerson.com Telephone: North and South America Europe and Middle East Asia Pacific...
-
Page 3: Table Of Contents
Contents Chapter 1 Before you begin ......................5 Safety ............................ Chapter 2 Product overview and architecture ................7 Installation options ........................ Multidrop installation......................10 Chapter 3 Installation........................11 Supplying power ........................11 3.1.1 MVD Direct Connect installations without the MVD Direct Connect I.S. barrier ..11 3.1.2 MVD Direct Connect installations with the MVD Direct Connect I.S. - Page 4 Direct Connect Meters...
-
Page 5: Before You Begin
Before you begin Before you begin This manual provides installation information for Micro Motion ® MVD™ Direct Connect meters. MVD Direct Connect meters may or may not include the MVD Direct Connect I.S. barrier. Both installation types are discussed here. Additionally, this manual provides basic information for establishing communication between the MVD Direct Connect meter and the remote host system. - Page 6 Before you begin Direct Connect Meters...
-
Page 7: Product Overview And Architecture
Product overview and architecture Product overview and architecture MVD Direct Connect meters are used to supply Micro Motion sensor data directly to a remote Modbus-capable host, rather than to a Micro Motion transmitter. Because there is no transmitter component, MVD Direct Connect systems are not intrinsically safe unless the MVD Direct Connect I.S. - Page 8 Product overview and architecture Figure 2-2 MVD Direct Connect installations – Remote core processor, no I.S. barrier DC power supply Remote host Junction box User-supplied power cable User-supplied RS-485 cable Sensor Core processor Micro Motion 9-wire cable Figure 2-3 MVD Direct Connect installations – Integral core processor, I.S. barrier DC power supply 4-wire cable Core processor...
- Page 9 Product overview and architecture Figure 2-4 MVD Direct Connect installations – Remote core processor, I.S. barrier DC power supply User-supplied power cable Junction box User-supplied RS-485 cable 4-wire cable Remote host Sensor Barrier Micro Motion 9-wire cable Core processor Hazardous area Safe area Installation Manual...
-
Page 10: Multidrop Installation
Product overview and architecture Multidrop installation Up to fifteen MVD Direct Connect installations can be networked to a single remote host. If I.S. barriers are used, one barrier is required for each core processor. Figure 2-5 shows the four options for a multidrop installation. Figure 2-5 Multidrop installation options Safe area Hazardous area... -
Page 11: Chapter 3 Installation
Installation Installation Supplying power Power supply requirements depend on your installation type: • MVD Direct Connect without the MVD Direct Connect I.S. barrier (see Figure 2-1 Figure 2-2) • MVD Direct Connect with the MVD Direct Connect I.S. barrier (see Figure 2-3 Figure 2-4) -
Page 12: Mvd Direct Connect Installations With The Mvd Direct Connect I.s. Barrier
Installation Example The core processor is mounted 350 feet from a DC power supply. If you want to use 18 AWG cable, calculate the required voltage at the DC power supply as follows: MinimumSupplyVoltage CableResistance CableLength 0.15A ... -
Page 13: Locating The Components
Installation Example A single MVD Direct Connect I.S. barrier is mounted 350 feet from a DC power supply. If you want to use 18 AWG cable, calculate the required voltage at the DC power supply as follows: ... -
Page 14: Installing The Core Processor
Installation Table 3-3 Wire sizes and lengths – MVD Direct Connect installations with I.S. barrier Span Cable type Wire size Max length Core processor RS-485 22 AWG (0,35 mm ) or larger 500 feet (150 meters) to barrier Power 22 AWG (0,35 mm 300 feet (90 meters) 20 AWG (0,5 mm 500 feet (150 meters) - Page 15 Installation To mount the core processor: 1. Identify the components shown in Figure 3-2. For dimensions, see Figure 3-3. 2. If desired, reorient the core processor housing on the bracket. a. Loosen each of the four cap screws (4 mm). b.
- Page 16 Installation Figure 3-3 Dimensions – Remote core processor inches Dimensions in (mm) Ø4 3/8 (111) 5 11/16 (144) 2X 3 (76) 5 1/2 To centerline (140) of 2˝ pipe Pipe mount 1/2˝–14 NPT 4 9/16 2 1/2 M20 X 1.5 (116) (64) Wall mount...
- Page 17 Installation Figure 3-4 Dimensions – Remote enhanced core processor inches Dimensions in (mm) Ø4 3/8 (111) 5 11/16 (144) 2X 3 (76) To centerline of 2˝ pipe 5 1/2 (140) Pipe mount 2 1/2 4 9/16 (64) 1/2˝–14 NPT (116) Wall mount M20 X 1.5 3 13/16...
-
Page 18: Wiring The Core Processor To The Sensor
Installation Wiring the core processor to the sensor Note This step is required only if the core processor is mounted separately from the sensor. Refer to Figure Figure 2-4. Wire the core processor to the sensor using a Micro Motion 9-wire cable. See the sensor installation manual for instructions. - Page 19 Installation Figure 3-5 Micro Motion cable gland and heat shrink 4 1/2 in (114 mm) 3/4 in (19 mm) Gland nut Gland clamping insert 7/8 in (22 mm) 7/8 in Gland body (22 mm) Shielded heat shrink 5. For connection at the core processor housing, prepare cable as follows (for armored cable, omit Steps 5d through 5g): a.
- Page 20 Installation Figure 3-7 Applying the heat shrink Shielded heat shrink completely covers exposed drain wires g. Position gland clamping insert so the interior end is flush with the heat shrink. h. Fold the cloth shield or braid and drain wires over the clamping insert and approximately 1/8 inch (3 mm) past the O-ring.
- Page 21 Installation Figure 3-10 Connecting the wires at the core processor Standard core processor Enhanced core processor RS-485/A (White) VDC + RS-485/B RS-485/B (Green) (Red) (Green) RS-485/A VDC – (White) (Black) VDC– (Black) 4-wire ground screw (do not use) VDC+ (Red) 8.
-
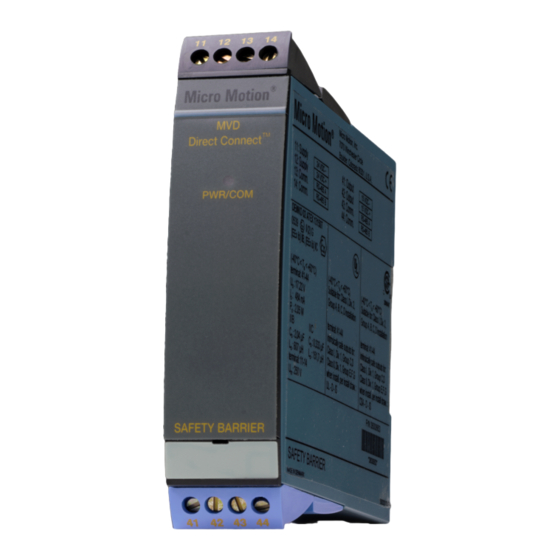
Page 22: Installing The Mvd Direct Connect I.s. Barrier
Installation Installing the MVD Direct Connect I.S. barrier Note This step is required only for installations that include the MVD Direct Connect I.S. barrier. Refer to Figure 2-3 Figure 2-4. The barrier is designed to snap onto a 35 mm DIN rail. Dimensions are shown in Figure 3-11. -
Page 23: Wiring To The Remote Host
Installation Wiring at the MVD Direct Connect I.S. barrier Note This step applies only to installations that include the MVD Direct Connect I.S. barrier. Refer to Figure Figure 2-4. 1. Connect the core processor to the barrier: a. Connect the RS-485 wires from the core processor to the I.S. RS-485 terminals at the barrier (terminals 43 and 44), matching A and B. -
Page 24: Wiring To The Power Supply
Installation Wiring to the remote host Note This step is required for all MVD Direct Connect installations. 1. At the remote host, open the wiring compartment and identify the RS-485 terminals. Refer to the vendor documentation if required. 2. If you are connecting the RS-485 wires directly from the core processor (see Figures 2-1 and 2-2): a. -
Page 25: Grounding
Installation 3.10 Grounding Note This step is required for all MVD Direct Connect installations. CAUTION! Improper grounding could cause measurement error. To reduce the risk of measurement error: • Ground the meter to earth, or follow ground network requirements for the facility. •... - Page 26 Installation Direct Connect Meters...
-
Page 27: Mvd Direct Connect Communications
MVD Direct Connect communications MVD Direct Connect communications For communication with the remote host, the core processor uses an industry-standard RS-485 half-duplex communication line driver. Supported communication settings are described in Table 4-1. The remote host can use any supported setting and the core processor will automatically detect and switch. -
Page 28: Additional Information
MVD Direct Connect communications Table 4-2 Byte contents in Modbus commands and responses Byte Bits Definitions S E E E E E E E S = Sign E = Exponent E M M M M M M M E = Exponent M = Mantissa M M M M M M M M M = Mantissa... - Page 29 MVD Direct Connect communications Installation Manual...
- Page 30 F +44 0800 966 181 Micro Motion Japan ©2014 Micro Motion, Inc. All rights reserved. Emerson Process Management The Emerson logo is a trademark and service mark of Emerson 1-2-5, Higashi Shinagawa Electric Co. Micro Motion, ELITE, ProLink, MVD and MVD Direct Shinagawa-ku...
Need help?
Do you have a question about the Micro Motion MVD Direct Connect and is the answer not in the manual?
Questions and answers