Advertisement
Quick Links
Advertisement

Related Manuals for OMT-Veyhl Clever


Summary of Contents for OMT-Veyhl Clever
- Page 1 HEIGHT ADJUSTABLE TABLE USER GUIDE...
-
Page 2: Table Of Contents
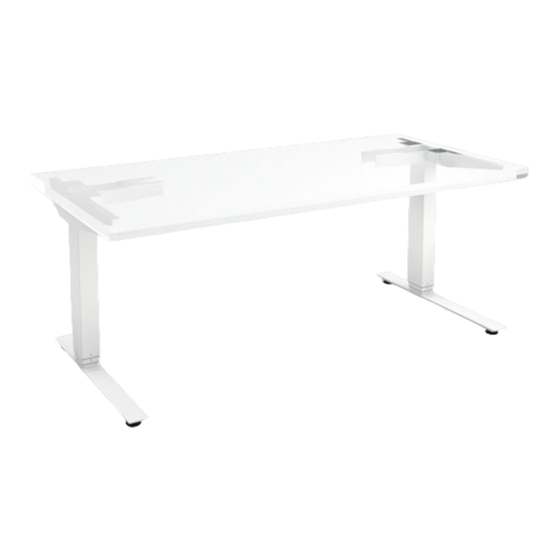
TABLE OF CONTENTS User Guide TABLE OF CONTENTS Parts Diagram Independent Independent with HAT Channel Three-Leg: 90 Degree Three-Leg: 120 Degree Safety Information 9-14 Assembly Instructions Operation 15-16 Initialization/Reset Handswitch Operation Programmable Handswitch Operation - Change the Height Unit - Change the Height Display - Save Memory Position - Recall Memory Position Troubleshooting... - Page 3 PARTS DIAGRAM User Guide PARTS DIAGRAM INDEPENDENT For tables 60" or Less 24" and 30" depths, T and C configurations PARTS Qty/Package 1. Column 2. Top Support 3. Foot 4. M8x1.25 12mm Self-Threading Screw 8 5. M10x1.5 30mm Screw 6. Handswitch Control Box 8.
-
Page 4: Parts Diagram
PARTS DIAGRAM User Guide INDEPENDENT WITH HAT CHANNEL For tables 60"−84" 24" and 30" depths, T and C configurations PARTS Qty/Package 1. Column 2. Top Support 3. Foot 4. HAT Channel 5. M8x1.25 12mm Self-Threading Screw 8 6. M10x1.5 30mm Screw Handswitch 8. -
Page 5: Three-Leg: 90 Degree
PARTS DIAGRAM User Guide THREE-LEG: 90 DEGREE For tables up to 72" 24" and 30" depths, T and C configurations PARTS Qty/Package 1. Support Beam 2. M8x1.25 12mm Self-Threading Screw 12 3. Top Support 4. Column 5. Foot 6. M10x1.5 30mm Screw #10-15 "... -
Page 6: Three-Leg: 120 Degree
PARTS DIAGRAM User Guide THREE-LEG: 120 DEGREE For tables up to 60" 24" and 30" depths, T and C configurations PARTS Qty/Package 1. Support Beam 2. M8x1.25 12mm Self-Threading Screw 12 3. Top Support 4. Column 5. Foot 6. M10x1.5 30mm Screw #10-15 "... -
Page 7: Safety Information
SAFETY INFORMATION User Guide SAFETY INFORMATION IMPORTANT SAFETY INSTRUCTIONS Save these instructions. DANGER To reduce the risk of electric shock: Always unplug the furnishing from the electrical outlet before cleaning or servicing. WARNING: Risk of Electric Shock, Fire and Injury – Review the assembly instructions to confirm that the appropriate critical components and accessories are being used with the furnishing. - Page 8 SAFETY INFORMATION User Guide DO NOT OVERLOAD DESK To prevent table from tipping or collapsing, make sure the desk frame is not overloaded by the weight of tabletop and objects on table. Evenly distribute load; excess loads near edges can reduce stability and lead to tip over.
-
Page 9: Assembly Instructions
ASSEMBLY INSTRUCTIONS User Guide ASSEMBLY INSTRUCTIONS The assembly of the table frame to be made in accordance with this manual. Changes to the table frame or improper use may affect the safety, function, and life of your product. This manual is for all sit-stand tables from the series. Due to different models or types, pictures may vary. - Page 10 ASSEMBLY INSTRUCTIONS User Guide FASTEN THE TOP SUPPORT ONTO THE TABLE TOP Be sure top supports are mounted 1.5" from edge of work surface. ASSEMBLE THE BEAM AND COLUMN TO THE TOP SUPPORT Align the independent beam to the top support. Assemble using the M8x1.25 x 12mm length screws (4 per column) and a T40 Torx driver.
- Page 11 ASSEMBLY INSTRUCTIONS User Guide FASTEN THE INDEPENDENT BEAM TO THE TABLE TOP Be sure to use approved screws per the table top supplier. INDEPENDENT INDEPENDENT WITH HAT CHANNEL Note: Feed the motor cables through the HAT channel before attaching the HAT channel to the tabletop.
- Page 12 ASSEMBLY INSTRUCTIONS User Guide THREE-LEG: 90 DEGREE TOP SIZE 3.9in 3.4in 24in 30in 14in TABLE LENGTH 72in 3.9in 3.4in 8.7in 45° THREE-LEG: 120 DEGREE TABLE DEPTH 24in 24in 30in 30in TABLE LENGTH 60in 3.4in 120° 1.9in 30° 21.9in...
- Page 13 ASSEMBLY INSTRUCTIONS User Guide FASTEN THE CONTROL BOX AND HANDSWITCH TO THE TABLE TOP Make sure the control box and handswitch are fastened in a location where all the cables will connect without being in tension. Be sure to use approved screws per the table top supplier.
- Page 14 ASSEMBLY INSTRUCTIONS User Guide CONNECT THE HANDSWITCH (HS) CABLE TO THE CONTROL BOX CONNECT THE SUPPLIED POWER CORD (AC) TO THE CONTROL BOX ATTACH ALL CABLES TO THE TABLE TOP Attach cables in order to avoid any damage during operation. Never attach cables and cords to legs.
- Page 15 OPERATION INFORMATION User Guide OPERATION INFORMATION INITIALIZATION/RESET The desk must be initialized/reset after any of the following: - After assembly - After disconnection from the power supply - After any impact on the table top. To initialize/reset, move the table to the lowest position by pressing the DOWN button on the handswitch until the columns reach the lowest position.
- Page 16 OPERATION INFORMATION User Guide PROGRAMMABLE HANDSWITCH OPERATION (continued) CHANGE THE HEIGHT UNIT (inches or centimeters) The handswitch can display the table height in either centimeters or inches. With the help of the S5-menus, the unit of measure can be changed. To change the unit of measure, follow these steps: 1.
- Page 17 TROUBLESHOOTING User Guide TROUBLESHOOTING UNIT ERROR CODE SOURCE SOLUTION No power supply Plug in the power cord or check the connection Table does not on the control box move No connection or a loose Verify the plug connections of the motor cable connection to the drives to the control box No connection or a loose...
- Page 18 TROUBLESHOOTING User Guide HANDSWITCH DISPLAY ERROR CODE SOURCE SOLUTION The control box monitors the duty cycle (time-controlled) and its max Wait until the “HOT” display goes out - the table is working properly again temperature. A value has been exceeded. M1 –...
- Page 19 TECHNICAL DATA User Guide TECHNICAL DATA GENERAL CONTROL BOX Power supply 120 VAC ±10% / 60 Hz Standby power consumption, primarily <0.3 W Operating temperature 0-35°C Protection class IP 20 Maximum power output 216VA/24V TWO-COLUMN FRAME WITH CONTROL BOX Maximum lift capacity 200 lb (≈...
- Page 20 Meets BIFMA X5.5 2014. WARRANTY CONTACT YOUR SALES REPRESENTATIVE FOR WARRANTY INFORMATION INTERTEK LISTING BELONGS TO: System: Clever OMT-Veyhl USA 11511 James Street Holland, MI 49424 End of life cycle: Once product is disassembled, all steel components can be recycled at your local metal collector.
- Page 21 USER GUIDE Rev N | 062421...
Need help?
Do you have a question about the Clever and is the answer not in the manual?
Questions and answers