Sundstrom APR SR 200 Operating Instruction
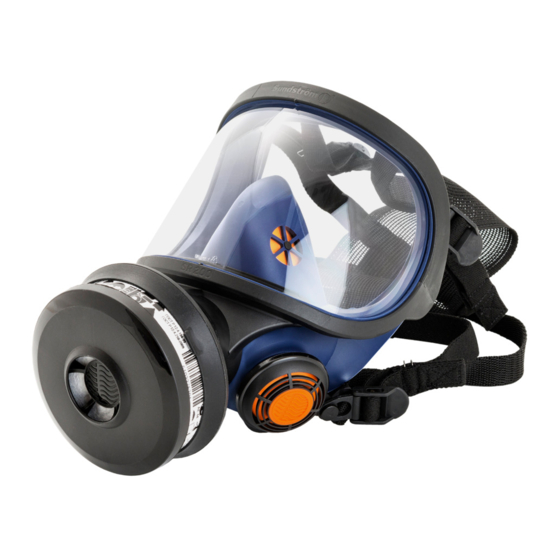
Full face mask
Hide thumbs
Also See for APR SR 200:
- Instructions for use manual (133 pages) ,
- User instruction (28 pages) ,
- Operation instruction manual (25 pages)

Related Manuals for Sundstrom APR SR 200


Summary of Contents for Sundstrom APR SR 200
- Page 1 Drawn up by: 2010-09-13 / RK Revision: HI-SR 200 USA Reviewed: 2014-03-27 / PA Page: 1 of 18 Operating instruction APR SR 200 full face mask...
-
Page 2: General Information
Drawn up by: 2010-09-13 / RK Revision: HI-SR 200 USA Reviewed: 2014-03-27 / PA Page: 2 of 18 General information The SR 200 full face mask can be used in three configurations: Together with filters/cartridges from the Sundström filter range in accordance with NIOSH approval label. - Page 3 Drawn up by: 2010-09-13 / RK Revision: HI-SR 200 USA Reviewed: 2014-03-27 / PA Page: 3 of 18 2.1 Unpacking 2.2 Packing list Check that the equipment is complete in accordance with the packing list, and that no transport damages have occurred. Packing list: ...
- Page 4 Drawn up by: 2010-09-13 / RK Revision: HI-SR 200 USA Reviewed: 2014-03-27 / PA Page: 4 of 18 Fit the filter/combined filter in the filter adapter SR 280-3 so that the arrow on the filter points towards the filter adapter. Carefully check that the edge of the filter is in the internal groove of the filter mounting.
- Page 5 Drawn up by: 2010-09-13 / RK Revision: HI-SR 200 USA Reviewed: 2014-03-27 / PA Page: 5 of 18 2.5 Inspection points before use Check that the mask is complete, correctly assembled, thoroughly cleaned and undamaged. Check particularly carefully the inhalation and exhalation membranes and their seats.
- Page 6 Drawn up by: 2010-09-13 / RK Revision: HI-SR 200 USA Reviewed: 2014-03-27 / PA Page: 6 of 18 Check that the surface at the bottom of the filter connection is in good condition. Check that the seal at the bottom of the filter connection is in good condition.
- Page 7 Drawn up by: 2010-09-13 / RK Revision: HI-SR 200 USA Reviewed: 2014-03-27 / PA Page: 7 of 18 3 A. Donning Remove any hood, glasses or ear protection from head. Slacken the four elastic straps by moving the strap holders forward, at the same time pulling the straps.
- Page 8 Drawn up by: 2010-09-13 / RK Revision: HI-SR 200 USA Reviewed: 2014-03-27 / PA Page: 8 of 18 Slacken the upper two inelastic straps by opening the buckles. Move the head harness upwards, place your chin in the face piece chin support and pull the head harness over your head.
- Page 9 Drawn up by: 2010-09-13 / RK Revision: HI-SR 200 USA Reviewed: 2014-03-27 / PA Page: 9 of 18 Adjust the fit of the mask on your face, so that it fits firmly but comfortably. Adjust the lengths of the upper pair of straps and fix by means of the buckles.
- Page 10 Drawn up by: 2010-09-13 / RK Revision: HI-SR 200 USA Reviewed: 2014-03-27 / PA Page: 10 of 18 4.1 Cleaning Proceed as follows: Remove the adapter/filter. Remove the covers for the exhalation valves and remove the exhalation membranes (two.) Remove the inhalation membranes (three.) Remove the head harness.
- Page 11 Drawn up by: 2010-09-13 / RK Revision: HI-SR 200 USA Reviewed: 2014-03-27 / PA Page: 11 of 18 which clean and disinfect are recommended for daily care. If the mask is heavily soiled, use warm water (up to 40 °C,) mild soap solution and a soft brush, followed by rinsing with clean water and drying in air at room temperature.
- Page 12 Drawn up by: 2010-09-13 / RK Revision: HI-SR 200 USA Reviewed: 2014-03-27 / PA Page: 12 of 18 4.4.1 To change the visor The visor is mounted in a groove surrounding the visor opening of the outer mask and is held in place by one upper and one lower frame half.
- Page 13 Drawn up by: 2010-09-13 / RK Revision: HI-SR 200 USA Reviewed: 2014-03-27 / PA Page: 13 of 18 Markings are made to show the center of the visor, frame halves and mask. Press the new visor into the groove, making sure that the center markings are in line.
- Page 14 Drawn up by: 2010-09-13 / RK Revision: HI-SR 200 USA Reviewed: 2014-03-27 / PA Page: 14 of 18 Fit the screws and tighten them alternately until the two halves of the frame are firmly in contact. Perform a fit check. 4.4.2 To change the inhalation membranes (three) One membrane is in the center of the inner mask on a fixed dowel.
- Page 15 Drawn up by: 2010-09-13 / RK Revision: HI-SR 200 USA Reviewed: 2014-03-27 / PA Page: 15 of 18 4.4.3 To change the exhalation membranes (two) The exhalation membranes are mounted on a fixed dowel on the inside of the valve covers on each side of the outer mask.
- Page 16 Drawn up by: 2010-09-13 / RK Revision: HI-SR 200 USA Reviewed: 2014-03-27 / PA Page: 16 of 18 4.4.4 To change the head harness The head harness can be ordered as a spare part only as a complete harness. Snap the (six) strap holders of the head harness of the face piece strap mountings.
- Page 17 Drawn up by: 2010-09-13 / RK Revision: HI-SR 200 USA Reviewed: 2014-03-27 / PA Page: 17 of 18...
- Page 18 Drawn up by: 2010-09-13 / RK Revision: HI-SR 200 USA Reviewed: 2014-03-27 / PA Page: 18 of 18...
Need help?
Do you have a question about the APR SR 200 and is the answer not in the manual?
Questions and answers