Sundstrom SR 200 Operating Instruction
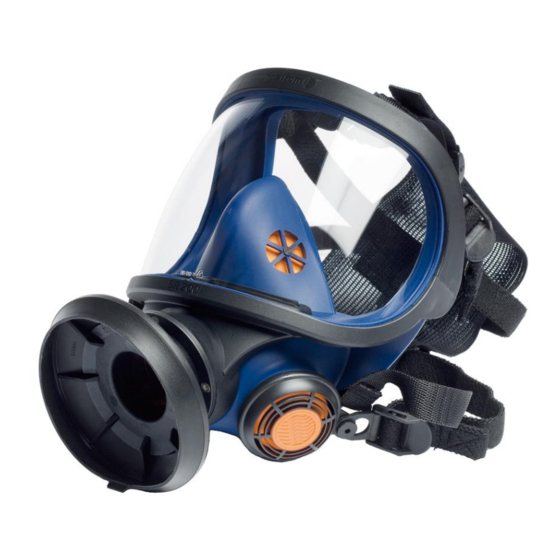
Full face mask
Hide thumbs
Also See for SR 200:
- Instructions for use manual (133 pages) ,
- User instruction (28 pages) ,
- Operation instruction manual (25 pages)

Related Manuals for Sundstrom SR 200


Summary of Contents for Sundstrom SR 200
- Page 1 Drawn up by: 2009-01-20 / RK Revision: OI01H-1218 SR 200 Reviewed: 2017-02-13 / PA Page: 1 of 17 Operating instruction SR 200 full face mask...
-
Page 2: General Information
• Together with compressed air attachment SR 307 in accordance with EN 14594:2005 class 3A/3B. In addition, the SR 200 is available in a special version – The SR 200 Airline – that is designed for connection to compressed air, but is also provided with filter back-up. - Page 3 Drawn up by: 2009-01-20 / RK Revision: OI01H-1218 SR 200 Reviewed: 2017-02-13 / PA Page: 3 of 17 2.1 Unpacking 2.2 Packing list Check that the equipment is complete in accordance with the packing list, and that no transport damages have occurred.
- Page 4 Drawn up by: 2009-01-20 / RK Revision: OI01H-1218 SR 200 Reviewed: 2017-02-13 / PA Page: 4 of 17 the user´s face. Carefully check that the edge of the filter is in the internal groove of the filter mounting. Fit pre-filter SR 221 in the pre-filter holder...
- Page 5 Drawn up by: 2009-01-20 / RK Revision: OI01H-1218 SR 200 Reviewed: 2017-02-13 / PA Page: 5 of 17 3. Donning/Doffing 3.1 To fit the filter in a mask Turn the filters into the mask. Screw until the thread reaches the seal at the bottom of the filter connection, then another 45 degrees.
- Page 6 Drawn up by: 2009-01-20 / RK Revision: OI01H-1218 SR 200 Reviewed: 2017-02-13 / PA Page: 6 of 17 The membranes are consumables and must be replaced if there are any signs of damage or ageing. Check that the surface at the bottom of the filter connection is in good condition.
- Page 7 Drawn up by: 2009-01-20 / RK Revision: OI01H-1218 SR 200 Reviewed: 2017-02-13 / PA Page: 7 of 17 3.3 Putting the mask on Slacken the four elastic straps by moving the strap holders forward, at the same time pulling the straps.
- Page 8 Drawn up by: 2009-01-20 / RK Revision: OI01H-1218 SR 200 Reviewed: 2017-02-13 / PA Page: 8 of 17 Tension the elastic straps in pairs by pulling the free strap ends towards rear. Adjust the fit of the mask on your face, so that it fits firmly but comfortably.
- Page 9 Drawn up by: 2009-01-20 / RK Revision: OI01H-1218 SR 200 Reviewed: 2017-02-13 / PA Page: 9 of 17 4.1 Cleaning Sundström cleaning tissues (SR 5226) which clean and disinfect are recommended for daily care. If the mask is heavily soiled, use warm water (up to 40 °C).
- Page 10 Drawn up by: 2009-01-20 / RK Revision: OI01H-1218 SR 200 Reviewed: 2017-02-13 / PA Page: 10 of 17 Remove the head harness. If necessary, remove the visor. See action 4.4.1 Clean as described above. Critical areas are the exhalation membranes and the valve seats which must have clean and undamaged contact surfaces.
- Page 11 Drawn up by: 2009-01-20 / RK Revision: OI01H-1218 SR 200 Reviewed: 2017-02-13 / PA Page: 11 of 17 4.4.1 To change the visor The visor is mounted in a groove running around the visor opening of the outer mask and is held in place by one upper and one lower frame half.
- Page 12 Drawn up by: 2009-01-20 / RK Revision: OI01H-1218 SR 200 Reviewed: 2017-02-13 / PA Page: 12 of 17 Markings are made to show the centres of the visor, frame halves and mask. Press the new visor into the groove, making sure that the centre markings are in line.
- Page 13 Drawn up by: 2009-01-20 / RK Revision: OI01H-1218 SR 200 Reviewed: 2017-02-13 / PA Page: 13 of 17 Fit the screws and tighten them alternately until the two halves of the frame are firmly in contact. Carry out leakage testing in accordance with section 2.6.1.
- Page 14 Drawn up by: 2009-01-20 / RK Revision: OI01H-1218 SR 200 Reviewed: 2017-02-13 / PA Page: 14 of 17 4.4.3 To change the exhalation membranes (two) The exhalation membranes are mounted on a fixed dowel on the inside of the valve covers on each side of the outer mask.
- Page 15 Drawn up by: 2009-01-20 / RK Revision: OI01H-1218 SR 200 Reviewed: 2017-02-13 / PA Page: 15 of 17 4.4.4 To change the head harness The head harness can be ordered as a spare part only as a complete harness. Snap the (six) strap holders of the head harness off the mask strap mountings.
- Page 16 Drawn up by: 2009-01-20 / RK Revision: OI01H-1218 SR 200 Reviewed: 2017-02-13 / PA Page: 16 of 17...
- Page 17 Drawn up by: 2009-01-20 / RK Revision: OI01H-1218 SR 200 Reviewed: 2017-02-13 / PA Page: 17 of 17...
Need help?
Do you have a question about the SR 200 and is the answer not in the manual?
Questions and answers