Sundstrom SR 200 Airline Operating Instruction
Hide thumbs
Also See for SR 200 Airline:
- Instructions for use manual (133 pages) ,
- User instruction (28 pages) ,
- Operation instruction manual (25 pages)

Related Manuals for Sundstrom SR 200 Airline


Summary of Contents for Sundstrom SR 200 Airline
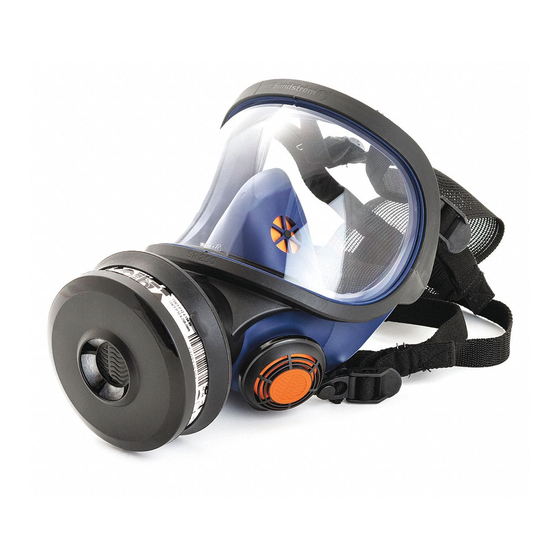
- Page 1 Drawn up by: 2010-11-15 / RK OI03H-1018 Revision: Reviewed: 2014-07-22 / PA SR 200 Airline Page: 1 of 24 Operating instruction SR 200 Airline...
-
Page 2: General Information
EN 14594:2005 class 4A/4B. The unique feature of the SR 200 Airline is the scope it provides for filter back up. SR 200 can be used in three different configurations. - Page 3 Reviewed: 2014-07-22 / PA SR 200 Airline Page: 3 of 24 2.1 Unpacking SR 200 Airline 2.2 Packing list Check that the equipment is complete in accordance with the packing list and that no transport damage has occurred. Packing list: •...
- Page 4 Drawn up by: 2010-11-15 / RK OI03H-1018 Revision: Reviewed: 2014-07-22 / PA SR 200 Airline Page: 4 of 24 …and exhalation membranes and their seats. The membranes are consumables and must be replaced if there are any signs of damage or ageing.
- Page 5 Drawn up by: 2010-11-15 / RK OI03H-1018 Revision: Reviewed: 2014-07-22 / PA SR 200 Airline Page: 5 of 24 Check that the seal at the bottom of the filter connection is in good condition. Check the condition of the head harness.
- Page 6 Drawn up by: 2010-11-15 / RK OI03H-1018 Revision: Reviewed: 2014-07-22 / PA SR 200 Airline Page: 6 of 24 Turn the control valve knob anti-clockwise as far as it will go, in order to throttle the air flow rate to a minimum.
- Page 7 Drawn up by: 2010-11-15 / RK OI03H-1018 Revision: Reviewed: 2014-07-22 / PA SR 200 Airline Page: 7 of 24 2.4 Putting the equipment on Belt with control valve Put the belt on and adjust the length. Arrange the control valve in a way that...
- Page 8 Drawn up by: 2010-11-15 / RK OI03H-1018 Revision: Reviewed: 2014-07-22 / PA SR 200 Airline Page: 8 of 24 Filter During work in atmospheres containing both particulates and gases/vapours (such as spray painting) the particulate filter and chemical cartridge should be combined.
- Page 9 Drawn up by: 2010-11-15 / RK OI03H-1018 Revision: Reviewed: 2014-07-22 / PA SR 200 Airline Page: 9 of 24 Pre-filter prevents premature clogging of the main filter. The pre-filter holder prevents damage to the main filter. N.B. The pre-filter is a pre-filter only, and cannot be used as a substitute for particulate filter.
- Page 10 Drawn up by: 2010-11-15 / RK OI03H-1018 Revision: Reviewed: 2014-07-22 / PA SR 200 Airline Page: 10 of 24 • Hold the face piece firmly in place, raw a deep breath and hold your breath for ten seconds. • If the fit is good, the mask will be pressed against your face.
-
Page 11: Mask - Fitting
Drawn up by: 2010-11-15 / RK OI03H-1018 Revision: Reviewed: 2014-07-22 / PA SR 200 Airline Page: 11 of 24 Mask - Fitting Remove any hood, glasses or ear protection from head. Slacken the four elastic straps by moving the strap holders forward, at the same time pulling the straps. -
Page 12: Airflow - Rate
Drawn up by: 2010-11-15 / RK OI03H-1018 Revision: Reviewed: 2014-07-22 / PA SR 200 Airline Page: 12 of 24 Tension the elastic straps in pairs by pulling the free strap ends towards rear. Adjust the fit of the mask on your face, so that it fits firmly but comfortably. - Page 13 Drawn up by: 2010-11-15 / RK OI03H-1018 Revision: Reviewed: 2014-07-22 / PA SR 200 Airline Page: 13 of 24 2.5 Taking the facepiece off When using backup-filter Remove sealing cover if fitted. Disconnect the compressed air hose from the control valve.
- Page 14 Drawn up by: 2010-11-15 / RK OI03H-1018 Revision: Reviewed: 2014-07-22 / PA SR 200 Airline Page: 14 of 24 Pull head harness forward over your head and remove the mask. When using the sealing plug Leave the polluted work area and then take the equipment off.
- Page 15 Drawn up by: 2010-11-15 / RK OI03H-1018 Revision: Reviewed: 2014-07-22 / PA SR 200 Airline Page: 15 of 24 Releasing the compressed air tube / breathing hose Both couplings are of safety type and are released in two stages. Push the coupling towards the nipple.
- Page 16 Drawn up by: 2010-11-15 / RK OI03H-1018 Revision: Reviewed: 2014-07-22 / PA SR 200 Airline Page: 16 of 24 Proceed as follows: Remove the adapter/filter. Remove the covers for the exhalation valves and remove the membranes (two) Remove the inhalation membranes (three) Remove the head harness.
-
Page 17: Maintenance Schedule
Drawn up by: 2010-11-15 / RK OI03H-1018 Revision: Reviewed: 2014-07-22 / PA SR 200 Airline Page: 17 of 24 4.2 Storage Store the equipment in Sundström storage box SR 344 in temperature from -20 °C to +40 °C. 4.3 Maintenance schedule... - Page 18 Drawn up by: 2010-11-15 / RK OI03H-1018 Revision: Reviewed: 2014-07-22 / PA SR 200 Airline Page: 18 of 24 Carefully prise the top part of the mask off the visor, and remove the visor from the lower groove. Take this opportunity to clean the groove, if necessary.
- Page 19 2010-11-15 / RK OI03H-1018 Revision: Reviewed: 2014-07-22 / PA SR 200 Airline Page: 19 of 24 Carefully prise the top half of the face piece over the visor and make sure that the visor is in the groove in the mask.
- Page 20 Drawn up by: 2010-11-15 / RK OI03H-1018 Revision: Reviewed: 2014-07-22 / PA SR 200 Airline Page: 20 of 24 4.4.3 To change the inhalation membranes (three) One membrane is in the centre of the inner mask on a fixed dowel.
- Page 21 Drawn up by: 2010-11-15 / RK OI03H-1018 Revision: Reviewed: 2014-07-22 / PA SR 200 Airline Page: 21 of 24 Prise off the membranes. Press the new membranes onto the dowels. Carefully check that the membranes are in contact with the valve seats all round.
- Page 22 Drawn up by: 2010-11-15 / RK OI03H-1018 Revision: Reviewed: 2014-07-22 / PA SR 200 Airline Page: 22 of 24 Mounting of peel-offs SR 343 / SR 353 for PC-visor. Remove the seal on the 2 adhesives. Attach one at a time.
- Page 23 Drawn up by: 2010-11-15 / RK OI03H-1018 Revision: Reviewed: 2014-07-22 / PA SR 200 Airline Page: 23 of 24...
- Page 24 Drawn up by: 2010-11-15 / RK OI03H-1018 Revision: Reviewed: 2014-07-22 / PA SR 200 Airline Page: 24 of 24...
Need help?
Do you have a question about the SR 200 Airline and is the answer not in the manual?
Questions and answers