Advertisement
Tools Needed
1. Cordless drill
Tools Needed
2. Cordless impact wrench
3. 7/32" drill bit
1.
Cordless drill
4. Stud finder
2.
Cordless impact wrench
5. 1/2" open-ended wrench
3.
7/32" drill bit
6. 7/16" open-ended wrench
4.
Stud finder
7. 1/2" socket
5.
7/16" open-ended wrench
8. 9/16" open-ended wrench
6.
1/2" open-ended wrench
9. 9/16" socket
7. 1/2" socket
8.
9/16" open-ended wrench
10. Socket wrench
9.
9/16" socket & ratchet
11. 1/8" Allen wrench
10. 1/8" Allen wrench
12. Tape measure
11. Tape measure
Measure and Mark Studs
WARNING: Be sure that you are clear of any electrical wires and/or components before drilling
WARNING: Be sure that you are clear of any electrical wires and/or components before drilling into
into studs. If you are unsure of any hidden wiring, please consult a qualified electrician.
studs. If you are unsure of any hidden wiring, please consult a qualified electrician.
1. Locate studs in the wall using a stud finder.
1. Locate studs in the wall using a stud finder.
a. If studs are 16" on center, proceed with instructions.
b. If studs are not 16" on center, a stringer board will be needed. When attaching a stringer board for
a. If studs are 16" on center, proceed with instructions.
the Incline Folding Bench, be sure that it is at least 8" tall, and long enough to be drilled into two
studs. (Customer Service should be consulted if recommendations are needed for attaching a
b. If studs are not 16" on center, a stringer board will be needed. When attaching a stringer
stringer board.)
board for the Incline Folding Bench, be sure that it is at least 8" tall, and long enough to
2. From the floor, measure and mark the wall at 9 1/4" and 13 3/4" on the two located studs.
3.
Drill pilot holes a minimum of 2" deep on those marks using a 7/32" drill bit.
be drilled into two studs. (Contact customer service if you have questions.)
2. From the floor, measure and mark the wall at 9 1/4" and 13 3/4" on the two located studs.
3. Drill pilot holes a minimum of 2" deep on those marks using a 7/32" drill bit.
Patent Pending
Thank you for purchasing this product from PRx Performance
Read Instructions in their entirety. For any questions please call us: 701.566.0452
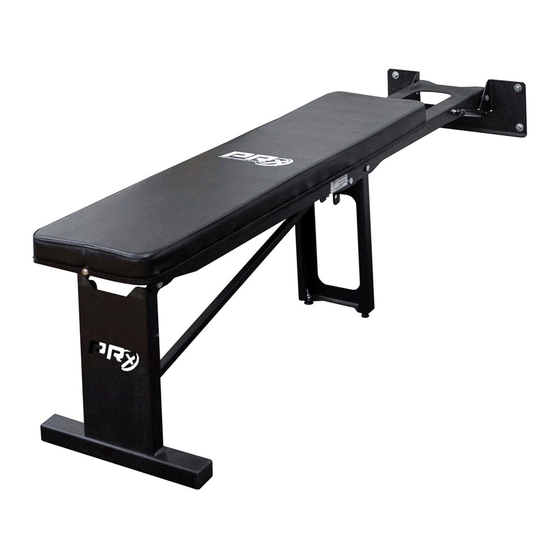
Incline Folding Bench
Incline Folding Bench
Installation Instructions
Installation Instructions
support@prxperformance.com 701-566-0452
support@prxperformance.com
P P E E R R F F O O R R M
M A A N N C C E E
Included Hardware
(4) - 5/16"x2 1/2"
Lag Bolts
(2) - Serrated Flange Nuts
(2) -3/8"
Bushings
(2) - 3/8" Hex
Bolts
Measure and Mark Studs
Included Hardware
(4) - 5/16" Flat Washers
(4) #10-32x7/16" Phillips FHS
(2) -3/8" Flat
Washers
(2) Side Handles
(2) -3/8" Nylock
Nuts
(2) Leveling Feet
1
1
Advertisement
Table of Contents

Related Manuals for PRx Performance Profile Incline Folding Bench


Summary of Contents for PRx Performance Profile Incline Folding Bench
- Page 1 P P E E R R F F O O R R M M A A N N C C E E Thank you for purchasing this product from PRx Performance Read Instructions in their entirety. For any questions please call us: 701.566.0452...
- Page 2 the hardware pack. (Figures 4&5) Leg Assembly Assemble Bench Components Assemble Bench Components 1. Remove the bench components from their boxes (Figure 1). WARNING: Bench components are heavy and may require 2 people to lift. Remove the bench components from their boxes. (Figure 1) WARNING: Bench components are 2.
- Page 3 aligning the pilot holes to the holes in the wall bracket. (Figure 6) Make sure the bench remains fully extended. Keeping the wall bracket aligned wrench, screw your lag bolts (with washers) into the pilot holes. (In the event th Position Bench Against Wall please contact customer service for a replacement.) 1.
- Page 4 5. Retract the pins by pulling on the incline setting latch handle (Figure 8). 6. While keeping the locating pins retracted, slide the seat assembly forward until they align with the holes (Figure 8). 7. Flip the support bracket up and attach it to the back of the backrest (Figure 9). Figure 8 Figure 9 (701) 566-0452...
- Page 5 Attach Shocks and Level Attach Shocks and Level 1. Place bench in the upright stored position against the wall (Figure 11). The help of a second 1. Bench can now be placed in the upright stored position against the wall.(Fig.9) The help of a second person may be needed at this time, as the bench will be fairly heavy until the shocks are person may be needed at this time, as the bench will be fairly heavy until the shocks are installed.
- Page 6 Incline Bench User Instructions Incline Bench User Instructions Incline Bench User Instructions 1. Grab the backrest containment latch at the head end of the bench, pull it out, and lift up. 1. Grab the Backrest Containment Latch at the head end of the bench, pull it out, and lift up. The seat will automatically move back to the inclined position as you lift, and the backrest will simultaneously slide up The seat will automatically move back to the inclined position as you lift, and the backrest 1.
- Page 7 LIMITED LIFETIME WARRANTY: This product is warranted by PRx Performance LLC, to the original user- LIMITED LIFETIME WARRANTY: This product is warranted by PRx Performance LLC, to the original user-owner only, against owner only, against defective materials or workmanship for the lifetime of the product. During the warranty defective materials or workmanship for the lifetime of the product.
- Page 8 Incline Bench User Instructions Adjust Position of Bench within the Rack With your bench and your rack both deployed, check to make sure the bench is far enough in or out of the rack so that you are comfortable taking the barbell on and off the rack. WARNING: Make sure the barbell is empty while testing the position of the bench to the rack.
Need help?
Do you have a question about the Profile Incline Folding Bench and is the answer not in the manual?
Questions and answers