Interlogix TruVision TVB-2403 Configuration Manual
Hd-tvi 1080p camera
Hide thumbs
Also See for TruVision TVB-2403:
- Configuration manual (10 pages) ,
- Installation manual (16 pages) ,
- Installation manual (3 pages)

Related Manuals for Interlogix TruVision TVB-2403


Summary of Contents for Interlogix TruVision TVB-2403
- Page 1 TruVision HD-TVI 1080P Camera Configuration Manual P/N 1073162-EN • REV A • ISS 31MAR16...
- Page 2 Copyright © 2016 United Technologies Corporation. All rights reserved. Interlogix is part of UTC Climate, Controls & Security, a unit of United Technologies Corporation. Trademarks and The TruVision and Interlogix names and logos are trademarks of patents United Technologies. Other trade names used in this document may be trademarks or registered trademarks of the manufacturers or vendors of the respective products.
-
Page 3: Table Of Contents
Content Introduction 2 HD-TVI 1080P IR Bullet Cameras 2 HD-TVI 1080P IR Dome Cameras 2 HD-TVI 1080P Box Cameras 2 Programming 3 Using the camera Menu button 3 Using a TVI output 3 TVS-C200 CVBS OSD controller 4 Menu trees 6 TVB-2403/4403 and TVD-2403/4403 cameras 6 TVC-2401/4401 cameras 6 TVB-2404/4404, TVB-2405/4405, TVD-2404/4404 and TVD-... -
Page 4: Introduction
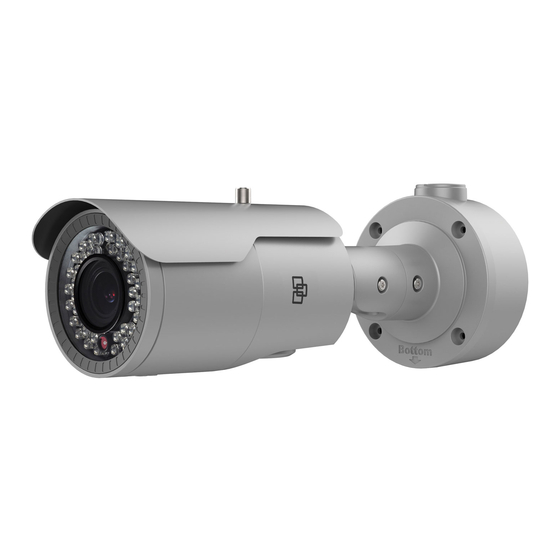
Introduction This is the configuration manual for following camera models: HD-TVI 1080P IR Bullet Cameras TVB-2403 (1080P TVI Bullet Camera, Fixed Lens, IR, PAL) TVB-4403 (1080P TVI Bullet Camera, Fixed Lens, IR, NTSC) TVB-2404 (1080P TVI Bullet Camera, VF Lens, IR, PAL) ... -
Page 5: Programming
Programming Once the camera hardware has been installed, the camera can be configured using the built-in OSD button, a TVI DVR menu, or the OSD TVS-C200 controller (purchased separately). Note: TVC-2401/4401 does not support the TruVision TVS-C200 OSD controller. Using the camera Menu button For the cameras with built-in OSD button, please press the Menu button to call... -
Page 6: Tvs-C200 Cvbs Osd Controller
For more details, refer to the TVI DVR user manual. TVS-C200 CVBS OSD controller Interlogix offers two different versions of the OSD controller: the TVS-C100 controller and the TVS-C200 controller. Please choose the corresponding controller by referring to the product datasheets. - Page 7 Table 2: Using the OSD control button Button direction Description Moves the cursor upward to select an item Left Moves the cursor left to select or adjust the parameters of the selected item. Right Moves the cursor to the right to select or adjust the parameters of the selected item.
-
Page 8: Menu Trees
Menu trees The menu trees of the TruVision 1080P TVI cameras are shown below. TVB-2403/4403 and TVD-2403/4403 cameras TVC-2401/4401 cameras TruVision HD-TVI 1080P Camera Configuration Manual... -
Page 9: Tvb-2404/4404, Tvb-2405/4405, Tvd-2404/4404 And Tvd- 2405/4405 Cameras
TVB-2404/4404, TVB-2405/4405, TVD-2404/4404 and TVD- 2405/4405 cameras TVB-2406/4406 cameras TruVision HD-TVI 1080P Camera Configuration Manual... -
Page 10: Configuration
Configuration This section describes how to set up the menu settings. Video Out Select PAL or NTSC. Languages Select one of the languages available: English, Japanese, CHN1, CHN2, Korean, German, French, Italian, Spanish, Polish, Russian, Portuguese, Dutch, Turkish, Hebrew or Arabic. Note: The TVB-2406/4406 camera only supports English and Chinese. -
Page 11: Exposure
ZOOM SPEED Move the cursor left/right to adjust the zoom speed. PRESET Set the lens pre-set, delete or call pre-configured lens preset. A total of 64 presets can be set. FOCUS MODE Select Manual, Auto, or Trigger mode. Auto mode: The camera focuses automatically. Manual mode: Click Zoom+ and Zoom- to focus. -
Page 12: Backlight
D-WDR Digital Wide Dynamic Range. Select ON/OFF to enable /disable the function. It helps to balance the brightness level of the whole image. Note: When D-WDR is enabled, the brightness function is disabled. DEFOG During foggy or rainy weather, the camera image becomes hazy. The defog function can increase the image contrast and brightness level to show more detail. -
Page 13: White Balance
value, the brighter the image. WDR OFFSET: Set the offset from 0 to 100. The higher the value, the brighter the dark area of the image. HSBLC Highlight Suppression Backlight Compensation. Use this function to mask strong light sources across a scene and improve image quality. -
Page 14: Day & Night
MANUAL Adjust the white balance by customizing the Blue and Red value, which range from 1 to 100. MANUAL WB BLUE ---|------ 51 ---|------ 50 RETURN RET Select ATW for the white balance to be automatically adjusted according to the scene illumination. AWC→SET If enabled, this function will only adjust the WB once. - Page 15 The image switches from color to B/W or from B/W to color automatically according to the light conditions. TRIGGER This function is only available with the TVB-2406/4406 camera. Select Enable/Disable to turn the IR LED ON/OFF. Noise reduction (NR) reduces noise, especially in low light conditions, and improves image quality.
-
Page 16: Special
Special Use this menu to configure the camera name, digital effect settings for the image, motion detection, privacy mask, dead pixel correction, as well as check the camera version. Select the following options under the Special menu: SPECIAL 1. CAM TITLE ... - Page 17 V-FLIP: Image flips 180 degrees vertically. ROTATE: Image flips 180 degrees both horizontally and vertically. D-ZOOM: Set the digital zoom ON to enlarge the image by creating pixels through interpolation. D-ZOOM 1. D-ZOOM x 2.0 2. PAN & TILT 3.
- Page 18 from 0 to 60. The higher the value, the higher the sensitivity level to trigger an alarm. Note: Branch movement, rain drops, snowflakes, flashing lights in the defined area may be detected and trigger a false alarm. In such cases, adjust the sensitive value. MOTION VIEW: Enabled this feature to trigger a flickering transparent red mosaic on the detected area when motion is detected.
-
Page 19: Adjust
AUTO: Detect and repair defective pixels automatically. ON: Repair defective pixels manually, configurable range [0-255], select higher value to repair the defective pixels easily, OFF: Disable DPC function. STATIC DPC: Detect and correct defective pixels manually. Select On/Off to enable/disable. STATIC DPC 1.START 2.LEVEL... -
Page 20: Reset
SHARPNESS Adjust the value from 0 to 15. The higher the value, the clearer and sharper the image appears. MONITOR Select CRT or LCD. CRT: Set the black level [-30 to +30], blue gain [-50 to +50], and red gain [-50 to +50]. ----|----+0 1.
Need help?
Do you have a question about the TruVision TVB-2403 and is the answer not in the manual?
Questions and answers