Table of Contents
Advertisement
Quick Links
Advertisement
Table of Contents

Related Manuals for Viotek RFI25CBA


Summary of Contents for Viotek RFI25CBA
- Page 1 RFI25CBA GAMING MONITOR USER MANUAL In order to continue serving our customers and providing the best products, our product information including our user manuals may receive updates from time to time. Please check our website for the latest user manuals and product materials.
-
Page 3: Table Of Contents
Table of Contents Section 1: Safety Precautions..............4 Section 2: Box Contents .................5 Section 3: Product Overview ..............6 3.1 – Rocker Button ................6 3.2 – Monitor Ports ................6 Section 4: Stand Installation ..............7 Section 5: Wall Mounting................9 Section 6: Basic Operation ..............10 Section 7: Indicator Light ...............10 Section 8: OSD ..................11 8.1 –... -
Page 4: Section 1: Safety Precautions
VIOTEK shall not be held responsible for injury or damage of products or persons due to failure to adhere to the aforementioned precautions or any others noted hereafter. -
Page 5: Section 2: Box Contents
Section 2: Box Contents Monitor x 1 Stand Stem x 1 Stand Base x 1 Screws x 4 Power Adapter x 1 DP Cable x 1 Screwdriver x 1 (DC 19V, 3.42A) Type-C Cable x 1 User Manual x 1... -
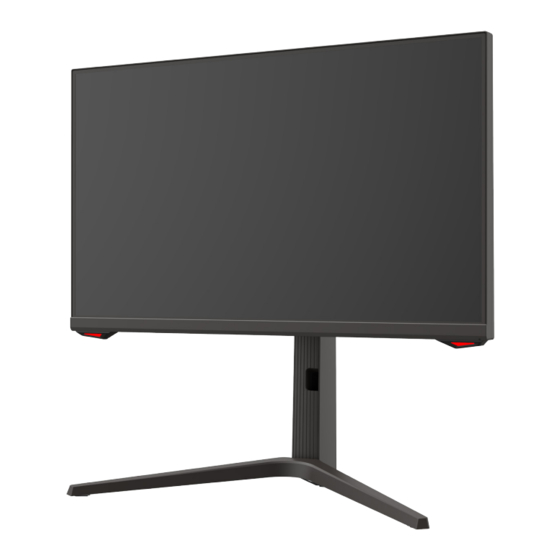
Page 6: Section 3: Product Overview
Section 3: Product Overview 3.1 – Rocker Button Press Rocker up: Crosshairs shortcut; OSD menu navigation. Power Button: Turn off monitor (longpress); put monitor to sleep (quick- press) Press Rocker to the left: RGB Range/Port Selection shortcut. When connecting a Type-C device (phone, laptop, etc.) and using the monitor in portrait mode (vertical position), long-press the Rocker to the left to open the Port Selection shortcut menu. -
Page 7: Section 4: Stand Installation
Section 4: Stand Installation Keep the foam underneath the monitor while attaching the stand. 1. Open the package, take out the product with foam still attached, and gently place it on a desktop or table. Stand Base Stand Stem Foam Monitor Foam 2. - Page 8 4. Place the monitor on your desktop or table after completing installation. To avoid damage, do not touch the screen when moving the monitor. 5. Carefully adjust monitor’s height, angle and/or orientation as desired. Height adjust 4.72 ±0.20 in. (120 ±5 mm) Orientation adjust 90 Pivot adjust 30 Tilt adjust -5~20...
-
Page 9: Section 5: Wall Mounting
Section 5: Wall Mounting This monitor includes screws that may only be used when attaching the monitor to a mount. No mount or mounting accessory is included. 1. Open the package, take out the product with foam still attached, and gently place it on a desktop or table. -
Page 10: Section 6: Basic Operation
GPUs that use AMD® FreeSync™ or NVIDIA® G-Sync™. The feature is off on VIOTEK monitors by default and must be manually enabled in the monitor’s OSD (see Section 8: OSD). To use this feature, the connecting device must be compatible with adaptive sync (FreeSync and/or G-Sync);... -
Page 11: Section 8: Osd
Section 8: OSD The On-Screen Display (OSD) Menu may be used to adjust your monitor’s settings and appears on screen after turning on the monitor and pressing Rocker to the right. When using the monitor for the first time, settings will automatically adjust to optimal settings according to your computer’s configuration. -
Page 12: Osd Menu Functions
8.1 – OSD Menu Functions Main Menu Sub-Menu Options Description Input Source Type-C NONE Switch to USB Type-C signal input NONE Switch to DP signal input HDMI 1 NONE Switch to HDMI 1 signal input HDMI 2 NONE Switch to HDMI 2 signal input Brightness/ Brightness 0~100... - Page 13 Main Menu Sub-Menu Options Description Picture Sharpness 0~100 Adjust the clarity and visibility of the Quality edges in the image Setting Response Off, High, Activate and adjust overdrive Time Middle, Low function to decrease response time Noise Off, High, Reduce the interference of image Reduction Middle, Low noise caused by signal source...
-
Page 14: Section 9: Port Selection
Main Menu Sub-Menu Options Description Language English, Set OSD language 简体中文, 한국어, Русский, Español, 日本語, Français 0-100 Adjust the OSD’s horizontal position H-Position 0-100 Adjust the OSD’s vertical position V-Position 0-100 Set the OSD’s overall transparency Transparency OSD Time 5-100 Set how long the OSD remains open after non-use OSD Rotation Normal, 90, 180,... -
Page 15: Section 10: Eco Modes And Gameplus Switching
• The monitor can provide power to your connected mobile device when connected via Type-C. • When using the monitor in vertical position (portrait mode) for the first time, set a proper resolution ratio on your computer; otherwise, the monitor may not display properly. •... -
Page 16: Section 11: Troubleshooting
Section 11: Troubleshooting 11.1 – General Problems The screen is blank • Press the power button to turn the monitor on. • Confirm the brightness and contrast settings are set normally. • Check if the indicator light is flashing. If so, there is no signal from your video source. -
Page 17: Pip (Picture In Picture) Input Information
Dim image • Adjust the brightness and contrast ratio. Image jitter/moire pattern • Nearby electric equipment may be interfering with the monitor. Light indicator is on or flashing, but there is no image displayed on screen • Check if the monitor power is on. •... -
Page 18: Section 12: Cleaning
PBP Phone Mode It is recommended to set It is recommended the first panel to 1440 x to set the phone 1080 resolution. panel to 480 x 1080 resolution. At this resolution, tearing and visual deformation should be minimized. Section 12: Cleaning Take the following steps when cleaning the monitor. -
Page 19: Section 13: Information
Section 13: Information 13.1 – Specifications Item Detail Model Number RFI25CBA Screen Size 24.5’’ Viewing Angle 178°/178° (H/V) Aspect Ratio 16:9 Resolution 1920 x 1080p Backlight E-LED Typical Brightness 250 cd/m2 (min); 300cd/m2 (max) Default Color Temperature 6500 Colors sRGB 98%; NTSC 85%... -
Page 20: Resolution Compatibility For Dp
13.2 – Resolution Compatibility for DP System Requirements below are the minimum system requirements for your RFI25CBA monitor. The requirements are recommended in order to properly use all of the monitor’s features and ensure high-quality picture. Minimum Requirements Operating System: Windows® 7 / Windows® 8 / Windows® 10 64-bit (latest service pack) or higher, Processor (CPU): Intel®... - Page 21 Important: Do not disassemble the Product. Disassembling the Product will void this Warranty. Only WP or a party expressly authorized by WP should perform service on this Product. DISCLAIMER OF WARRANTY: THE REMEDIES DESCRIBED ABOVE ARE YOUR SOLE AND EXCLUSIVE REMEDIES AND OUR ENTIRE LIABILITY FOR ANY BREACH OF THIS LIMITED WARRANTY.
- Page 23 COPYRIGHT © 2021 VIOTEK. ALL RIGHTS RESERVED.
Need help?
Do you have a question about the RFI25CBA and is the answer not in the manual?
Questions and answers