Table of Contents
Advertisement
Quick Links
Advertisement
Table of Contents

Related Manuals for Kolpin Outdoors KAWASAKI MULE QUICK-MOUNT 4500


Summary of Contents for Kolpin Outdoors KAWASAKI MULE QUICK-MOUNT 4500
- Page 1 KAWASAKI MULE ™ QUICK-MOUNT 4500 LB WINCH KIT P/N 26-2000 QUICK-MOUNT WINCH KIT Assembly / Owner’s Manual APPLICATION: Kawasaki MULE ™ Pro-FX / FXT / FXR / DX / DXT Verify accessory fitment at Kolpin.com Instr 26-2000 Rev 01 2020-09 Page 1 of 12...
-
Page 2: Before You Begin
INTRO Thank you for purchasing Kolpin engineered products. With proper installation, usage, care, and maintenance, your Kolpin product will last for years to come. BEFORE YOU BEGIN • Read and understand the entire installation manual, including all installation instructions, operating instructions, and safety warnings and guidelines before installing or operating your accessory. -
Page 3: Kit Contents
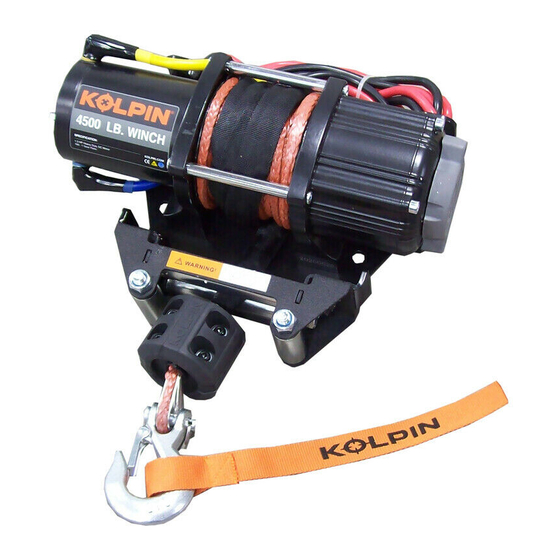
KIT CONTENTS PART NUMBER PART DESCRIPTION Winch Assembly – 4500 lb 3-Wire Splitter Winch Switch 25-0700 UTV Dash Switch Harness Remote Switch Screw – Torx ® Pan Head HI/LO, 10 x 3/4 7512026 Washer – Flat, M5 7556724 Cable Tie 7080492 Winch Bracket Nut –... - Page 4 WINCH DETAIL PART DESCRIPTION PART NUMBER Kolpin ® Winch Strap, Orange 85071 Roller Hawse Hook RPR0108 Winch Stop 85080 Kolpin ® Synthetic Rope 85064 Winch 4500 lb 25–9450R Cable – Winch, Blue 6 GA (241 mm) Cable – Winch, Yellow 6 GA (241 mm) Cable –...
-
Page 5: Accessory Installation
INSTALLATION INSTRUCTIONS VEHICLE PREPARATION ACCESSORY INSTALLATION GENERAL WINCH INSTALLATION 1. Park vehicle on a flat surface. 1. Make sure wire routing and connections are as shown and make necessary adjustments. 2. Shift vehicle transmission to NEUTRAL and set parking brake. 3. - Page 6 4. Put winch in position. 6. Attach winch power cables to parking brake cable / transmission shifting cable bundle with two cable ties 5. Install winch onto vehicle frame with two winch brackets and four winch bracket nuts . Torque 7.
- Page 7 2. Remove and keep three dash panel fasteners on 4. Cut out blank on dash panel. top of panel. Release dash panel from front dash. 3. Remove and keep two fasteners from hood access panel. Lift off hood access panel, releasing the two top tabs, and set aside.
- Page 8 6. Connect dash harness to switch. 10. Install two screws and two washers to attach remote to dashboard. Tighten until fully seated. IMPORTANT Wires must be connected in order shown. • Top “Out” – Green wire • Middle – Red wire •...
-
Page 9: Control Switch Operation
14. Connect remote harness to winch harness. 3. Connect positive and negative battery cables as shown in Owner’s Manual. WARNING When BOTH battery cables are disconnected ALWAYS connect AND tighten red positive (+) battery cable FIRST. Failure to comply will result in a high current electrical arc that may result in battery explosion, if tool touches grounded frame. -
Page 10: Troubleshooting
TROUBLESHOOTING SYMPTOM POSSIBLE CAUSES RECOMMENDED SOLUTION Winch will not operate. Contactor not receiving power. Turn vehicle key ON. Connections between components not in Check connections. Connect wired proper order. handlebar switch connection from vehicle main wire harness directly to contactor to make sure a direct connection will operate the winch. - Page 11 Winch operates in one Defective or stuck contactor. Tap contactor to loosen contacts. direction only. Repair or replace contactor. Defective switch assembly. Replace switch assembly. Replace winch assembly. Defective brake assembly. ELECTRICAL CONNECTION REFERENCE GUIDE Instr 26-2000 Rev 01 2020-09 Page 11 of 12...
-
Page 12: Warranty
Peripheral products such as engines, electric motors, and actuators may carry an original manufacturer’s warranty. Most hardware is general in nature and is easily obtained locally. Be sure to replace with minimum metric class 8.8 specification. Kolpin Outdoors, Inc. Telephone: (763)-478-5800 Toll Free: (877)-956-5746 Fax Number: (800)-245-7569 www.kolpin.com...
Need help?
Do you have a question about the KAWASAKI MULE QUICK-MOUNT 4500 and is the answer not in the manual?
Questions and answers