
Related Manuals for Elba 140-G94


Summary of Contents for Elba 140-G94
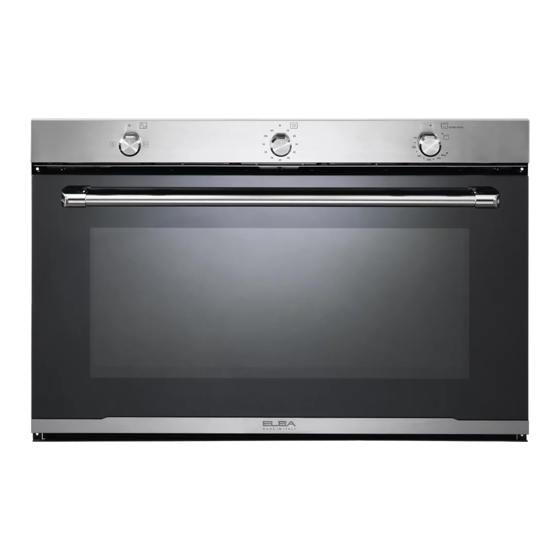
- Page 1 Instructions for the use - Installation advices BUILT-IN GAS OVENS ELBA QUALITY MADE IN ITALY Made in Italy...
- Page 3 Dear Customer, Thank you for having purchased and given your preference to our product. The safety precautions and recommendations within this booklet are for your own safety and that of others. They will also provide a means by which to make full use of the features offered by your appliance.
- Page 4 IMPORTANT SAFETY PRECAUTIONS AND RECOMMENDATIONS IMPORTANT: This appliance is designed and manufactured solely for the cooking of domestic (household) food and is not suitable for any non domestic application and therefore should not be used in a commercial environment. The appliance guarantee will be void if the appliance is used within a non domestic environment i.e.
- Page 5 • CAUTION: this appIiance must only be installed in a permanently ventilated room in compliance with the applicable regulations. • Do not operate your appliance by means of an external timer or separate remote-control system. • Do not carry out cleaning or maintenance operations on the appliance without having previously disconnected it from the electric power supply.
- Page 6 • WARNING: During use the appliance and its accessible parts become hot; they remain hot for some time after use. Care should be taken to avoid touching heating elements – inside the oven. The door is hot, use the handle. –...
- Page 7 • Clean the oven regularly and do not allow fat or oils to build up in the oven base or tray. Remove spillages as soon as they occur. • Do not stand on the open oven door. • Always stand back from the appliance when opening the oven door to allow steam and hot air to escape before removing the food.
- Page 8 CONTROL PANELS Fig. 1.1 Fig. 1.2 Fig. 1.3 Fig. 1.4...
- Page 9 CONTROLS DESCRIPTION Gas grill control knob Gas oven thermostat control knob Depending on the models: Oven light control knob Oven light / rotisserie control knob Oven light / fan motor control knob Oven light / rotisserie / fan motor control knob Oven light / rotisserie and fan motor / fan motor control knob Depending on the models: 60’...
- Page 10 HOW TO USE THE OVEN OPERATING PRINCIPLES ATTENTION: Heating and cooking in the gas oven are The oven door becomes very hot obtained in the following ways: during operation and very hot steam a. by normal convection goes out from the area below the The heat is produced by the oven gas control panel.
- Page 11 IMPORTANT NOTES: THERMOSTAT • Do not use the appliance in case of The numbers printed on the control panel or power failure or if the cooling fan on the knob (fig. 2.2) indicate the increasing motor is damaged. The appliance oven temperature value (see table below).
- Page 12 LIGHTING OF OVEN BURNER During and after use of the oven, IMPORTANT: The oven door must be certain parts will become very hot. open during this operation. Keep children away. To light the oven burner: ATTENTION: case manual 1 – Open the oven door to the full lighting, never turn the thermostat extent.
- Page 13 GRILL BURNER IGNITION OF THE GRILL BURNER The grill is controlled by a gas tap assuring ATTENTION: Never turn the control the opening and the closing of the gas knob before opening the oven door. supply. To ignite the grill burner: Turning the knob, so that the indicator line Open the oven door to the full points to the symbols printed on the panel,...
- Page 14 IMPORTANT NOTE (only for the “fan assisted” models - models having also the position ): It is not possible to use the fan motor in combination with the gas grill; a safety device switches off the fan motor when the gas grill control knob is turned on grill position.
- Page 15 COOKING WITH GAS OVEN Only for the “fan assisted” models - Once the oven gas burner has been lit, models having also the position close the oven door and preheat the oven for at least 15 minutes. Preheating should always be carried out with the oven empty: remove the trays and racks from the oven cavity.
- Page 16 COOKING WITH FAN ASSISTED For correct use of the gas oven, always GAS OVEN (Only for the “fan assisted” preheat it (bottom burner) for at least models - models having also the 15 minutes. position Preheating should always be carried OVEN BURNER AND FAN MOTOR out with the oven empty: remove the trays and racks from the oven cavity.
- Page 17 USE OF THE GRILL OVEN LIGHT Very important: The grill must always be The oven provides an interior lamp to allow used with the oven door closed. the visual inspection during the cooking. Turn on the grill, as explained in the To light the oven lamp turn the knob (fig.
- Page 18 ROTISSERIE USE OF THE ROTISSERIE (fig. 2.10) (MODELS WITH ROTISSERIE ONLY) • Insert the tray into the lowest rack This is used for spit roasting under the grill holders of the oven and insert the and comprises: rod support into the intermediate rack •...
- Page 19 ALARM, ELECTRIC OR ELECTRONIC CLOCK 60’ ALARM 120’ ALARM (fig. 3.1) (fig. 3.2) The timer is equipped with a time buzzer The timer is equipped with a time buzzer and may be regulated for a maximum and may be regulated for a maximum period of 60 minutes.
- Page 20 MODELS WITH ELECTRIC CLOCK MINUTE MINDER WITH MINUTE MINDER (fig. 3.3) The minute minder function consists only of a buzzer which is automatically activated The electric clock is a device which groups at the end of the set time (max 3 hours). the following functions: To set the minute minder press the “setting •...
- Page 21 ELECTRONIC CLOCK WITH ALARM ELECTRONIC ALARM (fig. 3.4) The alarm program consists only of a The electronic clock is a device which buzzer which may be set for a maximum groups the following functions: period of 99 minutes. To set the time, push the ) or •...
- Page 22 DIGITAL ELECTRONIC CLOCK WITH TIMER (fig. 3.5) CLOCK and TIMER with “ TOUCH CONTROL” KEYS Keys: NOTES: The symbols may vary. simultaneously (for more than 2 seconds): • setting the clock; • setting the timer “ ” and “ ” volume touching once,...
- Page 23 SETTING THE CLOCK When first connected, or after a power failure, the digits will flash on the display. To set the clock, touch the “ MODE ” key, for more than 2 seconds, and then the “ ” or “ ”...
- Page 24 CLEANING AND MAINTENANCE GENERAL ADVICE INSIDE OF OVEN Important: The oven should always be cleaned after Before any operation of cleaning and use when it has cooled down. maintenance disconnect the appliance The cavity should be cleaned using a mild from the electrical supply.
- Page 25 ENAMELLED PARTS GLASS CONTROL PANEL (MODELS WITH GLASS CONTROL PANEL) All the enamelled parts must be cleaned with a sponge and soapy water or other Clean using an appropriate product. non-abrasive products. Always dry thoroughly. Dry preferably with a microfibre or soft Do not use harsh abrasive cleaners or cloth.
- Page 26 OVEN FITTING OUT • Assemble the wire racks to the oven walls using the 2 screws (fig. 4.1). • Slide in, on the guides, the shelf and the tray (fig. 4.2). The shelf must be fitted so that the safety catch, which stops it sliding out, faces the inside of the oven.
- Page 27 REPLACING THE OVEN LIGHTS NOTE: DEPENDING ON YOUR MODEL, YOUR OVEN MAY ONLY HAVE SOME OF THESE LIGHTS) WARNING: Ensure the appliance is switched off before replacing the lamp to avoid the possibility of electric shock. • Let the oven cavity and the heating elements to cool down. •...
- Page 28 REMOVING THE OVEN DOOR The oven door can easily be removed as follows: • Open the door to the full extent (fig. 4.5). • Open the lever “A” completely on the left and right hinges (fig. 4.6). • Hold the door as shown in fig. 4.7. Fig.
- Page 29 REFIT THE DOOR Hold the door firmly (fig. 4.10). Insert the hinge tongues into the slots, making sure that the groove drops into place as shown in the figure 4.11. Open the door to its full extent. Fully close the levers “A” on the left and right hinges, as shown in the figure 4.12. Close the door and check that it is properly in place.
- Page 30 ADVICE for the INSTALLER...
- Page 31 INSTALLATION IMPORTANT • The appliance shall be installed, regulated and adapted to function only by a SUITABLY QUALIFIED TECHNICIAN. Failure to comply with this condition will render the guarantee invalid. • The gas/electrical connection must be executed by a qualified tecnician in compliance with the regulations in force in your country and in observation of the manufacturer’s instructions.
- Page 32 Fig. 5.1a Fig. 5.1b...
- Page 33 FIXING THE OVEN Introduce the oven into the furniture opening and fix it with 4 screws (not supplied) as figure 5.2. It is essential that the oven rests on a surface which will support its weight, as the screw fixing is only complementary. Adjust the hinges of furniture doors adjacent to the oven to allow a 4-5 mm gap between the furniture door and the oven frame.
- Page 34 VENTILATION REQUIREMENTS The appliance must be installed in compliance with applicable local regulations concerning ventilation and the evacuation of exhaust gases. Intensive and prolonged use may require extra ventilation, e.g. opening a window, or more efficient ventilation increasing the mechanical suction power if this is fitted. CHOOSING SUITABLE SURROUNDINGS The room where the gas appliance is to be installed must have a natural flow of air so that the gas can burn (in compliance with applicable local regulations).
- Page 35 GAS SECTION GAS INSTALLATION REQUIREMENTS Important ! • Before installation, make sure that the local distribution conditions (gas type and pressure) and the adjustment of this appliance are compatible. The appliance adjustment conditions are given on the plate or the label. •...
- Page 36 Fig. 6.1 Appliance inlet pipe Floating nut ISO 228-1 (male) 1/2” G cylindrical Gasket Rigid pipe or flexible hose (not supplied with the appliance) Fig. 6.2 Interpose the gasket supplied Fig. 6.3...
- Page 37 ADDITIONAL GAS CONNECTION REQUIREMENTS When connecting the appliance to the gas supply with rigid pipes or a flexible hose, make sure that: • You use rigid pipes or a flexible hose compliant with applicable local regulations. The flexible hose shall be of the correct construction for the type of gas being used and of the correct size to maintain the heat output of the appliance.
- Page 38 GAS MAINTENANCE TABLE FOR THE CHOICE OF THE INJECTORS Nominal Reduced G30 (50 mbar) BURNERS power power Ø injector [kW] [kW] Ring opening [mm] [1/100 mm] Oven 4,70 1,30 1 (*) Grill 3,00 1,50 2 (*) (*) = Reference value AIR VENT NECESSARY FOR GAS COMBUSTION = (2 m /h x kW) BURNERS...
- Page 39 OPERATIONS TO BE EXECUTED FOR THE REPLACEMENT OF THE INJECTORS OF THE OVEN AND GRILL BURNERS Some models are provided with a set of injectors for the various types of gas. If the injectors are not supplied they can be obtained from the “Service Centre”. Select the injectors to be replaced according to the “Table for the choice of the injectors”.
- Page 40 GRILL BURNER • Gently unlock, from the burner, the safety valve probe “V” and the ignition electrode “E” (as indicated in fig. 6.5a). Take care not to damage the probe and the ignition electrode. • Unscrew and remove the burner securing screw “A” (fig. 6.5a). •...
- Page 41 REGULATION OF AIR SUPPLY TO OVEN AND GRILL BURNERS To regulate the air supply it is necessary to remove the burners from their housings (figs. 6.4b - 6.5b). • Using a cross-head screwdriver, slacken the screws “A” securing the air flow regulation collar “B”...
- Page 42 ADJUSTMENT OF THE OVEN BURNER MINIMUM In the minimum position the flame must have a length of about 4 mm and must remain lit even with a brusque passage from the maximum position to that of minimum. The flame adjustment is done in the following way: •...
- Page 43 Flame Flame Flame Flame correct faulty in with excess correct primary air primary air short and sharp flong, yellow clear too blue interior interior blue Flame faulty in cone tending to trembling cone primary air detach CAUSE air regulating correct air regulating Flame with excess tube, too...
- Page 44 ELECTRICAL SECTION • The bi-polar plug must be connected to an outlet connected to the grounding Before effecting any intervention on unit in conformity to security norms. the electrical parts the appliance must be disconnected from the network. • If the oven is to be connected directly to the mains, it must be placed with an omnipolar switch with minimum opening between the contacts of 3 mm...
- Page 45 CONNECTION OF THE POWER SUPPLY CABLE WARNING: If the power supply cable is damaged, it must be replaced only by an authorised service agent in order to avoid a hazard. • Unhook the terminal board cover by inserting a screwdriver into the two hooks “A” (fig. 7.1).
- Page 48 The manufacturer reserves the right to make all modifications to its products deemed necessary for manufacturer commercial reasons at any moment and without prior notice, without jeopardising the essential functional and safety characteristics of the appliances. www.elba-cookers.com Made in Italy Cod. 1105818/GB - ß0...
Need help?
Do you have a question about the 140-G94 and is the answer not in the manual?
Questions and answers