Advertisement
Available languages
Available languages
Quick Links
H-7951
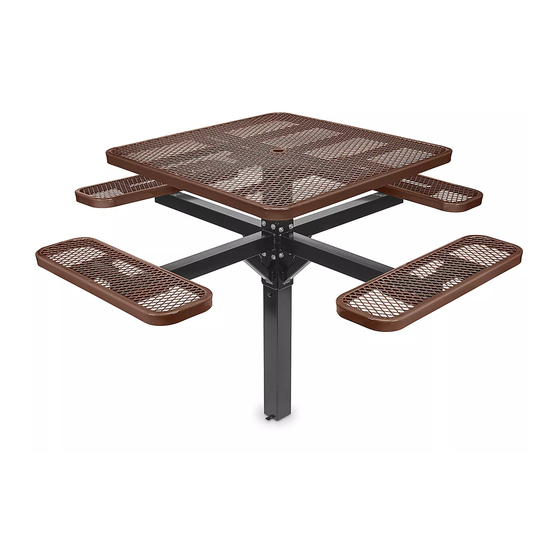
46" INGROUND
SQUARE PICNIC
TABLE
TOOLS NEEDED
Socket Wrench
5/16" x 1½"
5/16" Nut x 24
Bolt x 24
Bench Seat x 4
Figure 1
PAGE 1 OF 9
1-800-295-5510
uline.com
PARTS
5/16" Washer x 48
Tabletop x 1
ASSEMBLY
1/2" Wrench
14 mm Wrench
3/8" x 5" Bolt x 8
Inground Mount Pole x 1
1. Verify all parts are present before beginning.
Hardware is located in a white box.
2. Flip tabletop upside down. Attach inground mount
pole to the tabletop using eight 5/16 x 1½" bolts,
sixteen 5/16" washers and eight 5/16" nuts.
(See Figure 1)
Para Español, vea páginas 4-6.
Pour le français, consulter les pages 7-9.
1/2" Socket Bit
14 mm Socket Bit
3/8" Nut x 8
3/8" Washer x 16
Bench Support Bracket x 4
0321 IH-7951
Advertisement

Related Manuals for U-Line H-7951


Summary of Contents for U-Line H-7951
- Page 1 Para Español, vea páginas 4-6. Pour le français, consulter les pages 7-9. H-7951 1-800-295-5510 uline.com 46" INGROUND SQUARE PICNIC TABLE TOOLS NEEDED 1/2" Wrench 1/2" Socket Bit Socket Wrench 14 mm Wrench 14 mm Socket Bit PARTS 5/16" x 1½"...
- Page 2 ASSEMBLY CONTINUED 3. Attach two bench support brackets to inground Figure 2 mount pole using four 3/8 x 5" bolts, eight 3/8" washers and four 3/8" nuts. (See Figure 2) 4. Repeat step three with remaining two bench support Figure 3 brackets.
- Page 3 ASSEMBLY CONTINUED 6. Dig a hole approximately 24" deep and 16" wide. Figure 5 (See Figure 5) NOTE: The size of the footing is only a suggestion. Local soil conditions will determine the necessary size. 7. Fill the bottom of hole with 3-4" of gravel ensuring when the table is placed in the hole the top of the bench seat is 18"...
-
Page 4: Herramientas Necesarias
H-7951 800-295-5510 uline.mx MESA DE PÍCNIC DE INSTALACIÓN SUBTERRÁNEA DE 46" HERRAMIENTAS NECESARIAS Llave de 1/2" Dado de 1/2" Llave de Dado Llave de 14 mm Dado de 14 mm PARTES 24 Pernos de 24 Tuercas de 5/16" 48 Rondanas... - Page 5 CONTINUACIÓN DE ENSAMBLE 3. Fije dos brazos de soporte para banca al poste de Diagrama 2 instalación subterránea utilizando cuatro pernos de 3/8 x 5", ocho rondanas de 3/8" y cuatro tuercas de 3/8". (Vea Diagrama 2) 4. Repita el paso tres con los brazos de soporte para Diagrama 3 banca restantes.
- Page 6 CONTINUACIÓN DE ENSAMBLE 6. Excave un hoyo de aproximadamente 24" de Diagrama 5 profundidad y de 16" de ancho. (Ver Diagrama 5) NOTA: El tamaño del hoyo es solo una sugerencia. Las condiciones de la tierra locales determinarán el tamaño necesario. 7.
-
Page 7: Outils Requis
H-7951 1-800-295-5510 uline.ca TABLE DE PIQUE-NIQUE – 46 PO, CARRÉ, ANCRÉ DANS LE SOL OUTILS REQUIS Clé de 1/2 po Douille tournevis de 1/2 po Clé à douilles Clé de 14 mm Douille tournevis de 14 mm PIÈCES Boulon de Écrou de... - Page 8 MONTAGE SUITE 3. Fixez deux ferrures de support de banc au poteau Figure 2 d'ancrage à l'aide de quatre boulons de 3/8 x 5 po, huit rondelles de 3/8 po et quatre écrous de 3/8 po. (Voir Figure 2) 4. Répétez l'étape trois pour les deux ferrures de support Figure 3 de banc restantes.
- Page 9 MONTAGE SUITE 6. Creusez un trou d'environ 24 po de profondeur et 16 Figure 5 po de largeur. (Voir Figure 5) REMARQUE : Les dimensions proposées sont à titre indicatif seulement. Les conditions du sol détermineront la taille du trou nécessaire. 7.
Need help?
Do you have a question about the H-7951 and is the answer not in the manual?
Questions and answers