Advertisement
Table of Contents
π
H-2999
6' WOODEN
PICNIC TABLE
TOOlS NEEDED
Drill
Preassembled Table Top x 1
72" Seat Plank x 4
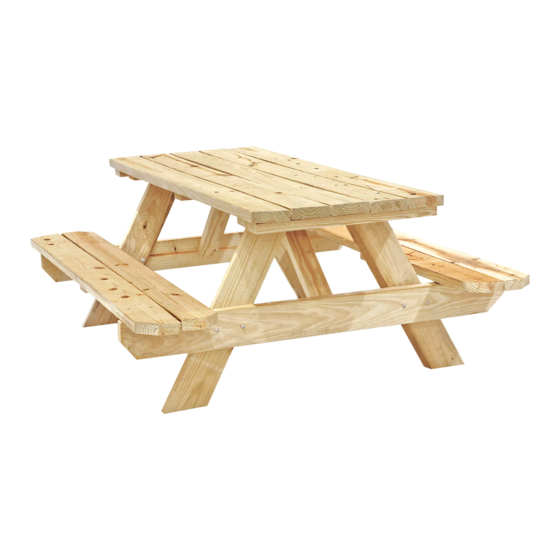
Figure 1
PAGE 1 OF 2
1-800-295-5510
uline.com
Tape Measure
7/16" Socket Wrench
59" Pre-Drilled Seat Cross-Member x 2
23.5" Diagonal Brace x 2
1/8" Drill Bit
PARTS
30" Pre-Drilled Table Leg x 4
ASSEMBlY
Prior to assembling your table, apply two coats of water
repellent to the table components.
1.
Place the pre-drilled seat cross-member on top of
the pre-drilled table legs. Position the legs so the
holes are aligned and the tops of the legs are level
and straight. (See Figure 1)
NOTE: There are predrilled holes on one end
of the table legs, these should be on the top of
the assembled legs.
2. Loosely attach with the 3½" carriage bolts through
the pre-drilled holes using the washers and nuts.
Repeat for the second leg.
Level
3½" Carriage bolt x 8
2½" Wood Screw x 36
10" Seat Block x 2
Washer x 8
Nut x 8
0115 IH-2999
Advertisement
Table of Contents

Related Manuals for U-Line H-2999


Summary of Contents for U-Line H-2999
- Page 1 π H-2999 1-800-295-5510 uline.com 6' WOODEN PICNIC TABLE TOOlS NEEDED Drill Tape Measure 7/16" Socket Wrench 1/8" Drill Bit Level PARTS Preassembled Table Top x 1 59" Pre-Drilled Seat Cross-Member x 2 3½" Carriage bolt x 8 2½" Wood Screw x 36 72"...
- Page 2 ASSEMBlY 3. Make sure legs are level and tighten all 3½" carriage bolts using a 7/16" socket wrench. 4. Place the preassembled table top upside down. Position the legs on the inside mount of the support bar. Make sure the legs are equal distance from either table edge and the cross-member is facing out.
Need help?
Do you have a question about the H-2999 and is the answer not in the manual?
Questions and answers