
Related Manuals for Z GRILLS ZPG-700E


Summary of Contents for Z GRILLS ZPG-700E
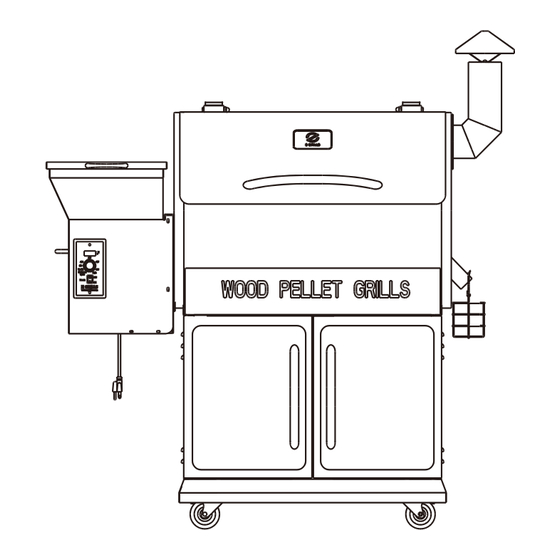
- Page 1 Smoke Shut Down High Cycle Power www.zgrills.com WOOD PELLET GRILL ZPG - 700E OWNER’S MANUAL 1- 785-317- 5170 EMAIL:support@zgrills.com WEBSITE:www.zgrills.com...
-
Page 2: Table Of Contents
CONTENTS WARNINGS COMPOENT LIST ASSEMBLY INSTRUCTIONS INITIAL FIRING INSTRUCTIONS SUBSEQUENT START-UP OPERATING TIPS MAINTENANCE & CLEANING TROUBLESHOOTING DIGTAL THERMOSTAT CONTROL WIRING DIAGRAM Z GRILLS SUPPORT -Y LIMITED WARRANTY... -
Page 3: Warnings
Do not tr y to smother the fire. Clean and maintain your grill after each time use. We suggest that use Z GRILLS BBQ WOOD PELLETS, which are specifically made to work in our grills. Do not use your grill on rainy days. -
Page 4: Assembly Instructions
ASSEMBLY INSTRUCTIONS COMPONENT LIST Bolt 5/32-32*6 mm Hopper Assembly I Hopper Assembly II Kep Nut 5/32-32... - Page 5 2.MOUNTING THE BODY FRAME: 1.Secure Left Plate(40)on the Platform(50)with1/4-20*12mm Bolt(52). 2.Secure Right Plate(45)on the Platform(50)with1/4-20*12mm Bolt(52). 3.Secure Back Plate(44)on the Platform(50)with1/4-20*12mm Bolt(52) and link with Left Plate(40) and Right Plate(45). 4.Locate the Beam(42) between Left Plate(40)and Right Plate(45) with 1/4-20*12mm Bolt(52). 1.ASSEMBLING OF BOTTOM BASE: 1.Upside down the bottom base, install the wheel(without brake) into the screw hole, then tighten the wheel by wrench(59).
- Page 6 3.Assembling of Hopper 5.Mounting the Hopper to the Chamber Remove the Gaskets and Bolts from the Hopper, open the Lid, insert the Hopper into Insert Hopper Assembly I(61) into Hopper Bottom Cover(3), align the holes. Insert the Chamber, then using these Bolts and Gaskets install it in sequence from inside. the 5/32-32*6mm Bolts(60) through the holes in the Hopper and 5/32-32 Kep Nuts(63), then open the Hopper Lid and tighten it from inside.
- Page 7 7.ATTACHING THE CHAMBER DOOR HANDLE: 9.POSITIONING THE DOOR HANDLE Align the holes in the Left Door(38) with the holes in the Handle(47). Place a Penetrate1/4-20*12mm Hexagon Bolt(53) through Ø18*Ø6.5*2.0mm Gasket(54) and Lid(9) directly to the handle and tighten up. Do not screw over-tight. Ø18*Ø6.5*2.0mm Gasket(54) on each 1/4-20*12mm Hexagon Bolt(53) and tight with Wrench.
- Page 8 11.POSITIONING THE HEAT BAFFLE: 13.POSITIONING THE PORCELAIN GRILL: Position The Heat Baffle(5) on the locating brackets which is on the inside walls of Position the Porcelain Grill(8)inside the cooking area and locate the Warming Rack(7) on the rack support inside the Chamber. the Grill.
-
Page 9: Initial Firing Instructions
Pellet Hopper. Failure to follow the steps may cause a hazardous “over-firing” Z Grills for the first time and each time the grill runs out of pellets. of your grill due to an excess of unburned pellets in the Firepot. -
Page 10: Operating Tips
OPERATING TIPS 1.Just like other barbecues, the actual temperature of this grill or the cooking times will be affected by external temperature, humidity, wind conditions, quality of pellets 8.Turn on the grill and turn the Temperature Dial to any setting desired. With and so on. -
Page 11: Maintenance & Cleaning
Use a warm soap water to wipe the grease. Do not use oven cleaner, abrasive cleansers or abrasive cleaning pads on the outside grill surfaces. Use Z Grills Cover to protect your grill is highly recommended. Use a high-quality car wax on the outside surfaces of the grill can protect your paint finish. -
Page 12: Troubleshooting
Get your new parts Z Grills model number, serial number Remove the control, check the fuse on Fuse and part identification number from back . Replace the fuse if blown. -
Page 13: Digtal Thermostat Control Wiring Diagram
Thank you for shopping with us! If you have any question, feel free to contact us or your dealer. Z GRILLS INC. will offer the best technical and sales support in the industr y. Please be prepared to provide the following information:... - Page 14 Z GRILLS 3 YEARS LIMITED WARRANTY Z Grills Inc guarantees a 3 years warranty of our products from the date of purchase by the original owner against defects in all materials and workman-ship. During the warranty period, Z Grills Inc will at its option repair or replace the defective parts.
Need help?
Do you have a question about the ZPG-700E and is the answer not in the manual?
Questions and answers