
Related Manuals for Gram FC Series


Summary of Contents for Gram FC Series
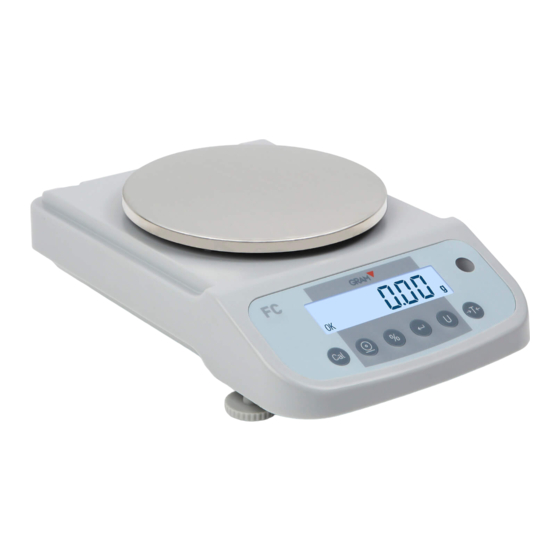
- Page 1 SERIES / SERIE / SÉRIE 100 / 200 / 2000 / 5000 OPERATION MANUAL MANUEL D´UTILISATION MANUAL DE UTILIZACION...
-
Page 2: Table Of Contents
INDEX English Safety information Installation Preparatory before using Storage Unfolding the package Package list Installation of the balance Usage conditions Install the balance with wind shield Install the balance with round weighing pan Connect the power adapter Install the external facilities Warm-up time Adjust the level gaugepurpose: Display and keys description... - Page 3 Clearance Clearing the stainless steel surface Safety check Troubleshooting Technical conditions Guarantee Notes...
- Page 4 SOMMAIRE Français Informations de sécurité Installation Avant d’utiliser la balance Entourage de la balance Emballage Liste de matériel Installation de la balance Conditions d’utilisation Installation de la balance avec pare-brise (cage de pesée) Installer la balance sans pare-brise (cage de pesée) Branchement secteur Raccordement d’appareils périphériques Temps de préchauffage...
- Page 5 Nettoyage Nettoyage de la superficie d’acier inoxydable Révision de sécurité Résolution de problèmes Conditions techniques Garantie Notes...
- Page 6 ÍNDICE Español Información de seguridad Instalación Antes de utilizar la balanza Entorno de la balanza Embalaje Lista de material Instalación de la balanza Condiciones de uso Montaje de balanza con paravientos Montaje balanza con el plato de pesada redondo Conectar el adaptor Montaje dispositivos externos Tiempo de precalentamiento Nivelar la balanza...
- Page 7 Limpieza Limpieza de la superficie de acero inoxidable Revisión de seguridad Solución de problemas Condiciones técnicas Garantía Notes Notes...
-
Page 8: Safety Information
ENGLISH SAFETY INFORMATION To avoid unnecessary demage to the balance, please pay attention to the following tips: • Please do not use this balance in dangerous área. • Please turn off the power of the balance before connect it or disconnect it with other facilities. -
Page 9: Preparatory Before Using
• This balance could only be connected to our accessories or optional fittings. We are not responsible for any modification the operator makes to our balance, including using the facilities and cable which are not supplied by us. However, we are always ready to offer the operation norms information. -
Page 10: Installation Of The Balance
• Pan support. • Power adapter. • User manual. INSTALLATION OF THE BALANCE Put it in a proper place, please avoid the following situations: • Much heat and direct sunlight. • Air currents and vibrations. • Excessive moisture. Usage Conditions Please do not lay the balance in a quite damp palce for a long time. -
Page 11: Install The Balance With Wind Shield
Install the balance with wind shield • Assemble the parts in the indicated order. Install the balance with round weighing pan • Installation Sequence. • Pan support. Connect the Power Adapter • Connect the power adapter to the balance. • Connect the power adapter to the power socket. -
Page 12: Adjust The Level Gaugepurpose
Adjust the Level GaugePurpose: • Adjust the level guage of the balance. The level guage needs to be adjusted once its place is changed.The two front bottom bolts are used to adjust the level guage. • Spin the two bolts as shown in the figure until the bubble in the level gauge is in the ceter of the circle. - Page 13 OK - Reading shown is stable. Reading shown is given in grams. OZ - Reading shown is given in ounces (1g = 0.03527396200 oz). ct - Reading shown is given in carats (1g = 5.0000000000 ct). dwt - Reading shown is given in pennyweight (1g = 0.64301493100dwt) Reading shown is given in percent weight.
-
Page 14: Power On / Power Off The Balance
POWER ON / POWER OFF THE BALANCE Procedure 1. Press the key to power on the balance. 2. Press and hold the for 5 seconds to power off. TARE FUNCTION Procedure 1. Put a container on the weighing pan. 2. Press the key, the balance will auto tare. -
Page 15: Percentage Mode
5. Press the for 3 seconds, the reference quantity will flicker, put the same quantity objects into the container and then press again the key. The reference quantity will be stable, the balance enters into count mode. 6. Put the rest of objects into the container, the balance will display the total quantity. -
Page 16: Weighing Units
WEIGHING UNITS Procedure Press the key to select the desired unit weight (g, oz, dwt). CALIBRATION Procedure To decide the accuracy of the balance through test the difference between thereading and the actual weight of the object on the weighing pan. 1. -
Page 17: Parameters
Under Setting State the function of keys are as follows: • to save the current parameter and enter into the next parameter setup. • to move to left. • to move to right. • pressed for several seconds to enter into linearity calibration state. - Page 18 Buzzer switch On, Off 11 C00802 Baudxx Baud rate 12:1200 KEY: PRT key CON: continuous 12 C00802 Con---xxx Communication mode Sty: communication when stable Sensor flexibility compensation, for 13 C01688 FLEXxx compensating weighing -5 to 5 deviation when the balance is unload 14 C01688 CrEEP-x Sensor creep rating...
- Page 19 Repeatibility 0 – 9. Setting to 0 compensation intensity, rEdrEP means canceling this larger value with function stronger compensation Largest range for whole rEdrNxx point or repeatability 0d – 20d compensation...
-
Page 20: Communication With A Computer
COMMUNICATION WITH A COMPUTER The balance keyboard functions can be accessed via the RS-232 interface. The following commands are available: U – : Units conversion. T – : Tare function. C – : Calibration with external standard weight. P – : Print function. -
Page 21: Rs-232 Interface Hardware
Unit field, it describes the units of the number being transmitted. Your balance will transmit G for grams, O for ounces and C for carats. Stable carácter, it corresponds to the OK indicator on the display. S means the reading is stable, space means the reading is not stable. Return character. -
Page 22: Routine Maintenance And Troubleshooting
Notice: “Handshake” signals, such as “clear to send” (CTS) are not used. The peripheral must have a mínimum buffer (15 characters). It is suggested that the máximum recommended cable lenght is 15 meters, the load impedance of the device connected should be between 3000 and 7000 ohms with no more than 2500 pf shunt capacitance. -
Page 23: Clearing The Stainless Steel Surface
Clearing the stainless steel surface All the stainless Steel components need to clean regularly. Remove the weighing pan and thoroughl clean it with a damp cloth or sponge. The cleaner applicable to stainless Steel are recommended. Wipe the stainless Steel surface of the balance first and then clear the stainless Steel weighing pan. - Page 24 The real weight is 5% higher Unload or contact your HHHHH than its capacity or the local service center. transducer is damaged. a) Install the right weighing a) The weighing pan is not on. pan and press the key. b) There is wrong connect with LLLLLLL b) Clear the connect.
-
Page 25: Technical Conditions
Calibrate the balance Apparent wrong No calibration or the tare Deduct the tare weight weighing display weight is deducted. before weighing. If there is any other trouble, please contact your local distributor or service center. TECHNICAL CONDITIONS AC-DC adapter Input: 220V/110V, output: 7.5V (+15% to -20%) 48-60Hz Power consumption: Maximam=16W, Average=8W... -
Page 26: Guarantee
This scale is guaranteed for one year from the delivery date. The guarantee covers any fabrication defect of the material. During this period GRAM PRECISION, SL, covers the manpower and the spare parts necessary for the reparation of the scale. -
Page 27: Notes
NOTES... -
Page 28: Informations De Sécurité
FRANÇAIS INFORMATIONS DE SÉCURITÉ Pour éviter des dommages inutiles à la balance, veuillez tenir particulièrement compte des conseils suivants: • Ne pas utiliser la balance dans des zones dangereuses. • Déconnecter la balance du réseau avant de la connecter ou déconnecter dans d’autres installations. -
Page 29: Avant D'utiliser La Balance
apparents, veuillez déconnecter la balance du réseau, la placer dans un endroit sûr et ne pas l’utiliser jusqu’à ce que l’installation ait été sécurisée. • La balance doit uniquement être connectée à nos accessoires ou pièces optionnelles. Nous ne pouvons être tenus responsables de toute modification effectuée à... -
Page 30: Liste De Matériel
LISTE DE MATÉRIEL • Balance. • Plateau de pesée • Support du plateau • Adaptateur de réseau • Manuel d’instructions INSTALLATION DE LA BALANCE Installer la balance dans un endroit approprié, éviter les situations suivantes: • Hautes températures et rayonnements solaires directs. •... -
Page 31: Installation De La Balance Avec Pare-Brise (Cage De Pesée)
Installation de la balance avec pare-brise (cage de pesée) • Monter toutes les pièces selon l’ordre indiqué. Installer la balance sans pare-brise (cage de pesée) • Installer le support du plateau. • Placer le plateau de pesée. Branchement secteur • Brancher le bloc d’alimentation secteur à... -
Page 32: Niveler La Balance
pendant 30 minutes avant de l’utiliser. Niveler la balance • Niveler la balance en utilisant les deux pieds réglabes avant jusqu’à ce que la bulle de niveau soit au centre du cercle. • À chaque fois que la balance est installée dans un endroit différent, elle doit être nivelée avant utilisation. - Page 33 Lecture en grammes. OZ - Lecture en onces (1g = 0.03527396200 oz). ct - Lecture en carats (1g = 5.0000000000 ct). dwt - Lecture en pennyweight (1g = 0.64301493100 dwt). Lecture en mode pourcentages. PCS - Lecture en mode compte-pièces. ------- La balance développe une lecture stable.
-
Page 34: Allumer / Éteindre La Balance
ALLUMER / ÉTEINDRE LA BALANCE Procédure 1. Appuyer sur la touche pour allumer la balance. 2. Appuyer sur la touche pendant 5 secondes pour éteindre la balance. FONCTION DE TARE Procédure 1. Placer un récipient sur le plateau de pesée. 2. -
Page 35: Fonction De Pourcentages
4. Appuyer sur la touche pour confirmer la valeur d’échantillon sélectionnée. 5. Appuyer sur la touche pendant trois secondes, la valeur d’échantillon clignotera. Placer à l’intérieur du récipient le nombre de pièces sélectionnées et appuyer à nouveau sur la touche , la valeur de l’échantillon cessera de clignoter et restera fixe sur l’écran, à... -
Page 36: Unités De Pesée
5. L’écran affichera la valeur du pourcentage de l’objet par rapport au poids de référence. 6. Pour retourner au mode normal de pesée, appuyer sur la touche UNITÉS DE PESÉE Procédure Appuyer sur la touche pour sélectionner l’unité de pesée souhaitée (g, oz, dwt). -
Page 37: Configuration De Paramètres
CONFIGURATION DE PARAMÈTRES Procédure Pour accéder au mode de configuration de paramètres, appuyer sur les touches en même temps pendant cinq secondes. Dans le mode de configuration, les fonctions des touches sont les suivantes: • Touche pour confirmer les configurations et passer au paramètre suivant. - Page 38 Rétroéclairage de BL – X On, Off, Auto l’affichage LCD Entrer dans le mode SLEEP 0 – 9 d’économies d’énergie Power-on self- POST 0, 1 inspection mode On, Off 11 C00802 Baudxx Vitesse de transmission 12:1200 Mode de KEY: en appuyant sur 12 C00802 Con---xxx communication...
- Page 39 Activer ou désactiver la rEdInt 0: interdit compensation de poids 0 – 9. Établir à 0 Menu non disponible rEdrEP signifie l’annulation sur le modèle FC de cette fonction Menu non disponible rEdrNxx 0d – 20d sur le modèle FC...
-
Page 40: Communication Avec Un Ordinateur
COMMUNICATION AVEC UN ORDINATEUR Les fonctions des touches de la balance peuvent être utilisées via RS-232. Les commandes suivantes sont disponibles: U – : Conversion unités de pesée. T – : Fonction tare. C – : Calibrage avec un poids de calibrage externe. P –... -
Page 41: Interface Rs-232
Champ d’unité, décrit l’unité de pesée des pesées transmises. La balance transmettra G pour grammes, O pour onces et C pour carats. Caractère de stabilité, correspond au symbole OK de l’affichage de la balance. S signifie que la lecture est stable, un espace signifie que la lecture est instable. -
Page 42: Description Du Pin
Description du pin 2 – TXD - - - la balance transmet des données. 3 – RXD - - - la balance reçoit des données. 5 – GRD - - - signal de terre. Note: Les modes de signal CTS ne sont pas utilisés. Le périphérique doit avoir un buffer minimum (15 caractères). -
Page 43: Nettoyage De La Superficie D'acier Inoxydable
la bague pour éviter des dommages dans le système de pesée. Nettoyage de la superficie d’acier inoxydable Tous les composants d’acier inoxydable doivent être nettoyés régulièrement. Retirer le plateau de pesée et le nettoyer avec un chiffon doux ou une éponge. Nous recommandons d’utiliser un nettoyant spécial pour acier inoxydable. - Page 44 Le poids réel est supérieur de Retirer le poids de la 5% a la capacité maximum de la HHHHH balance ou contacter le balance ou la cellule de charge Service Technique est endommagée a) Installer correctement a) Le plateau de pesée n’est le plateau et apuyyer sur le pas installé...
-
Page 45: Conditions Techniques
Valeur La valeur de la pesée diffère Vérifier qu’il n’y a pas une incorrecte de la du poids placé sur le plateau valeur de tare préréglée pesée de pésee Veuillez, pour toute question, contacter votre Distributeur ou le Service Technique Officiel. -
Page 46: Garantie
Cette balance est garantie contre tout défaut de fabrication et de matériel, pour une période d’1 an à partir de la date de livraison. Durant cette période, GRAM PRECISION, prendra en charge la réparation de la balance. Cette garantie n’inclut pas les dommages occasionnés par un usage inapproprié... -
Page 47: Notes
NOTES... -
Page 48: Información De Seguridad
ESPAÑOL INFORMACIóN DE SEGURIDAD Para evitar daños innecesarios a la balanza, por favor preste mucha atención a los siguientes consejos: • No utilizar la balanza en áreas peligrosas. • Desconectar la balanza de la red antes de conectarla o desconectarla en otras instalaciones. -
Page 49: Antes De Utilizar La Balanza
favor desconectar la balanza de la red, situarla en un lugar seguro y no utilizarla hasta que la instalación de la misma sea segura. • La balanza solo puede ser conectada a nuestros accesorios o piezas opcionales. No nos haremos reponsables de cualquier modificación que el usario efectúe a la balanza, incluyendo el uso inadecuado de las instalaciones o que el cable de corriente, no sea el suministrado junto con la balanza. -
Page 50: Lista De Material
Lista de material • Balanza. • Plato de pesada. • Soporte del plato. • Adaptador de red. • Manual de instrucciones. INSTALACIóN DE LA BALANZA Instalar la balanza en un lugar apropiado, evitar las siguientes situaciones: • Altas temperaturas y rayos solares directos. •... -
Page 51: Montaje De Balanza Con Paravientos
Montaje de balanza con paravientos • Montar las piezas según el orden indicado. Montaje balanza con el plato de pesada redondo • Instalar el soporte del plato. • Colocar el plato de pesada. Conectar el adaptor • Conectar el adaptador a la balanza. •... -
Page 52: Nivelar La Balanza
Nivelar la balanza • Nivelar la balanza utilizando los dos pies regulables delanteros hasta que la burbuja del nivel quede en el centro del círculo. • Cada vez que la balanza sea instalada en un lugar distinto se deberá nivelar antes de su utilización. - Page 53 OZ - Lectura en onzas (1g = 0.03527396200 oz). ct - Lectura en quilates (1g = 5.0000000000 ct). dwt - Lectura en pennyweight (1g = 0.64301493100 dwt). Lectura en modo porcentaje. PCS - Lectura en modo cuentapiezas. ------- La balanza está desarrollando una lectura estable. UNABLE - Error de operación.
-
Page 54: Encender / Apagar La Balanza
ENCENDER / APAGAR LA BALANZA Procedimiento 1. Pulsar la tecla para encender la balanza. 2. Pulsar la tecla durante 5 segundos para apagar la balanza. FUNCIóN DE TARA Procedimiento 1. Colocar un recipiente sobre el plato de pesada. 2. Pulsar la tecla . -
Page 55: Función Porcentajes
4. Pulsar la tecla para confirmar el valor de la muestra seleccionado. 5. Pulsar la tecla durante 3 segundos, el valor de la muestra parpadeará. Colocar en el interior del recipiente el número de piezas seleccionado y pulsar nuevamente la tecla . -
Page 56: Unidades De Pesada
de referencia. 6. Para volver al modo normal de pesaje, pulsar la tecla UNIDADES DE PESADA Procedimiento Pulsar la tecla para seleccionar la unidad de pesada deseada (g, oz, dwt) . CALIBRACION Procedimiento 1. Nivelar la balanza y precalentarla durante 30 minutos. 2. -
Page 57: Parametros
Para acceder al modo de configuración de parámetros, pulsar las teclas al mismo tiempo durante 5 segundos. Dentro del modo de configuración, las funciones de las teclas son las siguientes: • Tecla para confirmar las configuraciones y pasar al siguiente parámetro •... - Page 58 Power-on self-inspection POST 0, 1 mode Sonido On, Off 11 C00802 Baudxx Velocidad de transmisión 12:1200 KEY: al pulsar una 12 C00802 Con---xxx Modo de comunicación tecla Compensación de la flexibilidad del sensor. Para compensar la 13 C01688 FLEXxx -5 to 5 desviación de pesaje cuando la balanza no está...
-
Page 59: Comunicación A Un Ordenador
COMUNICACIóN A UN ORDENADOR Las funciones de las teclas de la balanza pueden ser utilizadas via RS-232. Están disponibles los siguientes comandos: U – : Conversión unidades de pesada. T – : Función tara. C – : Calibración con una pesa de calibración externa. P –... -
Page 60: Interface Rs-232
Campo de unidad, describe la unidad de pesada de las pesadas transmitidas. La balanza transmitirá G para gramos, O para onzas y C para quilates. Carácter de estabilidad, corresponde al símbolo OK del display de la balanza. S significa que la lectura es estable, un espacio significa que la lectura es inestable. -
Page 61: Rutina De Mantenimiento Y Solución De Problemas
5 – GRD - - - señal de tierra. Nota:Los modos de señal CTS no son utilizados. El periférico debe tener un buffer mínimo (15 caracteres). Recomendamos que la longitud del cable sea de 15 metros, la impedancia de carga del equipo conectado sea entre 3000 y 7000 ohms con no más de 2500 pf de capacidad en paralelo. -
Page 62: Limpieza De La Superficie De Acero Inoxidable
Limpieza de la superficie de acero inoxidable Todos los componentes de acero inoxidable necesitan ser limpiados regularmente. Retirar el plato de pesada y limpiarlo con un trapo suave o esponja. Recomendamos utilizar un limpiador especial para el acero inoxidable. Limpiar la superficie de acero inoxidable de la balanza y seguidamente el plato de pesada. - Page 63 a) Instalar correctamente a) El plato de pesada no está el plato y pulsar la tecla instalado correctamente. LLLLLLL b) La célula de carga está b) Contactar con el Servicio averiada Técnico. Ver la sección de calibración NOCAL La calibración no responde. y comprobar que la pesa de calibración es la adecuada.
-
Page 64: Condiciones Técnicas
CONDICIONES TÉCNICAS Adaptador AC-DC Entrada: 220V/110V, Salida: 7.5V (+15% to -20%) 48-60Hz Consumo de alimentación: Maximo=16W, Promedio=8W... -
Page 65: Garantía
Esta balanza está garantizada contra todo defecto de fabricación y de material, por un periodo de 1 año a partir de la fecha de entrega. Durante este periodo, GRAM PRECISION, SL, se hará cargo de la reparación de la balanza. -
Page 66: Notes
NOTES... -
Page 67: Notes
NOTES... - Page 68 001/08072016 Gram Precision S.L. Travesía Industrial, 11 · 08907 Hospitalet de Llobregat · Barcelona (Spain) Tel. +34 902 206 000 · +34 93 300 33 32 Fax +34 93 300 66 98 gram.es comercial www.gram.es...
Need help?
Do you have a question about the FC Series and is the answer not in the manual?
Questions and answers