
Related Manuals for ITT Industries FLYGT DX Series


Summary of Contents for ITT Industries FLYGT DX Series
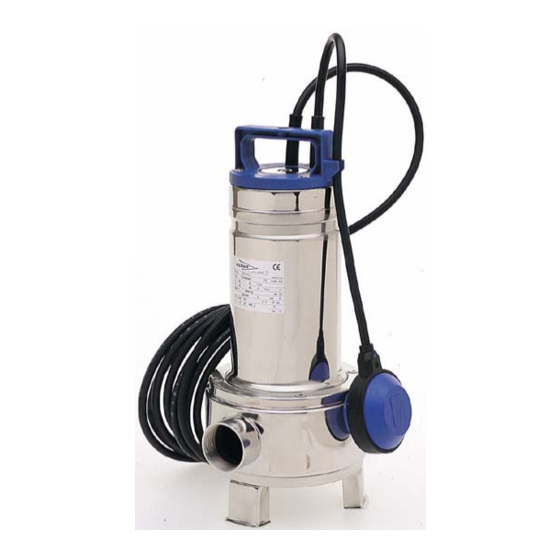
- Page 1 Doc. All manuals and user guides at all-guides.com First edition date :12/98 Revision date Disassembly and Assembly Instructions DX SERIES...
- Page 2 Doc. All manuals and user guides at all-guides.com Contents First edition date :12/98 Revision date DX pump disassembly P. 3 DX pump assembly P. 12 Head components - Exploded view P. 27 DX 35-5, 50-7 spare - Exploded view P. 28 DX 50-11, 50-15 spare - Exploded view P.
- Page 3 Doc. All manuals and user guides at all-guides.com Disassembly First edition date :12/98 Revision date • Place the pump on a clean and well-lit workbench. • Loosen the screw in the center of the head.
- Page 4 Doc. All manuals and user guides at all-guides.com Disassembly First edition date :12/98 Revision date • Unscrew the three socket head screws from the head. • Remove the head as shown in the picture, using a plasti hammer and chisel. Be careful not to damage the head.
- Page 5 Doc. All manuals and user guides at all-guides.com Disassembly First edition date :12/98 Revision date • Loosen the terminal box screws and disconnect all the wires, then remove the capacitor. (18 if any). • With a socket wrench, loosen the screws that hold the feet (12).
- Page 6 Doc. All manuals and user guides at all-guides.com Disassembly First edition date :12/98 Revision date • Remove the suction flange (5). • Loosen the impeller fastening hex screw. To secure the impeller, insert a screwdriver* through the pumps’ delivery port. Not shown in the picture.
- Page 7 Doc. All manuals and user guides at all-guides.com Disassembly First edition date :12/98 Revision date • Remove the impeller (2); if necessary, use a pair of pliers. On the DX 10-15-20 models, retrieve the impeller lock tab. Remove the V-ring (24).
- Page 8 Doc. All manuals and user guides at all-guides.com Disassembly First edition date :12/98 Revision date • Remove the stop ring and place the pump in a pan to collect the oil. (if necessary, prize it out with a screwdriver). • Tap the pump body (1) gently with a rubber hammer to separate from the shell with wound stator (3).
- Page 9 Doc. All manuals and user guides at all-guides.com Disassembly First edition date :12/98 Revision date • Remove the shell with stator after the oil residues have crained. Remove the fixed part of the mechanical seal (9) from the pump body. •...
- Page 10 Doc. All manuals and user guides at all-guides.com Disassembly First edition date :12/98 Revision date • Use a screwdriver to prize out the rotating part of the mechanical seal. Remove the washer underneath. • Tap the shaft gently (4) on the head side, through the hole in the bearing seat.
- Page 11 Doc. All manuals and user guides at all-guides.com Disassembly First edition date :12/98 Revision date • Slide out the rotor shaft and lower support. Separate the shaft from the support and remove the bearing ring (20) and the seal ring (21). •...
- Page 12 Doc. All manuals and user guides at all-guides.com Assembly First edition date :12/98 Revision date • View of motor casing with wound stator (3). • Insert the compensation ring(11) in the bearing seat, inside the motor casing with wound stator (3).
- Page 13 Doc. All manuals and user guides at all-guides.com Assembly First edition date :12/98 Revision date • Insert the rotor shaft with pre-assembled bearings (4). • Insert the lower bearing ring (20) with the lipped side upwards.
- Page 14 Doc. All manuals and user guides at all-guides.com Assembly First edition date :12/98 Revision date • Insert the seal ring (21) over the bearing’s lower support (6). During assembly make sure that the open side, where the spring is visible, is turned towards the inside of the bearing’s lower support.
- Page 15 Doc. All manuals and user guides at all-guides.com Assembly First edition date :12/98 Revision date • Insert the bearing’s lower support in the motor casing with wound stator. • Using a rubber hammer, gently tap the bearing’s lower support on alternate sides to slide it into place.
- Page 16 Doc. All manuals and user guides at all-guides.com Assembly First edition date :12/98 Revision date • Put the mechanical seal’s washer (9) on the pump shaft. • Using the seal guide, install the rotating part of the seal with the polished side up.
- Page 17 Doc. All manuals and user guides at all-guides.com Assembly First edition date :12/98 Revision date • With the plastic tap, position the rotating part of the seal in its seat as shown in the picture. • After installing the seal, position the oil conveyor (10) over the seal (9).
- Page 18 Doc. All manuals and user guides at all-guides.com Assembly First edition date :12/98 Revision date • Position the gasket (19) over the bearing’s lower support. • Install the fixed part of the seal (9) in the pump body (1), with the polished side up.
- Page 19 Doc. All manuals and user guides at all-guides.com Assembly First edition date :12/98 Revision date • With a plastic tap, slide the fixed part of the seal into position. • Carefully position the pump body (1) on the motor casing with wound stator (3).
- Page 20 Doc. All manuals and user guides at all-guides.com Assembly First edition date :12/98 Revision date • Assemble the fastening ring (15). • Tighten the fastening ring screws in cross sequence (driving torque 6Nm).
- Page 21 Doc. All manuals and user guides at all-guides.com Assembly First edition date :12/98 Revision date • Place the pump upside down and add “Esso Marcol 82” oil slowly through the hole in the pump body, allowing the air to escape (quantity 0.080 liters).
- Page 22 Doc. All manuals and user guides at all-guides.com Assembly First edition date :12/98 Revision date • Position the sandscreen V-ring (24) on the impeller (2); make sure that the squared side rests against the impeller. • For the DX 50 models: position the impeller lock tab in the shaft and install the impeller on the pump shaft.
- Page 23 Doc. All manuals and user guides at all-guides.com Assembly First edition date :12/98 Revision date • Using a socket wrench, tighten the impeller screw with its washer. (driving torque 5.5-6Nm). • Install the suction flange (5).
- Page 24 Doc. All manuals and user guides at all-guides.com Assembly First edition date :12/98 Revision date • Using a socket wrench, fasten the feet (12) to the pump body (1) through the flange (5). (driving torque 5.5-6Nm) • Turn the pump upside down and install the gasket (19) in its seat in the motor casing with wound stator.
- Page 25 Doc. All manuals and user guides at all-guides.com Assembly First edition date :12/98 Revision date • Install the electrical connection box (16), threading the wires through the holes. • Take the pre-assembled head (7+8+13+14+17+22) and connect the wires. (for the wiring procedure, see diagram on pages 30-31).
- Page 26 Doc. All manuals and user guides at all-guides.com Assembly First edition date :12/98 Revision date • Tap the head into position with a rubber hammer, being careful not to damage it. Lubricate the thread with HT1800 or equivalent type qrease, and tighten the screws.
-
Page 27: Head Components
Doc. All manuals and user guides at all-guides.com Head components First edition date :12/98 Revision date • 8 Handle • 7 Upper cover • 17 Electrical connection cover • 13 Supply cable • 22 Cable guide and cable fastener • 14 Float •... - Page 28 Doc. DX 35-5,50-7 Spares All manuals and user guides at all-guides.com First edition date :12/98 Exploded view Revision date 1 Pump body 2 Impeller 3 Motor casing + wound stator 4 Shaft + rotor and bearings 5 Suction flange 6 Bearing’s lower support 7 Upper cover 8 Handle and O-ring 9 Mechanical seal and washer...
- Page 29 Doc. DX 50-11,50-15 All manuals and user guides at all-guides.com First edition date :12/98 Spare Exploded view Revision date 1 Pump body 2 Impeller 3 Motor casing + wound stator 4 Shaft + rotor and bearings 5 Suction flange 6 Bearing’s lower support 7 Upper cover 8 Handle and O-ring 9 Mechanical seal and washer...
-
Page 30: Electrical Connections
Doc. Electrical All manuals and user guides at all-guides.com First edition date :12/98 Revision date Connections 50 AND 60 Hz THREE-PHASE CONNECTION DIAGRAM SUPPLY CABLE MOTOR START YELLOW-GREEN CABLE GUIDE CONNECTOR YELLOW-GREEN 50 AND 60 Hz SINGLE-PHASE CONNECTION DIAGRAM (WITHOUT FLOAT) CAPACITOR SUPPLY CABLE MOTOR... - Page 31 Doc. Electrical Connections All manuals and user guides at all-guides.com First edition date :12/98 Revision date with Panel 50 AND 60 Hz SINGLE-PHASE CONNECTION DIAGRAM (WITH FLOAT) CAPACITOR SUPPLY CABLE MOTOR LINE BROWN WHITE BROWN BROWN BLACK BLACK CABLE GUIDE YELLOW-GREEN YELLOW-GREEN PLUG...
Need help?
Do you have a question about the FLYGT DX Series and is the answer not in the manual?
Questions and answers