Advertisement
Quick Links
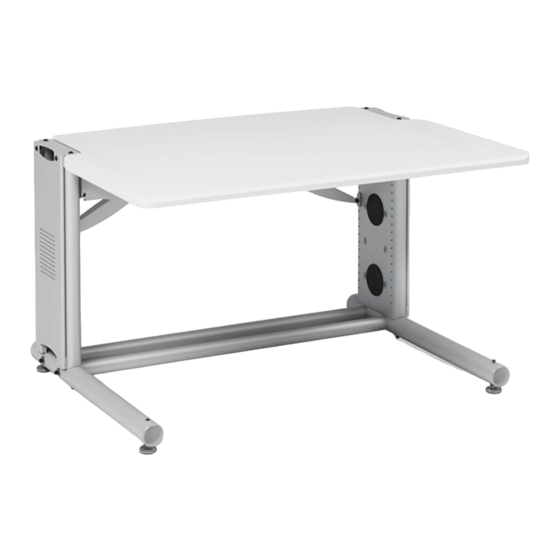
48" Bench II
These Assembly Instructions
are for the 48" Bench models.
Before beginning assembly
of your Bench, please take a
moment to review the parts
listed below to verify that your
shipment is complete.
Your Bench is heavy!
Don't try to lift it yourself. Work
with a buddy.
07
Enclosed Parts List
01– 48" Wide Bench Shelf ...................... Qty. 1 ........................... (see below)
28" Deep (ABS4829zz-xx and ABS4835zz-xx)
36" Deep (ABD4829zz-xx and ABD4835zz-xx)
02– Bench Leg Assemblies ................... Qty. 2
25" Bench Legs (ABS4829zz-xx and ABD4829zz-xx)
31" Bench Legs (ABS4835zz-xx and ABD4835zz-xx)
03– Bench Arm Left ................................. Qty. 1
04– Cross Ends .......................................... Qty. 2
05– 1" Button-hd PB Screw ................... Qty. 12
06– M6x12mm insert screw ................. Qty. 4
07– 2.5" End Caps ..................................... Qty. 4
08– Caster Inserts ..................................... Qty. 4
09– Caster, 5" locking .............................. Qty. 4
10– M8x101mm button head screw . Qty. 8
11– Curved Washers ................................ Qty. 8
12– Bench Base Tubes ............................ Qty. 2
28" Deep (ABS4829zz-xx and ABS4835zz-xx)
36" Deep (ABD4829zz-xx and ABD4835zz-xx)
www.ergotron.com |
USA: 1-800-888-8458
01
02
03
06
08
10
09
|
Europe: +31 (0)33-45 45 600
19
04
05
12
11
13– 15" Bench Buttress ........................... Qty. 2
14– 41.5" Bench Cross Tubes ................ Qty. 2
15– Keps Nuts M6 .................................... Qty. 8
16– M6x12mm Pan screws ................... Qty. 8
17– Bench Arm Right .............................. Qty. 1
18– Support Screws ................................ Qty. 20
19– 48" Bench Pans .................................. Qty. 2
All Screw quantities listed here are the minimum needed for your
Bench assembly. There may be a few extra Screws included, which
are not counted in the Parts List.
To make the assembly of your Bench even easier, we have included the
required tools.. The handy Hex Driver Bit can be used in your electric
drill in place of the Hex Driver.
20- Tool, Hex Driver M4 ........................... Qty. 1
21- Tool, Hex Driver Bit
22- Tool, Hex Key
Tool, 3-Way Wrench(not shown) .......... Qty. 1
|
China: 400-120-3051
18
17
13
14
16
15
5
/
" .................... Qty. 1
32
1
/
" ................................. Qty. 1
4
|
Japan: japansupport@ergotron.com
21
20
22
Advertisement

Related Manuals for Ergotron 48" Bench II


Summary of Contents for Ergotron 48" Bench II
- Page 1 12– Bench Base Tubes ......Qty. 2 22- Tool, Hex Key ” ......... Qty. 1 28” Deep (ABS4829zz-xx and ABS4835zz-xx) Tool, 3-Way Wrench(not shown) ..Qty. 1 36” Deep (ABD4829zz-xx and ABD4835zz-xx) www.ergotron.com | USA: 1-800-888-8458 Europe: +31 (0)33-45 45 600 China: 400-120-3051 Japan: japansupport@ergotron.com...
- Page 2 48” Bench Assembly Instructions Step 1 Leave these two holes open Use a mallet to install the two Bench Caster Inserts into each Bench Base Tube and secure with one Insert Screw per Insert. Use a mallet to pop two End Caps into the ends of both Base Tubes.
- Page 3 Step 4 Determine the desired height of your Shelf. This instruction will place the shelf at the top of the legs, either 34” or 40” from the fl oor (depending on which height Bench you purchased). The holes along the Leg Assemblies are spaced at 1” increments.
- Page 4 Step 7 Place the Bench Shelf (laminate facing down) onto the fl oor. 1” button Hd PB Screw With the help of another person, carefully rotate the Base Assembly (from Step 6) over onto the Shelf. Position the holes on the Pans and Arms to align with the twelve pre- Pans drilled holes on the Shelf.
- Page 5 | USA: 1-800-888-8458 Europe: +31 (0)33-45 45 600 China: 400-120-3051 Japan: japansupport@ergotron.com...
Need help?
Do you have a question about the 48" Bench II and is the answer not in the manual?
Questions and answers