
Subscribe to Our Youtube Channel
Related Manuals for R82 bronco


Summary of Contents for R82 bronco
- Page 1 English user manual © 2004 R82 A/S. All rights reserved. The R82 logo and the Bronco are registered trademarks of R82 A/S. 04.2007...
-
Page 2: Table Of Contents
Contents Bronco ................3 Safety ................4 Guarantee................4 Tools .................. 4 Washing ................4 Maintenance ..............4 Ready for use ..............5 Height adjustment of seat and body support ..... 6 Angle adjustment of the body support ....... 6 Brake ................. -
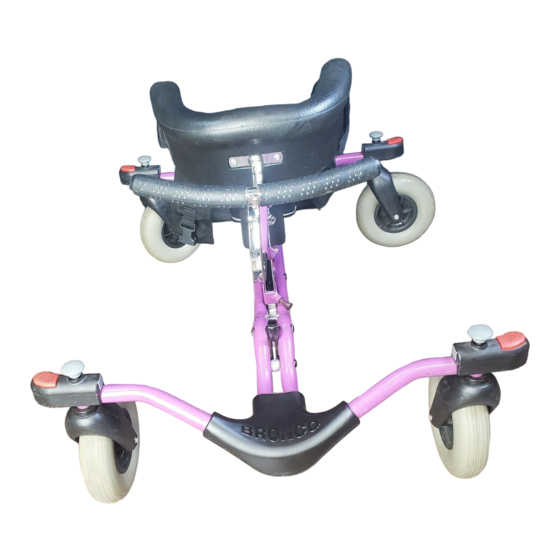
Page 3: Bronco
Congratulations on choosing the Bronco. We are convinced that it will fully live up to your expectations. The Bronco is the outdoor walking aid from R82 for children from 1½ to 8 years of age. This manual describes and illustrates all functions, and will enable you to take... -
Page 4: Safety
The Bronco is guaranteed for 12 months. The guarantee is only valid when using original R82 spare parts and fittings. All special adjustments must be made by R82. R82 will not be held responsible for damage or injury caused by use of non-original parts or repairs made by a non-authorized R82 person. -
Page 5: Ready For Use
The Bronco is delivered in parts to make it take up as little room as possible during transporta- tion. To make your Bronco ready for use, please follow the below description. 1) Dismount the fitting (A). 2) Mount the seat (B) on the vertical bar on the frame and fasten with the enclosed Allen key. -
Page 6: Height Adjustment Of Seat And Body Support
heiGht adjustMent of seat and Body support Use the Allen key as shown (A) to adjust the seat height. Fasten at the right position. Adjust the height or remove the body support by using the Allen key. (B) anGle adjustMent of the Body support Pull the small handle forward as shown (C), to release the gasspring. -
Page 7: Brake
1) Activate the brake (A) using a foot. 2) Deactivate the brake (B) using a foot. Make sure that all four brakes are activated before placing the user into the Bronco. direCtional staBilizer The directional stabilizer prevents the wheels from turning. -
Page 8: Abdominal Pad
aBdoMinal pad Use the Allen key to height adjust the abdominal pad (A). Use the Allen key to depth adjust the abdominal pad (B). The abdominal pad is only to be used on size 1+2. rear support Remove or adjust the depth of the rear support by utilizing the handle behind the seat. -
Page 9: Head Support
When both head support and side sup- ports are needed, the side supports have to be mounted on the body support bar. Please notice that Bronco size 2 can not be equipped with both head support and side supports. -
Page 10: Handbrace
handBraCe Use the enclosed 6 mm Allen key (A) to height adjust the handbrace. Depth adjustment of the handbrace is done with the 6 mm Allen key (B). arMrest To adjust the angle, loosen the black lever (C) below the armrest. -
Page 11: Side Supports
Adjust the height with the attached 6 mm Allen key. (B) helper’s handle The helper’s handle is mounted in the back of the Bronco, as shown (C). Fasten with the black lever. Do not lift the Bronco by using the helper’s handle. -
Page 12: Vertical Hand Grips, Mounted At The Ends
VertiCal hand Grips, Mounted at the ends Mount the vertical hand grips at the end of the hand brace in the following manner: 1) Pop out the stopper (A) with a screwdriver. 2) Insert the grip and the supplied bushing (B) into the hand brace at the desired angle. -
Page 13: Vertical Hand Grips, Mounted In The Middle
VertiCal hand Grips, Mounted in the Middle 1. Cut the grip material (A) and remove it from the handbrace. Remove the stopper. 2. Determine placement of the hand grip (B) and take measurements to determine length of new grip material required for both sides of the hand grip. -
Page 14: Product Identification
produCt identifiCation A) Serial number The label is placed just next to the left rear wheel. B) Manufacturer The label is placed just next to the left rear wheel. Dato: 31-01-02 Belast: kg 0840-01-111878-001 Varenr: 880003 5707292 134158 Parallelvej 3 DK-8751 Gedved... -
Page 15: Measurements
MeasureMents Size 0 Size 1 Size 2 cm (inch) cm (inch) cm (inch) Length (L) 95 (37") 107 (41¾") 125 (28¾") Width (W) 59 (23") 66 (25¾") 73 (28½") Height (H) 54-66 (21-25¾") 58-81 (22½-31½") 70-103 (27¼-40¼") Seat height (SH) 27-37 (10½-14½") 33-51 (12¾-20") 43-61 (16¾-23¾") Angle frequency (A) -
Page 16: Technical Data
Frame: Chrome or powder lacquered steel Upholstery: PUR (Polyurethane foam) distriButor produCer R82 A/S Parallelvej 3 8751 Gedved Denmark Please find your distributor on www.r82.com...
Need help?
Do you have a question about the bronco and is the answer not in the manual?
Questions and answers