Advertisement
Quick Links
Advertisement

Related Manuals for Wali TVDVD-04


Summary of Contents for Wali TVDVD-04
- Page 1 TVDVD-04...
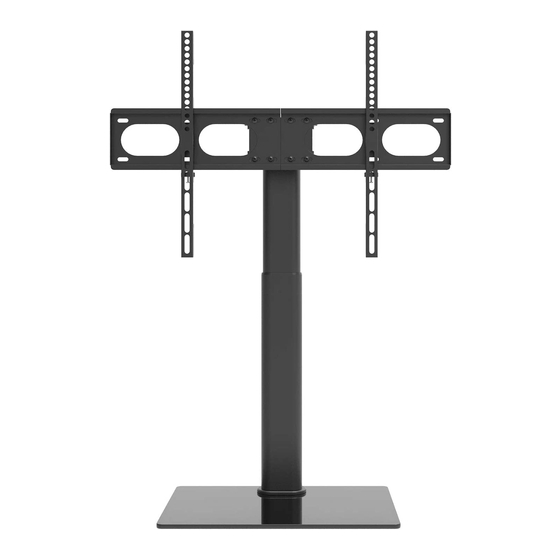
- Page 2 Supplied Parts List (1)Swivel Headstock-a1 (2)TV Plate-a2 (2)Monitor Bracket-b (1)Tempered Glass-c (1)Support Column-d1 (1)Support Column-d2 (1)Headstock (2) Wrench-d4 (1)Plastic Socket-e Connector-d3 (1)Metal Pad-f (8)M6x10 Bolt-g (8)M6 Washer-h (3)M8x22 Bolt-i (8)M6x6 Bolt-j (4)Rubber Foot-k (4)M4x12 Bolt-l (4)M4x30 Bolt-m (4)M6x20 Bolt-n (4)M6x35 Bolt-o (4)M8x20 Bolt-p (4)M8x35 Bolt-q (4)M8x50 Bolt-r (4)M4 Washer-s...
- Page 3 Step 1 Connecting the Support Column to Tempered Glass 1.1. Tear off the protect paper from the four piece of 1.2. Bolt Support Column-d1 through the tempered glass Rubber Foot-k, and then attach them to each corner of using provide parts (e,f,i) accessories, tighten them up with the Tempered Glass-c.
- Page 4 Step 3 Connecting the TV Plate to Support Column 3.1. Unscrew the center screw on Swivel Headstock-a1, 3.2. Attach TV Plate-a2 to the Swivel Headstock-a1 and adjust the then place the Swivel Headstock-a1 onto the Headstock holes to precisely match up, then use M6x6 Bolt-j and Connector-d3 and adjust the holes to precisely match up, M6 Washer-h to bolt them up with Allen Key-x .
- Page 5 Step 5 Attaching TV To TV Plate 1. Select your preferred viewing height and carefully hold 2. Swivel Headstock-a1 set up with tilt +15/-3 degree, use the TV assembled with Monitor Bracket-b onto the Wrench-d4 to loose/tight the beneath screw to set your assembled TV Plate-a2 , insert the Buckle-z to the preferred angle.
- Page 6 Mount the other end single hole to your wall using Anti-tip Cable Kit-y drill suitable hole size according to your wall material . Wood Stud Wall Concrete & Brick Wall 45m m 50m m 3.8m m 8m m Tie up the Nylon Cable Tie-z1 to Support Column-d1 for cable management. wall...
Need help?
Do you have a question about the TVDVD-04 and is the answer not in the manual?
Questions and answers