Bikespeed RealSpeed Instructions For The Installation And Description Of The Functions
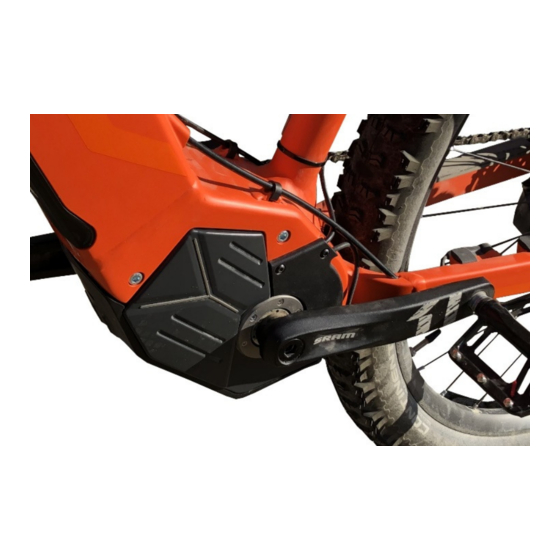
Sachs mid-motor design
Hide thumbs
Also See for RealSpeed:
- Instruction for the installation (28 pages) ,
- Instructions for the installation and description of the functions (24 pages) ,
- Instruction for the installation (16 pages)

Related Manuals for Bikespeed RealSpeed


Summary of Contents for Bikespeed RealSpeed
- Page 1 Instructions for the installation and description of the functions for Sachs mid-motor design …for further information visit… date: 26.08.2021 current version of this manual at bikespeed.de page 1...
-
Page 2: Product Description
(https://www.bikespeed.de) If you are unsure, please feel free to contact us. Product description The bikespeed-RS is a simple and compact kit to bypass the speed limit of 25 km/h of bikes with Sachs RS mid-design. The installation is completely invisible. - Page 3 unnecessary, and you can use the tuning if you have an additional lighting system powered by the battery. The tuning makes the final speed void, that means the terminal velocity is only limited by the power of the drive and the muscular strength invested.
-
Page 4: Compatibility List
Compatibility list Please note that the following list may not be up to date. At the time of printing this manual, the bikespeed-RS is compatible with the following motors and displays. If updates are made to your pedelec, it is also possible that compatibility may no longer be given. - Page 5 Safety instructions, product liability and exclusion of liability By using the bikespeed-RS on your pedelec, a relevant safety feature (the speed-dependent limitation of the motor power) is overridden. You must assume that your pedelec is not suitable for this and e.g., frame, brakes, chassis, tires, etc.
- Page 6 A modified bicycle may only be used by an authorized, trained and instructed person. We assume the following level of training: Function User Operator Only persons trained and instructed about the special dangers Maintenance personnel Only the manufacturer of the pedelec or an / technicians authorized specialist workshop by persons with the appropriate expertise...
- Page 7 Before using the system, please enquire about the legal consequences that may arise for you because of the installation. We expressly point out that the use of bikespeed RS will result in the loss of the manufacturer's warranty. Furthermore, the manufacturer and bikespeed have no product liability for your pedelec.
- Page 8 Bikespeed or the manufacturer of your pedelec cannot guarantee that brakes, frame, chassis, tires, etc. are designed for the use of the tuning part. Before use, the more highly stressed components of the pedelec (e.g., frame, brakes, tires, bearings, and suspension, etc.) must be tuned by the manufacturer or tested and approved by a suitable testing Centre (e.g.,...
-
Page 9: Description Of Functions
Description of functions The bikespeed-RS removes the limit at 25 km/h of your pedelec. All other features and functions of your bike remain as usual. This also includes the protective measures installed by the manufacturer (e.g., short circuit, overcurrent, power, torque, temperature, etc.), except for the safety device for limiting the maximum speed. - Page 10 Please enter the combination quickly without a pause of 3 seconds between two keys. Repeat the procedure, if necessary, to obtain the desired setting. Hint: A switched off bikespeed-RS cannot be switched on with the combination for service-mode (see on page 11)! Hint for the odometer...
- Page 11 Begin on the highest level. In case of success the entire battery index will blink 3x and meanwhile the software version of the bikespeed-RS will be shown on the speed indicator. Now the tuning is in service mode and maintenance as well as software updating can be executed.
- Page 12 Please activate the service-mode only for updates on your pedelec! A switched off bikespeed-RS cannot be switched on again with the combination for service-mode! After activating the service mode, we recommend switching off the bike without moving it again.
- Page 13 The configuration options can be found in the shop on our website. There all possibilities are described with many tips and videos. If you are interested to upgrade your standard bikespeed RS on a custom version, you can feel free to contact us.
-
Page 14: Help In Case Of Problems
Help in case of problems If your bikespeed-RS does not work correctly at any given time, please check the following steps to help yourself. Should you still have problems please write an email before sending back the bikespeed-RS. Cause Solution... - Page 15 Help in case of problems (continue) - bikespeed-RS (c) cannot - Keep in mind you have to switch the switched on or off stages to enter the combination. - Please start in a sufficient high or low stage. - Please enter the combination continuous with a pause from one to three seconds between two keystrokes.
- Page 16 During installation, ensure that the ergonomic principle and functionality of the pedelec are not changed or impaired. The protection class of the bikespeed-RS is IP64. The bikespeed-RS does not require a separate power source. It is supplied with energy from the battery of the pedelec in which the tuning is installed.
- Page 17 If you still have questions, please feel free to contact us at any time. To access the connectors for connecting the bikespeed RS, a cover on the motor must be removed and a cable pulled through the frame. Please follow the instructions on the following pages.
- Page 18 Please turn off the bike and remove the battery from the frame. Then remove the shown cover on the motor by loosening the 3 screws. Underneath you will find various connectors to the motor. It is best to disconnect all connectors on the motor to give yourself some space for the next steps.
- Page 19 Unfasten the lower battery holder by removing the 4 screws shown. Please note that the holder is connected with cables. Avoid Pulling on These. Thread a pull wire through underneath the motor. Start doing this behind the holder for the battery that you just removed. The target of the pull wire is the opening of the cover removed in step 1.
- Page 20 Tie the supplied approx. 1m long cable to the pull wire. It is recommended to pull a loop of this cable under the motor first. (see next step). The black 4-pin connector must go into the battery bay, the end with the two 3-pin connectors remains out of the opening of step 1.
- Page 21 When you have pulled the loop of the cable below the motor, then carefully pull the end with the 4-pin connector. The 4- pin connector must then be in the battery compartment, and the two 3-pin connectors through the opening from step 1. Please pull carefully so as not to tear off any connector.
- Page 22 Now connect the 3-pin connector of the retracted cable to the connector of the speed sensor. Plug the other 3-pin connector of the retracted cable into the connection on the motor to which the speed sensor was previously connected. The connectors are coded. Please do not use force to plug a connector.
- Page 23 Pull the approx. 1m long cable into the battery compartment. The 4-pin connector must reach up to the top of the upper battery holder. Then plug all the other connectors removed in step 2 back into the motor. Use the slots from which you previously removed the plugs.
- Page 24 Now remove the upper battery holder by first removing the 4 screws shown and then removing the holder. Now guide the cable threaded in steps 4 to 8 upward through the battery bay. Make sure that the cable does not get in the way when inserting the battery.
- Page 25 You can now connect the 4-pin connector of the pulled-in cable to the corresponding counterpart on the bikespeed-RS. Here, too, the connectors are coded and can only be plugged together the right way round. Next, remove the cable grommet through which the cable to the display is routed into the frame.
- Page 26 Then, inside the frame, connect the two black, round connectors of the bikespeed-RS to the connectors of the display that have just been disconnected. The best way to do this is to first connect the cable that has been...
- Page 27 The connections are now complete. Stow the bikespeed-RS in the upper area of the frame and screw the upper battery holder removed in step 9 back into place. page 27...
- Page 28 Hint for disposal Electric and electronic devices that have become waste are called old devices. Owners of such old devices have to bring these to recycling facilities, where these are handled and recorded separately from urban solid waste. Old devices must not end up in the household refuse. In fact, they have to be collected in special collecting and recycling systems.
- Page 29 page 29...
- Page 30 page 30...
- Page 31 EG Konformitätserklärung / EU Declaration of Conformity Wir, die Firma bikespeed GmbH We, the company Huberstr. 17 97084 Würzburg erklären in eigener Verantwortung, dass das weiter unten aufgeführte Produkt declare under our sole responsibility that the following product Geräteart / Type of Product:...
- Page 32 meets the essential requirements of the following EU-Directives: 2014/30/EU Directive on Electromagnetic Compatibility 2011/65/EU Directive on the restriction of the use of certain hazardous substances in electrical and electronic equipment 2006/42/EC Machinery directive angewandte Standards und Verordnungen / applied standards and regulations: EN 15194:2017 EN 12100:2011...
Need help?
Do you have a question about the RealSpeed and is the answer not in the manual?
Questions and answers