Table of Contents
Advertisement
Quick Links
Advertisement
Table of Contents

Related Manuals for Brother 885-V35/V37


Summary of Contents for Brother 885-V35/V37
- Page 1 Computerized Embroidery and Sewing Machine Operation Manual Product Code 885-V35/V37 GETTING READY SEWING BASICS UTILITY STITCHES EMBROIDERY APPENDIX http://solutions.brother.com Please visit us at where you can get product support and answers to frequently asked questions (FAQs).
-
Page 3: Introduction
• When transporting the sewing machine, be sure to carry it by its handle. Lifting the sewing machine by any other part may damage the machine or result in the machine falling, which could cause injuries. - Page 4 • Your close attention is necessary when the machine is used by or near children. • The plastic bag that this sewing machine was supplied in should be kept out of the reach of children or disposed of. Never allow children to play with the bag due to the danger of suffocation.
- Page 5 — — — — — — — — — — — — — — — — — — — — — — — — — — — — — — — — — — — — — — — — — — — — — — — — — — — — FOR USERS IN THE UK, EIRE, MALTA AND CYPRUS ONLY IMPORTANT •...
- Page 6 • The included interface cable should be used in order to ensure compliance with the limits for a Class B digital device. • Changes or modifications not expressly approved by Brother Industries, Ltd. could void the user's authority to operate the equipment.
-
Page 7: Table Of Contents
— — — — — — — — — — — — — — — — — — — — — — — — — — — — — — — — — — — — — — — — — — — — — — — — — — — — Contents Introduction ... - Page 8 — — — — — — — — — — — — — — — — — — — — — — — — — — — — — — — — — — — — — — — — — — — — — — — — — — — Useful Functions...
- Page 9 — — — — — — — — — — — — — — — — — — — — — — — — — — — — — — — — — — — — — — — — — — — — — — — — — — — — Adjusting the character spacing...
-
Page 10: Machine Features
— — — — — — — — — — — — — — — — — — — — — — — — — — — — — — — — — — — — — — — — — — — — — — — — — — — Machine Features a Automatic thread cutting The thread can be cut automatically after sewing (page 59, 65). -
Page 11: Accessories
Note Foot controller: Model T This foot controller can be used on the machine with product code 885-V35/V37.The product code is mentioned on the machine rating plate. The securing screw on the side of the presser foot holder is available through your authorized dealer. -
Page 12: Optional Accessories
Memo To obtain optional accessories or parts, contact your sales representative, the nearest authorized service center or visit the website at [http://www.brother.com/]. All specifications are correct at the time of printing. The part codes are subject to change without notice. -
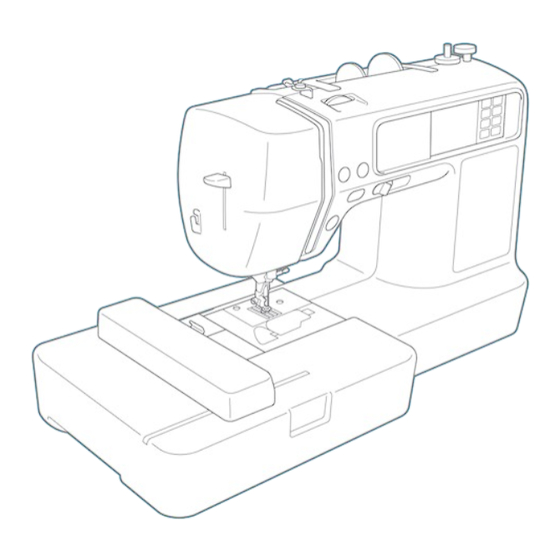
Page 13: Names Of Machine Parts And Their Functions
Names of Machine Parts and Their Functions The names of the various parts of the sewing machine and their functions are described below. Before using the sewing machine, carefully read these descriptions to learn the names of the machine parts. -
Page 14: Needle And Presser Foot Section
Do not cover the air vent while the sewing machine is being used. f Main power switch (page 17) Use the main power switch to turn the sewing machine on and off. g Foot controller jack (page 56) Insert the plug on the end of the foot controller cable into the foot controller jack. -
Page 15: Operation Buttons
— — — — — — — — — — — — — — — — — — — — — — — — — — — — — — — — — — — — — — — — — — — — — — — — — — — — Operation buttons The operation buttons help you to easily perform various basic sewing machine operations. a Start/stop button Press the start/stop button to start or stop sewing. -
Page 16: Operation Panel
Press to set the needle stop position, the buzzer sound, and more. i Sewing machine help key Press to get help on using the sewing machine. Displays simple explanations of setting upper thread / bobbin winding / setting bobbin thread / needle replacement /... -
Page 17: Getting Ready
GETTING READY The various preparations required before starting to sew are described in this chapter. Turning the Machine On/Off ...16 LCD (Liquid Crystal Display) Operation...18 Winding/Installing the Bobbin...22 Upper Threading ...31 Replacing the Needle ...39 Replacing the Presser Foot ...43 Sewing Cylindrical Pieces and Large Pieces...46... -
Page 18: Turning The Machine On/Off
— — — — — — — — — — — — — — — — — — — — — — — — — — — — — — — — — — — — — — — — — — — — GETTING READY Turning the Machine On/Off This section explains how to turn the sewing machine on and off. Power supply precautions Be sure to observe the following precautions concerning the power supply. -
Page 19: Turning On The Machine
— — — — — — — — — — — — — — — — — — — — — — — — — — — — — — — — — — — — — — — — — — — — — — — — — — — — Turning on the machine Prepare the included power cord. Make sure that the sewing machine is turned off (the main power switch is set to " then plug the power supply cord into the power supply jack on the right side of the machine. -
Page 20: Lcd (Liquid Crystal Display) Operation
Selected stitch, pattern settings and messages are displayed on the LCD (liquid crystal display) on the front of the sewing machine. Change the screen on the LCD using the keys on the right side of the LCD, and make operations by directly touching the icons with your finger or a "Operation panel"... - Page 21 The service count is a reminder to take your machine in for regular servicing. (Contact your authorized dealer for details.) The "NO." is the number for the embroidery and sewing machine. LCD (Liquid Crystal Display) Operation 19 Settings 0 to 10 Thread color/Time to...
- Page 22 — — — — — — — — — — — — — — — — — — — — — — — — — — — — — — — — — — — — — — — — — — — — GETTING READY Turn on the sewing machine. The highlighted display is the initial setting.
-
Page 23: Checking Machine Operating Procedures
/ presser foot replacement on the LCD. Turn on the sewing machine. The LCD comes on. Press (Sewing machine help key) on the display panel. The sewing machine help screen appears. Press the item to be displayed. Upper threading Bobbin winding Bobbin installation Needle replacement... -
Page 24: Winding/Installing The Bobbin
● Only use the Bobbin (part code: SA156, SFB (XA5539-151)) designed specifically for this sewing machine. Use of any other bobbin may result in injuries or damage to the machine. ● The included bobbin was designed specifically for this sewing machine. If bobbins from other models are used, the machine will not operate correctly. - Page 25 — — — — — — — — — — — — — — — — — — — — — — — — — — — — — — — — — — — — — — — — — — — — — — — — — — — — Turn on the sewing machine.
- Page 26 — — — — — — — — — — — — — — — — — — — — — — — — — — — — — — — — — — — — — — — — — — — — GETTING READY Note When sewing with fine, cross-wound thread,...
- Page 27 (Start/stop button) once to stop the machine. When the foot controller is plugged in, remove your foot from the foot controller. The bobbin winding will stop. CAUTION becomes slow, stop the machine. Otherwise, the sewing machine may be damaged. Winding/Installing the Bobbin 25...
- Page 28 Slide the sewing speed controller back to its original position. Memo When the sewing machine is started or the handwheel is turned after winding the bobbin, the machine will make a clicking sound; this is not a malfunction. ■ When the thread became tangled under the bobbin winder seat.
-
Page 29: Installing The Bobbin
● The included bobbin was designed specifically for this sewing machine. If bobbins from other models are used, the machine will not operate correctly. Use only the included bobbin or bobbins of the same type (part code: SA156, SFB (XA5539-151)). - Page 30 Needle position button b Presser foot lever Turn off the sewing machine. Slide the bobbin cover latch to the right. a Bobbin cover b Latch The bobbin cover opens.
- Page 31 — — — — — — — — — — — — — — — — — — — — — — — — — — — — — — — — — — — — — — — — — — — — — — — — — — — — Note If the thread is not correctly inserted through the tension-adjusting spring of the bobbin...
- Page 32 — — — — — — — — — — — — — — — — — — — — — — — — — — — — — — — — — — — — — — — — — — — — GETTING READY Carefully pull the upper thread upward to pull out the end of the bobbin thread.
-
Page 33: Upper Threading
— — — — — — — — — — — — — — — — — — — — — — — — — — — — — — — — — — — — — — — — — — — — — — — — — — — — Upper Threading This section describes how to position the spool for the upper thread, and then thread the needle. -
Page 34: Threading The Upper Thread
— — — — — — — — — — — — — — — — — — — — — — — — — — — — — — — — — — — — — — — — — — — — GETTING READY Threading the upper thread Set the spool of thread on the spool pin, and then... - Page 35 — — — — — — — — — — — — — — — — — — — — — — — — — — — — — — — — — — — — — — — — — — — — — — — — — — — — Slide the spool cap onto the spool pin and return the spool pin to its original position.
- Page 36 — — — — — — — — — — — — — — — — — — — — — — — — — — — — — — — — — — — — — — — — — — — — GETTING READY Make sure that the thread is passed into the thread take-up lever as shown below.
- Page 37 — — — — — — — — — — — — — — — — — — — — — — — — — — — — — — — — — — — — — — — — — — — — — — — — — — — — Lower the needle threader lever on the left side of the machine as much as possible to make the hook turn.
-
Page 38: Using The Twin Needle
— — — — — — — — — — — — — — — — — — — — — — — — — — — — — — — — — — — — — — — — — — — — GETTING READY ■... - Page 39 ● When using the twin needle, be sure to attach zigzag foot "J". If bunched stitches occur, use presser foot "N" or use a lightweight tear-away stabilizer. Turn on the sewing machine and select a stitch. • For stitch selection see "Selecting stitching" (page 51).
- Page 40 — — — — — — — — — — — — — — — — — — — — — — — — — — — — — — — — — — — — — — — — — — — — GETTING READY Press The screen for setting the twin needle...
-
Page 41: Replacing The Needle
Selecting the needle depending on the thread and fabric types The sewing machine needle that should be used depends on the fabric and thread thickness. Refer to the following table when choosing the thread and needle appropriate for the fabric that you wish to sew. -
Page 42: Checking The Needle
Use a 90/14 to 100/16 needle, regardless of the fabric or thread. ■ Embroidery needles Use a 75/11 home sewing machine needle. When embroidering on thick fabrics such as denim, use a 90/14 or 100/16 home sewing machine needle. CAUTION... -
Page 43: Replacing The Needle
Needle position button Turn off the sewing machine. CAUTION Before replacing the needle, be sure to turn off the sewing machine. Otherwise, injuries may occur if one of the operation buttons is accidentally pressed and the machine starts sewing. - Page 44 — — — — — — — — — — — — — — — — — — — — — — — — — — — — — — — — — — — — — — — — — — — — GETTING READY While holding the needle with your left hand, use the screwdriver to tighten the needle...
-
Page 45: Replacing The Presser Foot
● Use the presser foot appropriate for the type of stitch that you wish to sew, otherwise the needle may hit the presser foot, causing the needle to bend or break. ● Only use presser feet designed specifically for this sewing machine. Use of any other presser foot may result in injuries or damage to the machine. - Page 46 Check that the correct presser foot is attached before starting to sew. If the wrong presser foot is installed, turn off the sewing machine, attach the correct presser foot, and then select the desired stitch again. Buttonhole foot "A"...
-
Page 47: Removing And Attaching The Presser Foot Holder
Removing and attaching the presser foot holder Remove the presser foot holder when cleaning the sewing machine or when installing a presser foot that does not use the presser foot holder, such as the embroidery foot, optional free-motion open toe quilting foot "O"... -
Page 48: Sewing Cylindrical Pieces And Large Pieces
This is useful for sewing large pieces. a Cover of embroidery unit (extension table) CAUTION ● Do not move the sewing machine with the extension table attached. ● Do not use the extension table in any other way than how it is intended. - Page 49 — — — — — — — — — — — — — — — — — — — — — — — — — — — — — — — — — — — — — — — — — — — — — — — — — — — — Raise up the two legs on the reverse side of the extension table until they click.
- Page 50 — — — — — — — — — — — — — — — — — — — — — — — — — — — — — — — — — — — — — — — — — — — — GETTING READY...
-
Page 51: Sewing Basics
SEWING BASICS The necessary preparations for sewing are described in this chapter. Sewing...50 Setting the Stitch ...61 Useful Functions...64 Useful Sewing Tips ...68... -
Page 52: Sewing
For details on replacing the presser foot, refer to "Replacing the presser foot" (page 43). ↓ Turn on the sewing machine. For details on turning on the machine, refer to "Turning on the machine" (page 17). ↓ Select the stitch appropriate for the area to be sewn. -
Page 53: Stitch Types
If the wrong presser foot is used, the needle may hit the presser foot and bend or break. Turn on the sewing machine. • When an animation is displayed on the screen, touch the LCD with your finger. - Page 54 Check that the correct presser foot is attached before starting to sew. If the wrong presser foot is installed, turn off the sewing machine, attach the correct presser foot, and then select the desired stitch again. Memo For details on setting automatic reverse/ reinforcement stitching etc., refer to "Useful...
- Page 55 — — — — — — — — — — — — — — — — — — — — — — — — — — — — — — — — — — — — — — — — — — — — — — — — — — — — ■...
-
Page 56: Positioning The Fabric
— — — — — — — — — — — — — — — — — — — — — — — — — — — — — — — — — — — — — — — — — — — — SEWING BASICS Positioning the fabric Be sure that the fabric pieces are sewn in the correct... -
Page 57: Starting To Sew
— — — — — — — — — — — — — — — — — — — — — — — — — — — — — — — — — — — — — — — — — — — — — — — — — — — — Starting to sew Once you are ready to start sewing, you can start the sewing machine. Sewing can be started and stopped using the operation button the foot controller. For details on the foot controller, refer to next page. - Page 58 Turn off the sewing machine. Note When connecting the foot controller, be sure to turn off the sewing machine in order to prevent the machine from accidentally being started. Insert the foot controller plug into its jack on the right side of the sewing machine.
-
Page 59: Securing The Stitching
— — — — — — — — — — — — — — — — — — — — — — — — — — — — — — — — — — — — — — — — — — — — — — — — — — — — Memo When the foot controller is plugged in, (Start/stop button) cannot be used to start... - Page 60 (Start/stop button) is held down, the machine sews at a slow speed. The machine starts sewing in the normal sewing direction. After sewing to the end of the stitching, the sewing machine stops. Release (Start/stop button) or foot controller. Press...
-
Page 61: Cutting The Thread
Reverse stitching b Reinforcement stitching Memo The sewing machine can be set to automatically sew reverse or reinforcement stitches at the beginning and end of the stitching. For details, refer to "Automatic sewing reverse/reinforcement stitches"... - Page 62 When you wish to finish the stitching and the sewing machine is stopped, press position button) once to raise the needle. a Needle position button Raise the presser foot lever.
-
Page 63: Setting The Stitch
— — — — — — — — — — — — — — — — — — — — — — — — — — — — — — — — — — — — — — — — — — — — — — — — — — — — Setting the Stitch This machine is preset with the default settings for the stitch width and stitch length for each stitch. -
Page 64: Adjusting The Stitch Length
— — — — — — — — — — — — — — — — — — — — — — — — — — — — — — — — — — — — — — — — — — — — SEWING BASICS Adjusting the stitch length The stitch length can be adjusted to make the stitch... - Page 65 — — — — — — — — — — — — — — — — — — — — — — — — — — — — — — — — — — — — — — — — — — — — — — — — — — — — Memo When you finish sewing, remove the bobbin cover and then make sure that the thread is...
-
Page 66: Useful Functions
Functions useful in improving sewing efficiency are described below. Automatic sewing reverse/ reinforcement stitches The sewing machine can be set to automatically sew reverse or reinforcement stitches at the beginning and end of the stitching. Depending on the selected stitch, reverse stitches or reinforcement stitches are automatically set. -
Page 67: Automatically Cutting The Thread
— — — — — — — — — — — — — — — — — — — — — — — — — — — — — — — — — — — — — — — — — — — — — — — — — — — — Memo Press (Start/stop button) when you want to stop the sewing machine in the middle of sewing without reverse stitching or reinforcement stitching (for example, when you want to change the sewing direction). -
Page 68: Mirroring Stitches
The thread is cut here. Memo Press (Start/stop button) when you want to stop the sewing machine in the middle of sewing without programmed thread-cutting (for example, when you want to change the sewing direction). The sewing machine stops without programmed thread cutting. -
Page 69: Saving Stitch Settings
— — — — — — — — — — — — — — — — — — — — — — — — — — — — — — — — — — — — — — — — — — — — — — — — — — — — Saving stitch settings This machine is preset with the default settings for the stitch width (zigzag width), stitch length,... -
Page 70: Useful Sewing Tips
Changing the sewing direction When the stitching reaches a corner, stop the sewing machine. Leave the needle lowered (in the fabric). If the needle remained up when the machine stopped sewing, press (Needle position button) to lower the needle. -
Page 71: Sewing Hook-And-Loop Fastener
— — — — — — — — — — — — — — — — — — — — — — — — — — — — — — — — — — — — — — — — — — — — — — — — — — — — ■... -
Page 72: Sewing Stretch Fabrics
— — — — — — — — — — — — — — — — — — — — — — — — — — — — — — — — — — — — — — — — — — — — SEWING BASICS Sewing stretch fabrics First, baste the pieces of fabric together, and then sew... -
Page 73: Utility Stitches
UTILITY STITCHES The various stitches and their applications are described in this chapter. Stitch Setting Chart ...72 Overcasting Stitches...78 Basic Stitching ...82 Blind Hem Stitching ...84 Buttonhole Stitching/Button Sewing...87 Zipper Insertion...94 Sewing Stretch Fabrics and Elastic Tape ...99 Appliqué, Patchwork and Quilt Stitching ...101 Reinforcement Stitching ...108 Eyelet Stitching...113 Decorative Stitching...114... -
Page 74: Stitch Setting Chart
— — — — — — — — — — — — — — — — — — — — — — — — — — — — — — — — — — — — — — — — — — — UTILITY STITCHES Stitch Setting Chart Applications, stitch lengths and widths and whether the twin needle can be used are listed for utility... - Page 75 — — — — — — — — — — — — — — — — — — — — — — — — — — — — — — — — — — — — — — — — — — — — — — — — — — — — Stitch Name Pattern Blind hem stitch...
- Page 76 — — — — — — — — — — — — — — — — — — — — — — — — — — — — — — — — — — — — — — — — — — — UTILITY STITCHES Stitch Name Pattern...
- Page 77 — — — — — — — — — — — — — — — — — — — — — — — — — — — — — — — — — — — — — — — — — — — — — — — — — — — — Stitch Name Pattern Buttonhole stitch...
-
Page 78: Other Stitches
— — — — — — — — — — — — — — — — — — — — — — — — — — — — — — — — — — — — — — — — — — — UTILITY STITCHES Other stitches Stitch Type... - Page 79 — — — — — — — — — — — — — — — — — — — — — — — — — — — — — — — — — — — — — — — — — — — — — — — — — — — — Stitch Type Character stitches...
-
Page 80: Overcasting Stitches
— — — — — — — — — — — — — — — — — — — — — — — — — — — — — — — — — — — — — — — — — — — UTILITY STITCHES Overcasting Stitches Sew overcasting stitches along the edges of cut fabric to prevent them from fraying. -
Page 81: Sewing Overcasting Stitches Using Zigzag Foot "J
— — — — — — — — — — — — — — — — — — — — — — — — — — — — — — — — — — — — — — — — — — — — — — — — — — — — Sewing overcasting stitches using zigzag foot "J"... -
Page 82: Sewing Overcasting Stitches Using The Optional Side Cutter
— — — — — — — — — — — — — — — — — — — — — — — — — — — — — — — — — — — — — — — — — — — UTILITY STITCHES Sewing overcasting stitches using the optional side cutter Using the optional side cutter, seam allowances can be finished while the edge of the fabric is cut off. - Page 83 Raise the presser foot lever to check that the side cutter is securely attached. Pass the upper thread under the side cutter, and then pull it out toward the rear of the sewing machine. Select a stitch. • For details, refer to "Selecting stitching" (page 51 Make a cut of about 2 cm (3/4 inch) long in the fabric at the beginning of the stitching.
-
Page 84: Basic Stitching
— — — — — — — — — — — — — — — — — — — — — — — — — — — — — — — — — — — — — — — — — — — UTILITY STITCHES Basic Stitching Straight stitches are used for sewing plain seams. - Page 85 — — — — — — — — — — — — — — — — — — — — — — — — — — — — — — — — — — — — — — — — — — — — — — — — — — — — Lower the needle into the fabric at the beginning of the stitching.
-
Page 86: Blind Hem Stitching
— — — — — — — — — — — — — — — — — — — — — — — — — — — — — — — — — — — — — — — — — — — UTILITY STITCHES Blind Hem Stitching Secure the bottoms of skirts and pants with a blind hem. - Page 87 — — — — — — — — — — — — — — — — — — — — — — — — — — — — — — — — — — — — — — — — — — — — — — — — — — — — Fold back the fabric inside along the basting.
- Page 88 — — — — — — — — — — — — — — — — — — — — — — — — — — — — — — — — — — — — — — — — — — — UTILITY STITCHES ■...
-
Page 89: Buttonhole Stitching/Button Sewing
— — — — — — — — — — — — — — — — — — — — — — — — — — — — — — — — — — — — — — — — — — — — — — — — — — — — Buttonhole Stitching/Button Sewing Buttonholes can be sewn and buttons can be sewn on. -
Page 90: Buttonhole Sewing
— — — — — — — — — — — — — — — — — — — — — — — — — — — — — — — — — — — — — — — — — — — UTILITY STITCHES Buttonhole sewing The maximum buttonhole length is about 28 mm (1-1/8 inches) (diameter + thickness of the button). - Page 91 — — — — — — — — — — — — — — — — — — — — — — — — — — — — — — — — — — — — — — — — — — — — — — — — — — — — Pull out the button guide plate of buttonhole foot "A", and then insert the button that will be put through the buttonhole.
- Page 92 — — — — — — — — — — — — — — — — — — — — — — — — — — — — — — — — — — — — — — — — — — — UTILITY STITCHES Note Do not lower the needle into fabric when...
- Page 93 — — — — — — — — — — — — — — — — — — — — — — — — — — — — — — — — — — — — — — — — — — — — — — — — — — — — CAUTION ●...
-
Page 94: Button Sewing
— — — — — — — — — — — — — — — — — — — — — — — — — — — — — — — — — — — — — — — — — — — UTILITY STITCHES Button sewing Buttons can be sewn on with the sewing machine. Buttons with two or with four holes can be attached. Measure the distance between the holes in the button to be attached. - Page 95 — — — — — — — — — — — — — — — — — — — — — — — — — — — — — — — — — — — — — — — — — — — — — — — — — — — — Start sewing. Set the sewing speed controller to the left (so that the speed will be slow). The sewing machine automatically stops after sewing reinforcement stitches. Note Do not press...
-
Page 96: Zipper Insertion
— — — — — — — — — — — — — — — — — — — — — — — — — — — — — — — — — — — — — — — — — — — UTILITY STITCHES Zipper Insertion A zipper can be inserted. - Page 97 — — — — — — — — — — — — — — — — — — — — — — — — — — — — — — — — — — — — — — — — — — — — — — — — — — — — Align the seam with the center of the zipper, and then baste the zipper in place.
-
Page 98: Inserting A Side Zipper
— — — — — — — — — — — — — — — — — — — — — — — — — — — — — — — — — — — — — — — — — — — UTILITY STITCHES Inserting a side zipper Stitching is visible on only one piece of fabric. - Page 99 When you are about 5 cm (2 inches) from the end of the zipper, stop the sewing machine with the needle lowered (in the fabric), and then raise the presser foot lever.
- Page 100 When you are about 5 cm (2 inches) from the end of the zipper, stop the sewing machine with the needle lowered (in the fabric), and then raise the presser foot lever.
-
Page 101: Sewing Stretch Fabrics And Elastic Tape
— — — — — — — — — — — — — — — — — — — — — — — — — — — — — — — — — — — — — — — — — — — — — — — — — — — — Sewing Stretch Fabrics and Elastic Tape Stretch fabrics can be sewn and elastic tape can be attached. -
Page 102: Elastic Attaching
— — — — — — — — — — — — — — — — — — — — — — — — — — — — — — — — — — — — — — — — — — — UTILITY STITCHES Elastic attaching When elastic tape is attached to the cuff or waist of a... -
Page 103: Appliqué, Patchwork And Quilt Stitching
— — — — — — — — — — — — — — — — — — — — — — — — — — — — — — — — — — — — — — — — — — — — — — — — — — — — Appliqué, Patchwork and Quilt Stitching The stitches that can be used for sewing appliqu Stitch Name Pattern... -
Page 104: Appliqué Stitching
— — — — — — — — — — — — — — — — — — — — — — — — — — — — — — — — — — — — — — — — — — — UTILITY STITCHES Appliqué... -
Page 105: Patchwork (Crazy Quilt) Stitching
— — — — — — — — — — — — — — — — — — — — — — — — — — — — — — — — — — — — — — — — — — — — — — — — — — — — Patchwork (crazy quilt) stitching Fold the edge of the top piece of fabric and... -
Page 106: Quilting
— — — — — — — — — — — — — — — — — — — — — — — — — — — — — — — — — — — — — — — — — — — UTILITY STITCHES Quilting Sandwiching batting between the top and bottom... - Page 107 — — — — — — — — — — — — — — — — — — — — — — — — — — — — — — — — — — — — — — — — — — — — — — — — — — — — ■...
-
Page 108: Free-Motion Quilting
Drop feed lever (as seen from the rear of the machine) The feed dogs are lowered. Turn on the sewing machine, and then select a stitch • For details, refer to "Selecting stitching" (page 51). Use both hands to stretch the fabric taut, and then move the fabric at a consistent pace in order to sew uniform stitches roughly 2.0-... -
Page 109: Satin Stitching Using The Sewing Speed Controller
A decorative stitch can be sewn by changing the stitch width of a satin stitch. If the sewing machine is set so that the stitch width can be adjusted using the sewing speed controller, the stitch width can quickly and easily be adjusted. -
Page 110: Reinforcement Stitching
— — — — — — — — — — — — — — — — — — — — — — — — — — — — — — — — — — — — — — — — — — — UTILITY STITCHES Reinforcement Stitching Reinforce points that will be subject to strain, such as sleeve holes, inseams and pocket corners. - Page 111 — — — — — — — — — — — — — — — — — — — — — — — — — — — — — — — — — — — — — — — — — — — — — — — — — — — — Determine the desired length of the bar tack.
- Page 112 — — — — — — — — — — — — — — — — — — — — — — — — — — — — — — — — — — — — — — — — — — — UTILITY STITCHES Gently hold the end of the upper thread in your left hand, and then start sewing.
-
Page 113: Darning
— — — — — — — — — — — — — — — — — — — — — — — — — — — — — — — — — — — — — — — — — — — — — — — — — — — — Darning Fabric that has been torn can be darned. - Page 114 — — — — — — — — — — — — — — — — — — — — — — — — — — — — — — — — — — — — — — — — — — — UTILITY STITCHES Memo When lowering the presser foot, do not push...
-
Page 115: Eyelet Stitching
— — — — — — — — — — — — — — — — — — — — — — — — — — — — — — — — — — — — — — — — — — — — — — — — — — — — Eyelet Stitching Eyelets, such as those on belts, can be sewn. -
Page 116: Decorative Stitching
— — — — — — — — — — — — — — — — — — — — — — — — — — — — — — — — — — — — — — — — — — — UTILITY STITCHES Decorative Stitching The utility stitches contain the following decorative stitches. -
Page 117: Fagoting
— — — — — — — — — — — — — — — — — — — — — — — — — — — — — — — — — — — — — — — — — — — — — — — — — — — — Stitch Name Pattern Decorative stitch... -
Page 118: Scallop Stitching
— — — — — — — — — — — — — — — — — — — — — — — — — — — — — — — — — — — — — — — — — — — UTILITY STITCHES Sew with the center of the presser foot aligned along the center of the two pieces of fabric. -
Page 119: Smocking
— — — — — — — — — — — — — — — — — — — — — — — — — — — — — — — — — — — — — — — — — — — — — — — — — — — — Smocking The decorative stitch created by stitching or embroidering over gathers is called "smocking". -
Page 120: Shell Tuck Stitching
— — — — — — — — — — — — — — — — — — — — — — — — — — — — — — — — — — — — — — — — — — — UTILITY STITCHES Shell tuck stitching The gathers that look like shells are called "shell... -
Page 121: Joining
Memo Use a 130/705H 100/16 wing needle. The needle threader cannot be used with the wing needle, otherwise the sewing machine may be damaged. Manually pass the thread through the eye of the needle from the front to the back. For details, refer to "Threading the needle manually (without using the needle threader)"... - Page 122 — — — — — — — — — — — — — — — — — — — — — — — — — — — — — — — — — — — — — — — — — — — UTILITY STITCHES Select a stitch.
- Page 123 — — — — — — — — — — — — — — — — — — — — — — — — — — — — — — — — — — — — — — — — — — — — — — — — — — — — Press on the LCD.
-
Page 124: Sewing The Various Built-In Decorative Patterns
■ Needles and threads When sewing thin, mediumweight or stretch fabrics, use the ball point needle. When sewing thick fabrics, use a 90/14 home sewing machine needle. In addition, #50 to #60 thread should be used. ■ Trial sewing... -
Page 125: Changing The Stitch Density
— — — — — — — — — — — — — — — — — — — — — — — — — — — — — — — — — — — — — — — — — — — — — — — — — — — — Changing the stitch density If a decorative satin stitch has been selected, the stitch density can be changed. -
Page 126: Changing The Length For Satin Stitches
— — — — — — — — — — — — — — — — — — — — — — — — — — — — — — — — — — — — — — — — — — — UTILITY STITCHES Changing the length for satin stitches... -
Page 127: Realigning The Pattern
The pattern alignment stitch is selected. Start sewing. The pattern for making the adjustment is sewn. The sewing machine stops after sewing the pattern has finished. Check the sewn pattern. If the part of the pattern indicated in the illustration is sewn uniformly, the pattern is correctly aligned. -
Page 128: Combining Patterns
— — — — — — — — — — — — — — — — — — — — — — — — — — — — — — — — — — — — — — — — — — — UTILITY STITCHES Press to decrease the vertical space in the... - Page 129 Memo If repeated sewing repeatedly sewn until the sewing machine is stopped. If the sewing machine is turned off, the repeated/single sewing setting returns to its default setting. If pressed again, it turns to sewing). Sewing the Various Built-in Decorative Patterns 127...
- Page 130 — — — — — — — — — — — — — — — — — — — — — — — — — — — — — — — — — — — — — — — — — — — UTILITY STITCHES ■...
-
Page 131: Saving Patterns
— — — — — — — — — — — — — — — — — — — — — — — — — — — — — — — — — — — — — — — — — — — — — — — — — — — — Saving patterns Combined patterns can be saved for later use. Since saved patterns are not lost after the sewing machine is turned off, they can be retrieved at any time. Up to 10 patterns can be saved. - Page 132 — — — — — — — — — — — — — — — — — — — — — — — — — — — — — — — — — — — — — — — — — — — UTILITY STITCHES ■...
-
Page 133: Designing A Pattern (My Custom Stitch)
— — — — — — — — — — — — — — — — — — — — — — — — — — — — — — — — — — — — — — — — — — — — — — — — — — — — Designing a Pattern (My Custom Stitch) With the My Custom Stitch function, you can sew stitch patterns that you design yourself. -
Page 134: Entering The Pattern Data
— — — — — — — — — — — — — — — — — — — — — — — — — — — — — — — — — — — — — — — — — — — UTILITY STITCHES Entering the pattern data Follow the pattern drawn on the grid sheet and program the pattern into the sewing machine. Attach monogramming foot "N". • For details, refer to "Replacing the presser foot" (page 43). -
Page 135: Editing The Pattern Data
— — — — — — — — — — — — — — — — — — — — — — — — — — — — — — — — — — — — — — — — — — — — — — — — — — — — Editing the pattern data To edit the pattern you entered, press screen for editing the pattern appears. -
Page 136: Examples Of Designs
— — — — — — — — — — — — — — — — — — — — — — — — — — — — — — — — — — — — — — — — — — — UTILITY STITCHES Examples of designs Enter each of the points indicated in the table to sew the sample stitch. -
Page 137: Embroidery
EMBROIDERY The steps for embroidering are described in this chapter. Embroidering Neatly ...136 Attaching the Embroidery Foot...138 Attaching the Embroidery Unit...141 Preparing the Fabric ...144 Attaching the Embroidery Frame...148 Selecting Embroidery Patterns...150 Embroidering...157 Editing and Saving Patterns ...161 Using the Memory Function ...168... -
Page 138: Embroidering Neatly
When embroidering on large pieces of fabric, arrange the fabric so that it does not hang off the table where the sewing machine is placed. If embroidery is done with the fabric hanging off, the embroidery unit movement may be impaired, this could cause the pattern to sew incorrectly. -
Page 139: Embroidery Step By Step
— — — — — — — — — — — — — — — — — — — — — — — — — — — — — — — — — — — — — — — — — — — — — — — — — — — — Embroidery step by step The basic steps for embroidery are as follows. -
Page 140: Attaching The Embroidery Foot
Turn off the sewing machine. CAUTION Before attaching the embroidery foot, be sure to turn off the sewing machine. Otherwise, injuries may occur if one of the operation buttons is accidentally pressed and the machine starts sewing. - Page 141 — — — — — — — — — — — — — — — — — — — — — — — — — — — — — — — — — — — — — — — — — — — — — — — — — — — — Loosen the presser foot holder screw and remove the presser foot holder.
-
Page 142: Removing The Embroidery Foot
Needle position button Turn off the sewing machine. CAUTION Before removing the embroidery foot, be sure to turn off the sewing machine. Otherwise, injuries may occur if one of the operation buttons is accidentally pressed and the machine starts sewing. -
Page 143: Attaching The Embroidery Unit
Attaching the Embroidery Unit This section describes how to attach the embroidery unit. Embroidery unit precautions CAUTION ● Do not move the sewing machine with the embroidery unit in place. The embroidery unit may be dropped and cause injury. ● Keep your hands and other objects away from the embroidery carriage and frame. - Page 144 Push it in until it clicks and stops. The embroidery unit is attached. Note Make sure that there is no gap between the embroidery unit and the sewing machine, otherwise the embroidery pattern may not be sewn correctly. Be sure to fully insert the connector into the connection port.
-
Page 145: Removing The Embroidery Unit
— — — — — — — — — — — — — — — — — — — — — — — — — — — — — — — — — — — — — — — — — — — — — — — — — — — — Removing the embroidery unit Make sure that the sewing machine is completely stopped and follow the instructions below. -
Page 146: Preparing The Fabric
Use a water soluble sheet on thin materials like organdy and fabrics with a nap like towels. To obtain optional accessories or parts, visit [http://www.brother.com/], or [http:// www.brothermall.com] (in USA). CAUTION ● Always use stabilizer material when sewing embroidery projects. -
Page 147: Setting The Fabric In The Embroidery Frame
— — — — — — — — — — — — — — — — — — — — — — — — — — — — — — — — — — — — — — — — — — — — — — — — — — — — Setting the fabric in the embroidery frame The fabric is stretched in the embroidery frame. - Page 148 — — — — — — — — — — — — — — — — — — — — — — — — — — — — — — — — — — — — — — — — — — — — — EMBROIDERY Gently remove the fabric from the frame without loosening the adjustment screw.
- Page 149 — — — — — — — — — — — — — — — — — — — — — — — — — — — — — — — — — — — — — — — — — — — — — — — — — — — — Place the embroidery sheet on the inner frame.
-
Page 150: Attaching The Embroidery Frame
— — — — — — — — — — — — — — — — — — — — — — — — — — — — — — — — — — — — — — — — — — — — — EMBROIDERY Attaching the Embroidery Frame This section describes how to attach the embroidery frame. -
Page 151: Removing The Embroidery Frame
— — — — — — — — — — — — — — — — — — — — — — — — — — — — — — — — — — — — — — — — — — — — — — — — — — — — Removing the embroidery frame Make sure that the sewing machine is completely stopped and follow the instructions below. Raise the presser foot lever. -
Page 152: Selecting Embroidery Patterns
This section provides details on the various types of embroidery patterns available and the procedure for selecting a pattern. Copyright information The patterns saved in the sewing machine and embroidery cards are intended for private use only. Any public or commercial use of copyrighted patterns is an infringement of copyright law and is strictly prohibited. -
Page 153: Lcd (Liquid Crystal Display) Operation
— — — — — — — — — — — — — — — — — — — — — — — — — — — — — — — — — — — — — — — — — — — — — — — — — — — — LCD (liquid crystal display) operation The LCD (liquid crystal display) is operated using the... - Page 154 — — — — — — — — — — — — — — — — — — — — — — — — — — — — — — — — — — — — — — — — — — — — — EMBROIDERY NEEDLE COUNT: Needle progress number #123: Thread color number...
- Page 155 Press this key when you want to change the color, character by character in character embroidery. Since the sewing machine stops at the end of each character, the upper thread is changed as you sew. Press this key again to cancel multi- color.
-
Page 156: Selecting Alphanumeric Characters
— — — — — — — — — — — — — — — — — — — — — — — — — — — — — — — — — — — — — — — — — — — — — EMBROIDERY Selecting alphanumeric characters... -
Page 157: Selecting An Embroidery Pattern
— — — — — — — — — — — — — — — — — — — — — — — — — — — — — — — — — — — — — — — — — — — — — — — — — — — — Selecting an embroidery pattern There are 70 embroidery patterns, such as flowers... -
Page 158: Using An Embroidery Card
There are various cards with different themes. Note Always turn off the sewing machine to insert and remove embroidery cards. Insert the embroidery card into the embroidery card slot, facing it in the right direction. -
Page 159: Embroidering
— — — — — — — — — — — — — — — — — — — — — — — — — — — — — — — — — — — — — — — — — — — — — — — — — — — — Embroidering After the preparations are done, you can try embroidering. - Page 160 — — — — — — — — — — — — — — — — — — — — — — — — — — — — — — — — — — — — — — — — — — — — — EMBROIDERY Lower the presser foot lever.
-
Page 161: Appliquéing
Set up the thread for appliquéing. Lower the presser foot lever, and press a Appliqué position b Base fabric be finished neatly. (Start/stop button). The position for the appliqué is stitched, and the sewing machine stops. "APPLIQUE" will be displayed on the screen. Embroidering 159... - Page 162 Lower the presser foot lever, and press (Start/stop button). The position for the appliqué is stitched, and the sewing machine stops. Memo When "APPLIQUE MATERIAL", "APPLIQUE POSITION" and "APPLIQUE" are displayed, a specific color thread does not appear. Use a proper color thread to match the appliqué...
-
Page 163: Editing And Saving Patterns
— — — — — — — — — — — — — — — — — — — — — — — — — — — — — — — — — — — — — — — — — — — — — — — — — — — — Editing and Saving Patterns This section describes ways to edit, adjust, reposition and memorize patterns. - Page 164 — — — — — — — — — — — — — — — — — — — — — — — — — — — — — — — — — — — — — — — — — — — — — EMBROIDERY Size key Increases/decreases the size of...
-
Page 165: Adjusting The Thread Tension
— — — — — — — — — — — — — — — — — — — — — — — — — — — — — — — — — — — — — — — — — — — — — — — — — — — — CAUTION ●... -
Page 166: Connecting Character Patterns
— — — — — — — — — — — — — — — — — — — — — — — — — — — — — — — — — — — — — — — — — — — — — EMBROIDERY Connecting character patterns If the character pattern is too long to fit in the... -
Page 167: Resewing
When you have finished embroidering, cut the thread. Resewing When the wrong upper thread color has been sewn, it can be resewn with the correct color. Press sewing machine. Press Press Press beginning of the mistaken color. Press one more time to go to previous color. -
Page 168: Thread Runs Out Partway Through A Design
Thread runs out partway through a design When the upper thread or the bobbin thread runs out while sewing, the sewing machine stops. Move the needle back about 10 stitches and resume sewing. Memo When the bobbin thread runs out, cut the threads and remove the embroidery frame before replacing the bobbin thread. - Page 169 Turn off the sewing machine. Note Always detach the embroidery unit when you move the sewing machine. Turn on the sewing machine, and then select the pattern. Memo If you have changed the embroidery size and/or layout before turning off the machine, make the same setting changes again before restarting embroidering.
-
Page 170: Using The Memory Function
• Compatible operating systems: Microsoft Windows Me/2000/XP/Vista (Windows 98SE requires a driver. Download the driver from our web site (http://solutions.brother.com).) ■ Precautions on Using the Computer to Create and Save Data • If the file name of embroidery data cannot be identified, for example, because the name contains special characters, the file is not displayed. -
Page 171: Saving Patterns
"Saving..." appears while the pattern is being saved. After the pattern is saved, the initial screen appears again. Note Do not turn off the sewing machine while the pattern is being saved, otherwise the pattern data may be lost. ■ Retrieving a pattern Press (Retrieve key). -
Page 172: Retrieving Embroidery Patterns From The Computer
— — — — — — — — — — — — — — — — — — — — — — — — — — — — — — — — — — — — — — — — — — — — — EMBROIDERY Retrieving embroidery patterns from the computer... - Page 173 — — — — — — — — — — — — — — — — — — — — — — — — — — — — — — — — — — — — — — — — — — — — — — — — — — — — Select the pattern you wish to retrieve.
- Page 174 — — — — — — — — — — — — — — — — — — — — — — — — — — — — — — — — — — — — — — — — — — — — — EMBROIDERY...
-
Page 175: Appendix
APPENDIX The various maintenance and troubleshooting procedures are described in this chapter. Care and Maintenance ...174 Troubleshooting ...176 Upgrading Your Machine's Software...186 Index ...187... -
Page 176: Care And Maintenance
— — — — — — — — — — — — — — — — — — — — — — — — — — — — — — — — — — — — — — — — — — — — — — APPENDIX Care and Maintenance Simple sewing machine maintenance operations are described below. Cleaning the machine surface If the surface of the machine is dirty, lightly soak a cloth in neutral detergent, squeeze it out firmly, and then wipe the surface of the machine. - Page 177 — — — — — — — — — — — — — — — — — — — — — — — — — — — — — — — — — — — — — — — — — — — — — — — — — — — — Use the cleaning brush or a vacuum cleaner to remove any lint and dust from the race and bobbin thread sensor and their surrounding...
-
Page 178: Troubleshooting
If the machine stops operating correctly, check the following possible problems before requesting service. You can solve most problems by yourself. If you need additional help, the Brother Solutions Center offers the latest FAQs and troubleshooting tips. Visit us at [http://solutions.brother.com]. - Page 179 — — — — — — — — — — — — — — — — — — — — — — — — — — — — — — — — — — — — — — — — — — — — — — — — — — — — Symptom The upper thread was not The needle breaks.
- Page 180 — — — — — — — — — — — — — — — — — — — — — — — — — — — — — — — — — — — — — — — — — — — — — — APPENDIX Symptom Probable Cause...
- Page 181 — — — — — — — — — — — — — — — — — — — — — — — — — — — — — — — — — — — — — — — — — — — — — — — — — — — — Symptom The needle is incorrectly installed.
- Page 182 Support the fabric while embroidering. Stop the sewing machine and set the fabric up correctly. If the carriage is moved during the process, the pattern may be misaligned. Be careful when removing or attaching the embroidery frame.
-
Page 183: Error Messages
— — — — — — — — — — — — — — — — — — — — — — — — — — — — — — — — — — — — — — — — — — — — — — — — — — — — Error messages When erroneous operations are performed messages and advice on operation will be displayed on the LCD. - Page 184 — — — — — — — — — — — — — — — — — — — — — — — — — — — — — — — — — — — — — — — — — — — — — — APPENDIX Error Message Probable Cause...
- Page 185 — — — — — — — — — — — — — — — — — — — — — — — — — — — — — — — — — — — — — — — — — — — — — — — — — — — — Error Message Probable Cause You changed the stitch pattern settings, and then tried to save them by...
- Page 186 You tried to set a number of characters that will not fit within the frame. The upper thread has become tangled around the bobbin case, and the needle is bent and hitting the needle plate, etc., so the sewing machine stops (refer to page 176).
-
Page 187: Adjusting The Lcd
Turn the power on while pressing any of the operation panel keys except key). Press Turn off the sewing machine, then turn it on again. Operation beep Each time a key is pressed you will hear one beep. If an incorrect operation is performed you will hear two or four beeps. -
Page 188: Upgrading Your Machine's Software
Refer to the "Changing the machine settings" (page 18) for how to check the version of the sewing machine’s software. Memo The embroidery pattern which is saved in the sewing machine will not be deleted if you upgrade the software. While the software is being upgraded, the buzzer will not sound when a key is pressed. -
Page 189: Index
— — — — — — — — — — — — — — — — — — — — — — — — — — — — — — — — — — — — — — — — — — — — — — — — — — — — Index accessories ... - Page 190 — — — — — — — — — — — — — — — — — — — — — — — — — — — — — — — — — — — — — — — — — — — — — — APPENDIX free-motion quilting ...106 front view ...11...
- Page 191 ...150 selecting stitches ...51 selecting the needle ...39 settings key ...14 sewing basics ...50 sewing direction change ...68 sewing machine help key ...14 sewing speed controller ...13 shell tuck stitch ...118 side cutter ...80 size ...123 smocking ...117 smocking stitch ...114...
- Page 192 English XE3848-101② Printed in China...
Need help?
Do you have a question about the 885-V35/V37 and is the answer not in the manual?
Questions and answers
I need a video of the machine