Sign In
Upload
Download
Table of Contents
Contents
Add to my manuals
Delete from my manuals
Share
URL of this page:
HTML Link:
Bookmark this page
Add
Manual will be automatically added to "My Manuals"
Print this page
×
Bookmark added
×
Added to my manuals
Manuals
Brands
Rohde & Schwarz Manuals
Receiver
ESRP EMI
Getting started
Rohde & Schwarz ESRP EMI Getting Started
Test receiver
Hide thumbs
1
2
Table Of Contents
3
4
5
6
7
8
9
10
11
12
13
14
15
16
17
18
19
20
21
22
23
24
25
26
27
28
29
30
31
32
33
34
35
36
37
38
39
40
41
42
43
44
45
46
47
48
49
50
51
52
53
54
55
56
57
58
59
60
61
62
63
64
65
66
67
68
69
70
71
72
73
74
75
76
77
78
79
80
81
82
83
84
85
86
87
88
89
90
91
92
93
94
95
96
97
98
99
100
101
102
103
104
105
106
107
108
109
110
111
112
113
114
115
116
page
of
116
Go
/
116
Contents
Table of Contents
Bookmarks
Table of Contents
Table of Contents
1 Safety and Regulatory Information
Safety Instructions
Warning Messages in the Documentation
Korea Certification Class a
2 Documentation Overview
Getting Started Manual
Service Manual
User Manuals and Help
Basic Safety Instructions
Data Sheets and Brochures
Instrument Security Procedures
Release Notes and Open Source Acknowledgment (OSA)
Application Notes, Application Cards, White Papers, Etc
3 Conventions Used in the Documentation
Conventions for Procedure Descriptions
Typographical Conventions
Notes on Screenshots
4 Instrument Tour
The Front Panel
Touchscreen Display
Function Keys on the Front Panel
Noise Source Control
RF Input 50Ω
Probe Power
AF Output
Tracking Generator Output (Optional)
Rear Panel View
AC Power Supply Connection and Main Power Switch
Lan
VGA Interface
Ext Trigger / Gate in
Ref in
Ref out
GPIB Interface
Trigger Output
IF / Video
USB Interface
4.2.10 Usb
AUX Port
OCXO Option (R&S FSV-B4)
4.2.13 Device ID
5 Preparing for Use
Lifting and Carrying
Unpacking and Checking
Choosing the Operating Site
Setting up the R&S ESRP
Setting up the R&SESRP
Placing the R&S ESRP on a Bench Top
Connecting the AC Power
Mounting the R&S ESRP in a Rack
Connecting to a DC Power Source (Optional)
Switching the Instrument on and off
Connecting to LAN
Connecting a Keyboard
Connecting an External Monitor
Windows Operating System
Logging on
Checking the Supplied Options
Performing a Self Alignment and a Self Test
Considerations for Test Setup
6 Basic Operations
Information in the Diagram Area
Channel Display
Display of Hardware Settings
Measurement Settings Information
Diagram-Specific and Trace Information
Instrument and Status Information
Means of User Interaction
Toolbar
Touchscreen
On-Screen Keyboard
Keypad
Arrow Keys, UNDO/REDO Keys
Rotary Knob
Softkeys
Context-Sensitive Menus
Dialog Boxes
Setting Parameters
Entering Numeric Parameters
Entering Alphanumeric Parameters
Navigating in Dialog Boxes
Changing the Display
Changing the Focus
Switching between Split and Maximized Display
Soft and Mini Soft Front Panel Display
Displaying the Toolbar
Enlarging the Display Area
Zooming into the Diagram
Adding a Title to the Diagram Header
Removing the Diagram Footer
Selecting a Theme
6.4.10 Displaying and Setting the Date and Time
Changing the Display Update Rate
7 Basic Measurement Examples
Measuring a Sinusoidal Signal
Measuring the Level and Frequency Using Markers
Measuring the Signal Frequency Using the Frequency Counter
Measuring Harmonics of Sinusoidal Signals
Measuring Signal Spectra with Multiple Signals
Separating Signals by Selecting the Resolution Bandwidth
Measuring the Modulation Depth of an AM-Modulated Carrier (Span > 0)
Measuring AM-Modulated Signals
Measurements in Zero Span
Measuring the Power Characteristic of Burst Signals
Measuring the Signal-To-Noise Ratio of Burst Signals
Measuring FM-Modulated Signals
Storing and Loading Instrument Settings
Storing an Instrument Configuration (Without Traces)
Loading an Instrument Configuration (with Traces)
Storing Traces
Configuring Automatic Loading
Index
Advertisement
Quick Links
Download this manual
R&S
EMI Test Receiver
Getting Started
(=@^ï2)
1316469702
Version 07
Distributed by:
Sie haben Fragen oder wünschen eine Beratung? Angebotsanfrage unter +49 7121 / 51 50 50 oder über info@datatec.eu
®
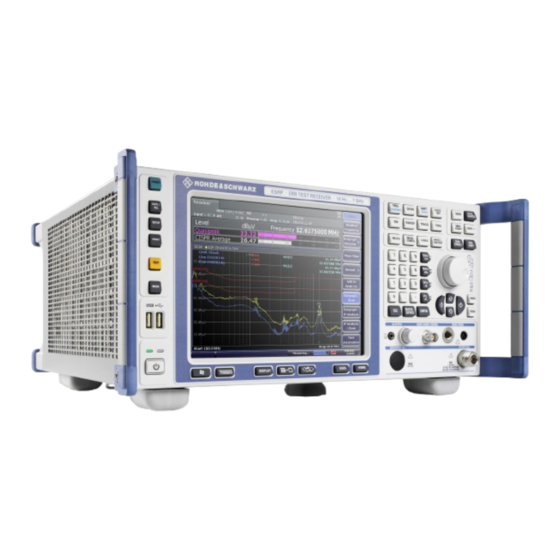
ESRP
Table of
Contents
Previous
Page
Next
Page
1
2
3
4
5
Advertisement
Table of Contents
Need help?
Do you have a question about the ESRP EMI and is the answer not in the manual?
Ask a question
Questions and answers
Related Manuals for Rohde & Schwarz ESRP EMI
Inverter Rohde & Schwarz AMU200A Application Note
(23 pages)
Receiver Rohde & Schwarz EMI Test ReceiverESCI Operating Manual
Emi test receiver (495 pages)
Receiver Rohde & Schwarz ESR User Manual
Emi test receiver (1081 pages)
Receiver Rohde & Schwarz ESRP3 EMI Getting Started
Test receiver (116 pages)
Receiver Rohde & Schwarz ESRP7 EMI Getting Started
Test receiver (116 pages)
Receiver Rohde & Schwarz ESRP3 EMV Getting Started
Test receiver (116 pages)
Receiver Rohde & Schwarz ESRP7 EMV Getting Started
Test receiver (116 pages)
Receiver Rohde & Schwarz ESL3 Quick Start Manual
Test receiver (20 pages)
Receiver Rohde & Schwarz ESM 500 A-F Operating Manual
Vtif-uhf-receiver (70 pages)
Receiver Rohde & Schwarz ESVP 354300052 Operating Manual
Test receiver (182 pages)
Receiver Rohde & Schwarz ESPI3 Service Manual
Emi test receiver (189 pages)
Receiver Rohde & Schwarz ESPI7 Service Manual
Emi test receiver (189 pages)
Receiver Rohde & Schwarz 890 Series User Manual
Vlf-hf receivers (406 pages)
Receiver Rohde & Schwarz EB510 Getting Started
Hf monitoring receiver (61 pages)
Receiver Rohde & Schwarz R&S EPL1000 Getting Started
Emi test receiver (74 pages)
Receiver Rohde & Schwarz R&S EPL1000 Troubleshooting Manual
Touch input issues (13 pages)
This manual is also suitable for:
Esrp3 emi
Esrp7 emi
Esrp3 emv
Esrp7 emv
Esrp
Table of Contents
Print
Rename the bookmark
Delete bookmark?
Delete from my manuals?
Login
Sign In
OR
Sign in with Facebook
Sign in with Google
Upload manual
Upload from disk
Upload from URL


Need help?
Do you have a question about the ESRP EMI and is the answer not in the manual?
Questions and answers