Table of Contents
Advertisement
Quick Links
Advertisement
Table of Contents

Subscribe to Our Youtube Channel
Related Manuals for 2connect 2C-WHS-26-2D


Summary of Contents for 2connect 2C-WHS-26-2D
- Page 1 2C-WHS-26-2D User Guide V1.0.5 - 1 -...
- Page 2 About This User Guide Disclaimer Please do not dismantle the product or tear up the seal on it, otherwise we won’t provide warranty or replacement service. The pictures in this user guide are for reference only. If there are any pictures which not match the actual product, please take actual products as the standard.
- Page 3 Version record version number Version description Version date LW-1.10A Initial version 2017-12-12 1. Add small language keyboard setting barcode; LW-1.10E 2. The virtual Bluetooth mode 2018-02-05 20:52:52 Jan 24 2018 setting the barcode; 3. HID search setting the barcode. Repair cannot be reconnected SW:LW-1.10M 17:24:17 Apr 11 2018 2018-6-30 Boot: 1.02A...
- Page 4 Add UPC / EAN / Jan additional code Add ean to ISBN Add ean to ISSN Can support unlimited length setting of one-dimensional barcode Add support for reverse barcode Increase codeID Increase AIM ID Add control character escape Add auto sense Repair the disconnection SW:LW-1.19C 16:58:20 Aug 15 2019 phenomenon under the specific...
-
Page 5: Table Of Contents
CATALOG 1.Product Introduction ........................- 9 - 1.1 Main feature ..........................- 9 - 1.2 Unpack your device ......................- 9 - 1.3 Communication port ......................- 9 - 1.4 LED indicator light ....................... - 9 - 1.5 Start-up, shutdown, standby and restart ................- 10 - 1.6 Maintenance ........................- 10 - 1.7 Reading skills ........................- 10 - 2.System Setting .......................... - Page 6 2.7 Add user-defined prefix/suffix....................- 18 - 2.8 Hide user-defined prefix/suffix...................- 19 - 2.9 Control character escape.....................- 22 - 2.10 GS Character barcode setting................... - 22 - 2.11 USB Keyboard case output control.................. - 23 - 2.12 Product user configuration....................- 23 - 2.13 Unicode Output Mode......................
- Page 7 2.22.16 Industrial 2 of 59(Industry 25 code)Turn barcode on/off setting......- 37 - 2.22.17 Industrial 2 of 5 Length limit setting..............- 37 - 2.22.18 Matrix 2 of 5(matrix 25 yards) (4-24 digits)Turn barcode on/off setting.....- 38 - 2.22.19 Matrix 2 of 5 Length limit setting.................- 38 - 2.22.20 Code 93 Turn barcode on/off setting..............
- Page 8 2.22.46 Data Matrix......................- 49 - 2.22.47 Aztec Code......................- 49 - Appendix 1 Data and edit barcode....................- 50 - Appendix 2 prefix / suffix control character table................- 54 - Appendix 3 prefix / suffix visible character table................- 55 - Appendix 4 barcode type ID table....................- 59 - Appendix 5 AIM ID table........................
-
Page 9: Product Introduction
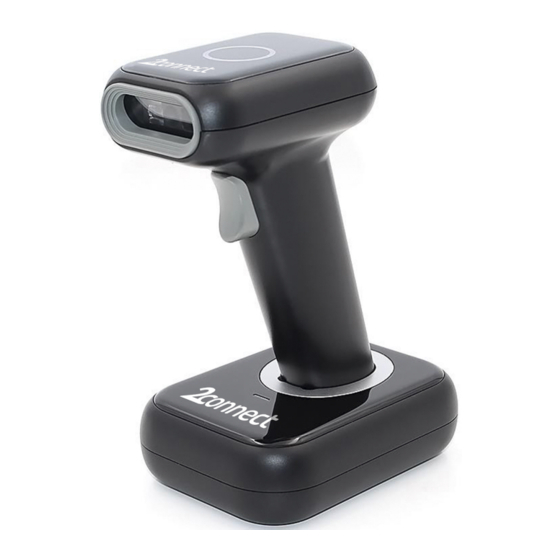
1.Product Introduction This user guide applies to HS-26 wireless with base which apply the complete set of patent technology developed by Guangzhou YOKO Electron Co., Ltd. The scanners above are of strong identification capability and support automatic continuous scanning mode with fast and flexible scanning speed. -
Page 10: Start-Up, Shutdown, Standby And Restart
Indicator status explain red light on Charging red light off No charging green light on No decoding green light off Decode successfully one blue light on Pairing successful or connect to USB two blue light twinkle alternately Bluetooth HID pair mode 1.5 Start-up, shutdown, standby and restart Start-up:Connect host computer with scanner, which will automatically start-up and in working state. -
Page 11: System Setting
2.System Setting This product is mainly used to set options and functions by reading a series of special barcodes,in this chapter,we'll detail the options and features available to users and provide the corresponding setup code.This method of setting up scanning is relatively straightforward and easy to understand, and is convenient for the user to operate. -
Page 12: Real-Time Mode
C:Connect the receiver to the computer or other devices, and the buzzer "beeps" once the pairing is successful, and the blue indicator light will be always on 2.2.2 Real-time mode In real-time mode, the scanned data is transmitted directly to the computer via wired or wireless,Aaer the transmission is successful, the scanner will emit a low-frequency short tone and the green indicator will flash once. -
Page 13: Initialization Setting
Display Total Warehouse Entries Upload warehousing data by scanning the “Data Upload” barcode,barcodes stored in the scanner after data upload are not automatically deleted.The user uploads the warehousing data multiple times by scanning the "data upload". Data Upload Note: Please try to ensure that the wireless signal connection is good when uploading data,or upload with the data cable connected. -
Page 14: Time Out Setting
Read Version Information 2.2.6 Time out setting Select time out setting barcode Time Out After 30S (Default) Time Out After 1min Time Out After 5min Time Out After 10min Time Out After 30min - 14 -... -
Page 15: Volume Setting
No Time Out Time Out Immediately Display Battery 2.3 Volume setting 2.3.1 Volume setting Low Volume Mute High Volume(Default) Middle Volume 2.3.2 Buzzer frequency setting - 15 -... -
Page 16: Language Setting
2.7K(Default) 2.4 Language setting Select the language keyboard you need English (Default) German French Spanish Italian Japanese - 16 -... -
Page 17: Transmission Speed Setting
International General Keyboard French(Belgian) 2.5 Transmission speed setting Select the required transmission speed (speed selection is related to reading barcode); Fast Transmission Medium Speed Transmission (Recommended For Use In IOS System Bluetooth Mode) Low Speed Transmission (Recommended For Bluetooth Mode In Android) Ultra Low Speed Transmission (Recommended Test Mode Used) - 17 -... -
Page 18: Suffix Setting
2.6 Suffix setting Select the end you want to add; <Data> <CR> <Data> <LF> <Data> <CR> <LF>(Default) <Data> <\t> Not S uffix 2.7 Add user-defined prefix/suffix Method of adding prefix and suffix:First scan to add prefix or suffix, then scan the corresponding barcode (see appendix), up to 32 bytes. -
Page 19: Hide User-Defined Prefix/Suffix
Add Prefix Add Suffix 2.8 Hide user-defined prefix/suffix Method of hiding prefixes and suffixes:First scan the hidden prefix or suffix, then scan the hidden bits, hiding up to 16 bytes. Hidden Barcode Prefix Hidden Barcode Suffix Hide 1 bit - 19 -... - Page 20 Hide 2 bits Hide 3 bits Hide 4 bits Hide 5 bits Hide 6 bits Hide 7 bits - 20 -...
- Page 21 Hide 8 bits Hide 9 bits Hide 10 bits Hide 11 bits Hide 12 bits Hide 13 bits - 21 -...
-
Page 22: Control Character Escape
Hide 14 bits Hide 15 bits Hide 16 bits 2.9 Control character escape Enable Control Character Escape Disable Control Character Escape (Default) 2.10 GS Character barcode setting Enable GS Symbol To Convert to | - 22 -... -
Page 23: Usb Keyboard Case Output Control
Disable GS Symbol To | (Default) 2.11 USB Keyboard case output control Force Conversion To Uppercase Force Conversion To Lowercase Case Interchange No Case Conversion (Default) 2.12 Product user configuration Scan the barcode below to save the current parameters of the product as a user configuration. -
Page 24: Unicode Output Mode
Restore User Configuration 2.13 Unicode Output Mode In order to output correctly according to the specified encoding format, you need to specify the output encoding format, such as Simplified Chinese in Notepad / excel output configuration into GBK encoding. When output encoding format... -
Page 25: Repeated Code Detection
Auto Sense Mode Off (Default) When the self-sensing mode is configured to be on, the scanner can automatically sense the barcode in front of the lens for decoding.。 Auto Sense Mode Turn On 2.15 Repeated code detection In induction mode, it is used to configure the interval time for solving the same barcode.If the setup time is not exceeded, the same barcode will only be solved once. -
Page 26: Screen Reading Mode
Repeat Code Detection Interval 2s 2.16 Screen reading mode When this mode is turned on, your scanner will be optimized to read the bar code displayed on the display such as your phone or computer.However, turning this mode on may result in a slight decrease in the speed at which the printed bar code is read. -
Page 27: Code Id Output Option Setting
2.19 Code ID output option setting Turn Off CODE ID (Default) Open Barcode Front CODE ID Open Barcode Latter CODE ID Edit: Custom CODE ID (Please follow the barcode type ID table and data and edit barcode in the appendix after scanning) Clear All Custom CODE ID - 27 -... -
Page 28: Aim Id Barcode Setting
2.20 AIM ID Barcode setting Turn Off Barcode AIM ID (Default) Open Barcode Front AIM ID Open Barcode Latter AIM ID 2.21 Inverse code option(for 1D barcode / DataMatrix/Aztec) Only Decode Normal Code(Default) Only Decode Inverse Code - 28 -... -
Page 29: Symbologies
Decode Both Normal Code And Inverse Code 2.22 Symbologies 2.22.1 Enable/disable all symbologies Opening all bar code types may result in slower decoding speed. It is recommended to open the required bar code type according to the usage scenario.The default is to turn on all bar codes Enable All Symbologies (Default ) Disable All Symbologies... -
Page 30: Enable/Disable All 2D Symbologies
2.22.3 Enable/disable all 2D symbologies Enable All 2D Symbologies Disable All 2D Symbologies 2.22.4 Codabar On/off setting Codabar Turn On Codabar Turn Off 2.22.5 Codabar Start/ending character setting Do Not Send Codabar Start/end Characters (Default) - 30 -... -
Page 31: Codabar Length Limit Setting
Send Codabar Start/End Characters 2.22.6 Codabar Length limit setting Codabar Minimum Length Limit (0~50 bits) Codabar Maximum Length Limit (0~50 bits) 2.22.7 Code 39 Turn barcode on/off setting Code 39 Turn On Code 39 Turn Off - 31 -... -
Page 32: Code 39 Check Bit Setting
2.22.8 Code 39 Check bit setting Code 39 Check Off (Default) Code 39 Check Open Does Not Send Check Bit Code 39 Check Open Send Check Bit 2.22.9 Code 39 Full ASCII On/off setting Full ASCII Turn On Full ASCII Turn Off(Default) - 32 -... -
Page 33: Code 39 Length Limit Setting
2.22.10 Code 39 Length limit setting Code 39 Minimum Length Limit (0~50 bits) Code 39 Maximum Length Limit (0~50 bits) 2.22.11 Code 32 (need code39to open) Turn barcode on/off setting Code 32 Turn On Code 32 Turn Off 2.22.12 Interleaved 2 of 5(ITF25)Turn barcode on/off setting ITF25 Turn On - 33 -... -
Page 34: Interleaved 2 Of 5(Itf25)Check Bit Setting
ITF25 Turn Off 2.22.13 Interleaved 2 of 5(ITF25)Check bit setting ITF25 Check Off (Default) ITF25 Check Open Does Not Send Check Bit ITF25 Check Open Send Check Bit 2.22.14 Interleaved 2 of 5(ITF25)Length selection setting ITF25 Any Length (4-24 bits) (Default) - 34 -... - Page 35 ITF25 6-bit Length ITF25 8-bit Length ITF25 10-bit Length 12-bit Length ITF25 14-bit Length - 35 -...
-
Page 36: Interleaved 2 Of 5 Length Limit Setting
ITF25 16-bit Length ITF25 18-bit Length ITF25 20-bit Length ITF25 22-bit Length ITF25 24-bit Length 2.22.15 Interleaved 2 of 5 Length limit setting Interleaved 2 of 5 Minimum Length Limit (0~50 bits) - 36 -... -
Page 37: Industrial 2 Of 59(Industry 25 Code)Turn Barcode On/Off Setting
Interleaved 2 of 5 Maximum Length Limit (0~50 bits) 2.22.16 Industrial 2 of 59(Industry 25 code)Turn barcode on/off setting Industrial 2 of 5 Turn On Industrial 2 of 5 Turn Off 2.22.17 Industrial 2 of 5 Length limit setting Industrial 2 of 5 Minimum Length Limit (0~50 bits) Industrial 2 of 5 Maximum Length Limit (0~50 bits) - 37 -... -
Page 38: Matrix 2 Of 5(Matrix 25 Yards) (4-24 Digits)Turn Barcode On/Off Setting
2.22.18 Matrix 2 of 5(matrix 25 yards) (4-24 digits)Turn barcode on/off setting Matrix 2 of 5 Turn On Matrix 2 of 5 Turn Off 2.22.19 Matrix 2 of 5 Length limit setting Matrix 2 of 5 Minimum Length Limit (0~50 bits) Matrix 2 of 5 Maximum Length Limit (0~50 bits) 2.22.20 Code 93 Turn barcode on/off setting Code 93 Turn On... -
Page 39: Code 93 Length Limit Setting
Code 93 Turn Off 2.22.21 Code 93 Length limit setting Code 93 Minimum Length Limit (0~50 bits) Code 93 Maximum Length Limit (0~50 bits) 2.22.22 Code 11 Turn barcode on/off setting Code 11 Turn On Code 11 Turn Off(Default) - 39 -... -
Page 40: Code 11 Check Bit Output Turn Barcode On/Off Setting
2.22.23 Code 11 Check bit output Turn barcode on/off setting Code 11 Check Digit Output Turn On Code 11 Check Digit Output Turn Off (Default) 2.22.24 Code 11 Check selection setting Code 11 Check Off (Default) Code 11 1 bit Check Code 11 2bit Check - 40 -... -
Page 41: Code 11 Length Limit Setting
2.22.25 Code 11 Length limit setting Code 11 Minimum Length Limit (0-50 bits) Maximum Length Limit (0-50 bits) 2.22.26 Code 128 Turn barcode on/off setting Code 128 Turn On Code 128 Turn Off 2.22.27 GS1-128 Turn barcode on/off setting GS1-128 Turn On - 41 -... -
Page 42: 128 Code Length Limit Setting
GS1-128 Turn Off 2.22.28 128 code Length limit setting 128 Code Minimum Length Limit (0-50 bits) 128 code Maximum Length Limit (0-50 bits) 2.22.29 UPC-A Turn barcode on/off setting UPC-A Turn On UPC-A Turn Off - 42 -... -
Page 43: Upc-A Check Bit Setting
2.22.30 UPC-A Check bit setting Send UPC-A Check Bits (Default) Do Not Send UPC-A Check Bits 2.22.31 UPC-A turn EAN-13 UPC-A Turn EAN-13 Turn On UPC-A Turn EAN-13 Turn Off 2.22.32 UPC-E Turn barcode on/off setting UPC-E Turn On - 43 -... -
Page 44: Upc-E Check Bit
UPC-E Turn Off 2.22.33 UPC-E Check bit Send UPC-E Check Bits (Default) Do Not Send UPC-E Check Bits 2.22.34 UPC-E extend UPC-A UPC-E Extend UPC-A Turn On UPC-E Extend UPC-A Turn Off (Default) 2.22.35 EAN/JAN-8 Turn barcode on/off setting EAN/JAN-8 Turn On - 44 -... -
Page 45: Ean/Jan-13 Turn Barcode On/Off Setting
EAN/JAN-8 Turn Off 2.22.36 EAN/JAN-13 Turn barcode on/off setting EAN/JAN-13 Turn On EAN/JAN-13 Turn Off 2.22.37 UPC/EAN/JAN Additional code setting Ignore UPC/EAN/JAN Add-On Code (Default) Decode UPC/EAN/JAN Add-On Code - 45 -... -
Page 46: Ean13 Turn Isbn
Adaptive UPC/EAN/JAN add-on code 2.22.38 EAN13 turn ISBN Turn On EAN13 To ISBN Code Turn Off EAN13 To ISBN Code (Default)) 2.22.39 EAN13 turn ISSN Turn On EAN13 To ISSN Code Turn Off EAN13 To ISSN Code(Default) - 46 -... -
Page 47: Gs1 Databar(Rss14
2.22.40 GS1 DataBar(RSS14) GS1 DataBar Turn On GS1 DataBar Turn Off 2.22.41 GS1 DataBar Limited GS1 DataBar Limited Turn On GS1 DataBar Limited Turn Off 2.22.42 GS1 DataBar Expanded GS1 DataBar Expanded Turn On - 47 -... -
Page 48: Pdf417
GS1 DataBar Expanded Turn Off 2.22.43 PDF417 PDF417 Turn On PDF417 Turn Off 2.22.44 QR Code QR Turn On QR Turn Off - 48 -... -
Page 49: Micro Qr
2.22.45 Micro QR Micro QR Turn On Micro QR Turn off 2.22.46 Data Matrix Data Matrix Turn On Data Matrix Turn Off 2.22.47 Aztec Code Aztec Turn On Aztec turn off - 49 -... -
Page 50: Appendix 1 Data And Edit Barcode
Appendix 1 Data and edit barcode - 50 -... - Page 51 - 51 -...
- Page 52 Cancel Current Setting - 52 -...
- Page 53 Cancel A String Of Data Read Before Cancel The Previous Read Data Save - 53 -...
-
Page 54: Appendix 2 Prefix / Suffix Control Character Table
Appendix 2 prefix / suffix control character table Disable Enable Disable Enable Setting barcode Setting barcode control control control control Insert Ctrl+A ↑ Ctrl+Q Home Ctrl+B ↓ Ctrl+R Ctrl+C ← Ctrl+S Delete Ctrl+D → Ctrl+T PageUp Ctrl+E Ctrl+U PageDown Ctrl+F Ctrl+V Ctrl+G Ctrl+W... -
Page 55: Appendix 3 Prefix / Suffix Visible Character Table
Appendix 3 prefix / suffix visible character table visible visible Setting barcode Setting barcode character character space " & - 55 -... - Page 56 < > - 56 -...
- Page 57 - 57 -...
- Page 58 - 58 -...
-
Page 59: Appendix 4 Barcode Type Id Table
Appendix 4 barcode type ID table Code type CODE ID(default) All code type Codabar Code128 Code32 < Code93 Code39 Code11 EAN-13 EAN-8 GS1 DataBar GS1-128 (EAN-128) 2 of 5 Interleaved 2 of 5 Matrix 2 of 5 Industry 2 of 5 UPC-A UPC-E ISBN... -
Page 60: Appendix 5 Aim Id Table
Appendix 5 AIM ID table Code type AIM ID Explain Codabar m:0~1 Code128 m:0,1,2,4 Code32 Code93 Code39 m:0,1,3,4,5,7 Code11 m:0,1,3,8,9 EAN-13 / EAN-8 m:0,1,3,4 GS1 DataBar GS1-128 (EAN-128) Interleaved 2 of 5 m:0,1,3 Matrix 2 of 5 Industry 2 of 5 UPC-A/ UPC-E m:0,3 ISBN... -
Page 61: Appendix 6 Control Character Set (Usb Keyboard Mode) (Not Enabled)
Appendix 6 Control character set (USB keyboard mode) (not enabled) Corresponding key value Corresponding key value (control Decimal (control character escaping character escaping off) Insert Ctrl+A Home Ctrl+B Ctrl+C Delete Ctrl+D PageUp Ctrl+E PageDown Ctrl+F Ctrl+G Backspace Ctrl+H Ctrl+I Enter (performance is affected by carriage return line feed processing Enter configuration) - Page 62 Ctrl+U Ctrl+V Ctrl+W Ctrl+X Ctrl+Y Ctrl+Z Ctrl+[ <FS> Ctrl+\ <GS> Ctrl+] Ctrl+^ Ctrl+_ - 62 -...
-
Page 63: Some Feature Configuration Instructions And Examples
Some feature configuration instructions and examples Barcode length limit configuration example When configuring the barcode minimum length limit, you must ensure that the configured minimum length is not greater than the current maximum length configuration,otherwise, errors will be prompted.Similarly, when configuring the barcode maximum length limit, you must also ensure that the maximum length of the configuration is not less than the current minimum length configuration.
Need help?
Do you have a question about the 2C-WHS-26-2D and is the answer not in the manual?
Questions and answers