Table of Contents
Advertisement
Quick Links
PID Profiling Controller
0600-0041-0000 Rev. F
April 2006
Series SD
User's Manual
PID Controller and
1241 Bundy Boulevard., Winona, Minnesota USA 55987
Phone: +1 (507) 454-5300, Fax: +1 (507) 452-4507 http://www.watlow.com
TOTAL
CUST T O O M M ER
CUS
ER
S S A A TISF
TISFA A CTI
CTIO O N N
3 Year Warranty
ISO 9001
ISO 9001
Registered Company
Winona, Minnesota USA
Made in the U.S.A.
$15.00
Advertisement
Table of Contents

Related Manuals for Watlow SD Series


Summary of Contents for Watlow SD Series
- Page 1 CTIO O N N 3 Year Warranty ISO 9001 ISO 9001 Registered Company Winona, Minnesota USA 1241 Bundy Boulevard., Winona, Minnesota USA 55987 Phone: +1 (507) 454-5300, Fax: +1 (507) 452-4507 http://www.watlow.com 0600-0041-0000 Rev. F Made in the U.S.A. April 2006 $15.00...
- Page 2 Watlow reserves the right to charge for no trouble found (NTF) returns. The Series SD User’s Manual is copyrighted by Watlow Winona, Inc., © February 2006 with all rights reserved.
-
Page 3: Table Of Contents
Table of Contents Chapter 1: Overview .................2 Chapter 2: Install and Wire ..............4 Dimensions ..................4 Installation ..................6 Wiring the Series SD ..............11 Chapter 3: Keys and Displays ............20 Home Page Overview ..............21 Operations Page Overview ............22 Setup Page Overview ..............23 Programming Page Overview ............24 Factory Page Overview .............24 Chapter 4: Home Page ..............25... -
Page 4: Chapter 1: Overview
Chapter 1: Overview The Watlow Series SD family of PID, microproces- Standard Series SD features include an IP65/NE- sor-based temperature controllers is available in 1/32, MA 4X front panel rating; CE compliance, UL, CUL, 1/16, 1/8 and 1/4 DIN panel mount sizes.* The product CSA and NSF agency approvals;... - Page 5 Operation, configuration and data logging with a opening, either by cutting it larger for a larger control- ® standard Windows ler or using a Watlow adapter plate to adapt it to a Infrared Communications smaller controller. • Facilitates controller setup, operation and moni- Step 2: Wire the controller.
-
Page 6: Chapter 2: Install And Wire
Chapter 2: Install and Wire Dimensions 1/32 DIN Series SD Controller Dimensions Front Back 97.8 mm 8.6 mm 53.6 mm 45.0 to 45.6 mm (0.34 in) (3.85 in) (2.11 in) (1.77 to 1.79 in) 47.2 mm (1.86 in) Ridges Tabs with Teeth Panel Cutout 22.2 to 22.5 mm 30.7 mm... - Page 7 1/8 DIN Series SD Controller Dimensions Front (vertical) Front (horizontal) 52.8 mm (2.08 in) 99.8 mm 92.0 to 93.0 mm (3.93 in) (3.62 to 3.65 in) Panel Cutout 52.8 mm 45.0 to 45.6 mm Panel Thickness (2.08 in) (1.77 to 1.79 in) 99.8 mm 1.52 to 9.53 mm (3.93 in)
-
Page 8: Installation
Removing the Screw Clamp Connectors ç To prevent component damage when Caution: Follow the instal- removing the screw clamp connector, lation procedure exactly to please follow these steps: guarantee a proper IP65/ 1. Insert a screwdriver in the top of NEMA 4X seal. - Page 9 Installing the 1/16 DIN Series SD Controller ç Caution: Follow the instal- Panel Retention lation procedure exactly to Hook Collar guarantee a proper IP65/ Locating Hole NEMA 4X seal. Make sure Case Slot the gasket between the Mounting Gasket panel and the rim of the Bracket Arrows indicate the Bezel...
- Page 10 Installing the 1/8 DIN Series SD Controller ç Caution: Follow the instal- Panel lation procedure exactly to Retention Collar guarantee a proper IP65/ Case Mounting NEMA 4X seal. Make sure Gasket Bracket the gasket between the Bezel panel and the rim of the Locating Hole case is not twisted and is seated properly.
- Page 11 Installing the 1/4 DIN Series SD Controller ç Caution: Follow the instal- Retention lation procedure exactly to Collar Panel Mounting guarantee a proper IP65/ Bracket NEMA 4X seal. Make sure Hook Locating Hole Slot the gasket between the Gasket panel and the rim of the case is not twisted and is Bezel seated properly.
- Page 12 Series SD Family — Back Views in Scale NOTE: The SD model number determines which diagram applies to your unit. Figure 10a — 1/32 DIN with 1 2 3 4 5 6 7 8 9 1 0 1 1 a Universal Process Output in- stalled for output 1 (S D 3 _ - _ F _ _ - _ _ _ _).
-
Page 13: Wiring The Series Sd
Wiring the Series SD Ó Warning: Isolation Blocks Use National Electric (NEC) There are no electrical connections between these blocks. or other country-specific standard wiring and safety Sensor Input Power Supply Input EIA/TIA-485 Commu- practices when wiring and nications Input Switched DC Outputs connecting this controller to a power source and to elec-... - Page 14 Thermocouple Input Figure 12a — ç (all model numbers) Thermocouples are polarity sensitive. The negative lead (usually red) must be Warning: connected to terminal 11. Use National Electric (NEC) • Input impedance: >20 MΩ or other country-specific standard wiring and safety practices when wiring and connecting this controller to a power source and to...
- Page 15 5 R.C. suppressor. normally open 6 Internal Circuitry Watlow carries the R.C. sup- pressor Quencharc brand name, which is a trademark of Output 1 Solid-state Relay Figure 13c — ITW Paktron. Watlow Part No.
- Page 16 R.C. suppressor. • Output supplies power. • Cannot use voltage and current output at the same time. Watlow carries the R.C. suppres- sor Quencharc brand name, which amps+ 5 is a trademark of ITW Paktron.
- Page 17 R.C. suppressor. Figure 15b — SD_ _ - _ _ C _ - _ _ _ _ Watlow carries the R.C. suppres- • Maximum supply current 30 mAÎ (dc). sor Quencharc brand name, which is a trademark of ITW Paktron.
- Page 18 R.C. SD_ _ - _ _ _ K - _ _ _ _ suppressor. • Form A contact Watlow carries the R.C. sup- • 0.5 A maximum, resistive pressor Quencharc brand • 20 VA pilot duty, 120/240VÅ (ac), inductive name, which is a trademark of ITW Paktron.
- Page 19 • Load capability: voltage, 1 kΩ minimum; current, 800 Ω maximum. R.C. suppressor. • Output supplies power. • Cannot use voltage and current output at the same time. Watlow carries the R.C. sup- pressor Quencharc brand name, which is a trademark 12 amps + of ITW Paktron.
- Page 20 When choosing an EIA/TIA 232 to 485 converter, look for one with the following features: Two-wire capability EIA/TIA-485 can be implemented as a two-wire system or a four-wire system. Most Watlow control- 485SD9TB lers, including the Series SD, use two-wire com- T-/R- T+/R+ munications when working with EIA/TIA-485.
- Page 21 Ethernet Gateway The EM00-GATE-0000 is a bridge that allows up to 32 Watlow controllers to be directly con- nected to an Ethernet network. The gateway provides a bridge for Modbus messages between the Ethernet bus and EIA- 485 or EIA-232 links. The Gateway supports...
-
Page 22: Chapter 3: Keys And Displays
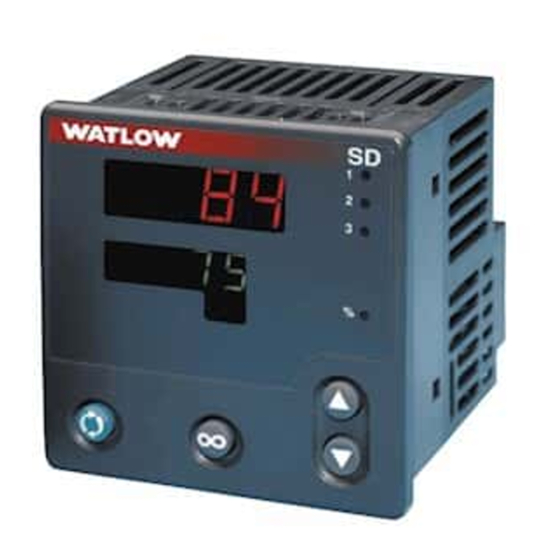
Chapter 3: Keys and Displays 1/8 DIN Horizontal 1/32 DIN 1/16 DIN 1/4 DIN 1/8 DIN Vertical Indicates the Upper Display (Left Display on 1/32 DIN): 1/32 DIN process in the Home Page, or the value of the parameter in the lower display in other pages. -
Page 23: Home Page Overview
Home Page Overview Adjusting the temperature set point Adjust the temperature set point in the Home Page. It is not necessary to enter any other page. The tempera- The Home Page is the default display of the Series SD ture set point appears in the lower display and only controller. -
Page 24: Operations Page Overview
Operations Page with TRU-TUNE+™ Operations Page Overview SD_E- _ _ _ _ - _ _ _ _ (typical defaults) The Operations Page contains parameters accessed during normal day-to-day operation. The Series SD provides a patented user-definable menu system, al- ‰ [Po;... -
Page 25: Setup Page Overview
Setup Page Overview [`SEt] [PAgE] The Setup Page contains parameters that define basic controller functions. Go to the Setup Page for initial configuration or if your application re- quirements change. Be sure to program the Setup Page first! Always press the Infinity Key ˆ to return to the Home Page. -
Page 26: Programming Page Overview
*** Profiling version only Calibration information for the Series SD controllers is available in pdf format. Go to www.watlow.com / Literature / Product User Manuals and search on Series SD Calibration Manual. Wat lo w Se rie s S D C hapter 3 Keys an d Dis pl ay s •... -
Page 27: Chapter 4: Home Page
Chapter 4: Home Page Press the Infinity Key ˆ at any time to go to the Home Page. Depending upon the controller’s status, you will see some combination of the parameters listed below. Normally, you will see the Process Value in the upper display and the Set Point in the lower display. See Home Page Over- view in the Keys and Displays chapter. -
Page 28: Chapter 5: Setup Page
91 R/W Always active. Enable the sensor feature, which [IS.En] [`Yes] (1) synchronizes the controller with a Watlow sensor. [IS; P 1] INFOSENSE™ 1 0 to 999 (0 to 999) 92 R/W [IS; E n] is set to [`yes]. [IS.P1] Set sensor point 1 code. - Page 29 Display Parameter Name Settings Range Default Modbus* Appears if: (less 40,001 Description (Integer values for Modbus in offset) parenthesis.) Read/Write [Sc; L o] Process Scale Low 0.00 to 20.00 mA: if 4.00 mA *73, 74 R/ [`Sen] is set to [`mA], [Sc.Lo] Set the low scale for process [`Sen] is set to [`mA]...
- Page 30 Display Parameter Name Settings Range Default Modbus* Appears if: (less 40,001 Description (Integer values for Modbus in offset) parenthesis.) Read/Write [SP; L o] Set Point Low Limit Min. operating range Min. op- *240, 241 Always active. [SP.Lo] Set the low range for the set (of sensor) to [SP;...
- Page 31 Display Parameter Name Settings Range Default Modbus* Appears if: (less 40,001 Description (Integer values for Modbus in offset) parenthesis.) Read/Write [PL`1] Power Limit 1 0.0 to 100.0% power (000 100.0% 160 R/W [Ot`1] is set to [hEAt] [PL 1] Set the maximum power output to 10000) (Two decimal or [CooL].
- Page 32 Display Parameter Name Settings Range Default Modbus* Appears if: (less 40,001 Description (Integer values for Modbus in offset) parenthesis.) Read/Write [r1; C O] Output 1 Retransmit Offset -999.0 to 999.0 (-999000 *310, 311 Output 1 is a process [r1.CO] Set the high scale for the process to 999000) output (SD_ _ - _ _ _ F output.
- Page 33 Display Parameter Name Settings Range Default Modbus* Appears if: (less 40,001 Description (Integer values for Modbus in offset) parenthesis.) Read/Write [Ctr3] Control Method 3 [`Ftb] Fixed Time Base [`Ftb] (0) 179 R/W [Ot`3] is set to [hEAt] [Ctr3] Set Output 3 control type. This or [CooL] and output parameter is only used with PID type is SD_ _-_ _ _ C -_...
- Page 34 Display Parameter Name Settings Range Default Modbus* Appears if: (less 40,001 Description (Integer values for Modbus in offset) parenthesis.) Read/Write [r3; L o] Output 3 Retransmit Low -1999.0 to 9999.0 *316, 317 Output 3 is a process [r3.Lo] Scale (-1999000 to 9999000) output (SD_ _ - _ _ _ F Set the low scale for the retrans- - _ _ _ _ ) and [Ot`3] is...
- Page 35 Display Parameter Name Settings Range Default Modbus* Appears if: (less 40,001 Description (Integer values for Modbus in offset) parenthesis.) Read/Write [hyS3] Alarm 3 Hysteresis 0.0 to 999.0 (0000 to 1.000 *136, 137 [Ot`3] is set to [dE;AL] [hyS3] Set the hysteresis for an alarm. 999000) or [Pr;...
- Page 36 Display Parameter Name Settings Range Default Modbus* Appears if: (less 40,001 Description (Integer values for Modbus in offset) parenthesis.) Read/Write [rP; S c] Ramp Scale** [hour] degrees/hour (0) [hour] (0) 267 R/W [``rP] is set to [`Str] [rP.Sc] Select the scale of the ramp rate. or [``On].
- Page 37 Display Parameter Name Settings Range Default Modbus* Appears if: (less 40,001 Description (Integer values for Modbus in offset) parenthesis.) Read/Write [`t; g n] Tune Gain 1 to 7 Least to most re- TRU-TUNE+™ version [ t.gn] Select the responsiveness of the sponsive.
-
Page 38: Chapter 6: Operations Parameters Table
Chapter 6: Operations Parameters Table These parameters can be selected to appear in the Operations Page. Select the parameters you want to appear in the Operations Page in the Programming Page. Press the Advance Key ‰ to enter the Operations Page and to step through the parameters. - Page 39 Display Parameter name Settings Range Default Modbus* Appears if" Description (less 40,001 offset) Read/Write [It; h t] Integral Heat 0.00 to 99.99 minutes/per 0.00 *224, 225 R/W At least one output is set to [hEAt], [ht; m ] [It.ht] Set the PID integral in min- repeat (0000 to 99990) is set to [`PId], utes per repeat for the heat...
- Page 40 Display Parameter name Settings Range Default Modbus* Appears if" Description (less 40,001 offset) Read/Write [dE; C L] Derivative Cool 0.00 to 9.99 minutes (0000 0.00 *230, 231 R/W At least one output is set to [CooL], [CL; m ] [dE.CL] Set the PID derivative time in to 99990) is set to [`PId],...
- Page 41 Display Parameter name Settings Range Default Modbus* Appears if" Description (less 40,001 offset) Read/Write [A1; L o] [Ot`1] is set to Alarm 1 Low Deviation: -1999 to 0 -999 (dev) *98, 99 R/W [dE; A L] or [Pr; A L] [A1.Lo] Set the low alarm set point.
-
Page 42: Chapter 7: Operations Parameters Table For Tru-Tune
Chapter 7: Operations Parameters Table for TRU-TUNE+™ These parameters can be selected to appear in the Operations Page. Select the parameters you want to appear in the Operations Page in the Programming Page. Press the Advance Key ‰ to enter the Operations Page and to step through the parameters. - Page 43 Display Parameter name Settings Range Default Modbus* Appears if" Description (less 40,001 offset) Read/Write [dE; h c] Derivative 0.00 to 3,600 seconds 0.00 *345, 346 R/W TRU-TUNE+™ ver- [dE.hc] Set the PID derivative time in (0000 to 3600) sion only. (SD_E - _ _ _ _ - _ _ _ _ ).
- Page 44 Display Parameter name Settings Range Default Modbus* Appears if" Description (less 40,001 offset) Read/Write [A1; L o] [Ot`1] is set to Alarm 1 Low Deviation: -1999 to 0 -999 (dev) *98, 99 R/W [dE; A L] or [Pr; A L] [A1.Lo] Set the low alarm set point.
-
Page 45: Chapter 8: Programming Page
Chapter 8: Programming Page The Programming Page allows you to select what parameters appear on the Operations Page. To go to the Pro- gramming Page, press both the Advance ‰ and Infinity ˆ keys for six seconds from the Home Page. [Prog] will appear in the upper display and [PAgE] will appear in the lower display. - Page 46 Programming Page Example On the Programming Page, select the following settings: [Po; h t] [~C-F] [~Aut] [Addr] [none] [none] An oven manufacturer wants users of their ovens to have easy access to the Series SD PID parameters. They also thru [~~P1] [~~P2] [~~P3] [~~P4] [~~P5] [~P20] want to limit access to other parameters they do not...
-
Page 47: Chapter 9: Programming Page For Tru-Tune
Chapter 9: Programming Page for TRU-TUNE+™ The Programming Page allows you to select what parameters appear on the Operations Page. To go to the Pro- gramming Page, press both the Advance ‰ and Infinity ˆ keys for six seconds from the Home Page. [Prog] will appear in the upper display and [PAgE] will appear in the lower display. - Page 48 Programming Page Example On the Programming Page, select the following settings: [Po; h t] [~C-F] [~Aut] [Addr] [none] [none] An oven manufacturer wants users of their ovens to have easy access to the Series SD PID parameters. They also thru [~~P1] [~~P2] [~~P3] [~~P4] [~~P5] [~P20] want to limit access to other parameters they do not...
-
Page 49: Chapter 10: Profiling Page
Chapter 10: Profiling Page The Profiling Page allows you to enter your ramp and soak profile information. To go to the Profiling Page from the Home Page, press the Advance Key ‰ and [Prof] appears in the lower display. Press the Up Key ¿ to change the upper display to [~yes]. - Page 50 Display Parameter name Set- Range Default Modbus* Appears if: (Integer values for Mod- Description tings (less 40,001 bus in parentheses.) offset) Read/Write [StYp] Set Point Step [tg; S P] Target Set Point -1999 to 9999 See page 53. Profiling version only. [tg.SP] Indicates ending set point value the (-1999000 to...
- Page 51 Display Parameter name Set- Range Default Modbus* Appears if: (Integer values for Mod- Description tings (less 40,001 bus in parentheses.) offset) Read/Write [SoaH] Soak Step [hour] Hours 0 to 99 See page 53. Profiling version only. [hour] The number of hours, (plus Min and (SD_ R - _ _ _ _ - _ Sec parameters) equal the total soak _ _ _ )
- Page 52 Display Parameter name Set- Range Default Modbus* Appears if: (Integer values for Mod- Description tings (less 40,001 bus in parentheses.) offset) Read/Write [``JL] Jump Loop Step [``JF] Jump File 1 to 4 See page 53. Profiling version only. [ JF] Selects the file which is to be (SD_ R - _ _ _ _ - _ jumped to.
- Page 53 How to Navigate the Profiling Menus Pre-Run Menu - Pre-Run Menu - Profile Menu Run Menu Profile Off Profile Run or Hold Menu function Start a profile. Holding, resuming or stop- Programming a Viewing profile sta- ping a profile. profile. tus.
- Page 54 Running a Profile To resume a profile on hold: 1. You must start from the Home Page. Press the To run a profile: Infinity Key ˆ to exit a menu and return to the 1. You must start from the Home Page. Press the Home Page.
- Page 55 Soak Step End Step A Soak step maintains the set point from the previous The End step ends the profile and selects the status of step for the time in hours, minutes and seconds entered the control set point and event outputs when a profile finishes.
- Page 56 [~~~0] [~Yes] [~~32] File] [Step] [Styp] [hour] [Min] [~SeC] [WF; p ] [WPr] S t ep 5 [~~~1] [~~~5] [~End] [~Off] [File] [Step] [Styp] [~End] Watlow Series SD Cha pte r 1 0 Pr ofi l i ng • •...
- Page 57 ___ LFil ___ End End: Off Hold Step 10 ___ End End: Off Hold Note: Step 10 in each file can only be an End Step. Watlow Series SD Cha pte r 1 0 Pr ofi l i ng • •...
- Page 58 Series SD Profiling Modbus Registers This section contains information for creating, editing and running profiles using Modbus. Some of these are available only through Modbus and others can be accessed through the front panel and Modbus. If a parameter is accessible only through Modbus, N/A appears in the display column.
- Page 59 Monitoring Profile Status from Modbus Display Parameter Name Settings Range Default Modbus* Appears if: (less 40,001 Description (Integer values for Modbus offset) in parentheses.) Read/Write File Running 1 to 4 900 R Profile is running. File number that is currently running. Step Running 1 to 10 901 R...
- Page 60 Low register numbers contain the two higher bytes; high register numbers contain the two lower bytes of the four-byte integer. Deci- mal precision is implied at three decimal places unless otherwise noted. All temperature parameters are in °F through Modbus. Watlow Series SD Cha pte r 1 0 Pr ofi l i ng •...
-
Page 61: Chapter 11: Factory Page
Chapter 11: Factory Page To go to the Factory Page, press both the Up ¿ and Down ¯ keys for six seconds from the Home Page. {FAct} will appear in the upper display and {page} in the lower display. • Press the Advance Key ‰... - Page 62 • Press the Infinity Key ˆ to exit the Factory Page. Calibration information for the Series SD controllers is available in pdf format. Go to www.watlow. com > Literature > Product User Manuals and search on Series SD Calibration Manual.
-
Page 63: Chapter 12: Features
Chapter 12: Features Saving and Restoring User Settings ....62 Saving and Restoring User Profiles ....62 Operations Page . -
Page 64: Saving And Restoring User Settings
Sav- Operations Page ing the settings overwrites any previously saved collection of Watlow’s patented user-defined menu system im- settings. Be sure to document all the controller settings. proves operational efficiency. The user-defined Operations... -
Page 65: Tuning The Pid Parameters
change the selected parameter in the top display. If you 3. When the system stabilizes, watch the process do not want a parameter to appear for that location, se- value. If this value fluctuates, increase the propor- lect [nonE]. To change the other 19 selections, press the tional band setting until it stabilizes. -
Page 66: Inputs
SD memory. differing control characteristics at various set points for These values characterize Watlow sensors, for the con- processes that are not entirely linear. troller to provide greater accuracy. - Page 67 Access Lockout The user’s access to the Operations Page can be con- trolled through the [`LOC] parameter. The [`LOC] pa- Negative Calibration Offset will rameter appears at the end of the Setup Page. It does not compensate for the difference Temperature Reading between the Sensor Reading and affect the Setup, Factory or Programming Pages.
-
Page 68: Control Methods
High Scale and Low Scale Auto (closed loop) and Manual (open loop) Control When an analog input is selected as process voltage or The controller has two basic modes of operation, auto process current input, you must choose the value of volt- mode and manual mode. - Page 69 mode and it is off while in the auto mode. For the profil- ing controller, the letter P appears in the left side of the The heating action switches off when the process lower display followed by the manual % power set point temperature rises above the set point.
- Page 70 Proportional plus Integral (PI) Control the process temperature to the set point. When the dead band value is zero, the heating element activates when The droop caused by proportional control can be cor- the temperature drops below the set point, and the cool- rected by adding integral (reset) control.
- Page 71 50% would result in an actual output power level of 50%. [ nLF3]) in the Setup Page. But if the PID calculated power output is 100%, then the power level will be 70%. Power scaling establishes the maximum power output and the minimum power output.
-
Page 72: Alarms
ing is done only at the zero cross of the ac line, which helps reduce electrical noise (RFI). Variable time base should be used with solid-state Set Point power controllers, such as a solid-state relay (SSR) or silicon controlled rectifier (SCR) power controller. Do not use a variable time base output for controlling electrome- chanical relays, mercury displacement relays, inductive loads or heaters with unusual resistance characteristics. -
Page 73: Retransmit
Alarm Hysteresis The process temperature has to enter the normal operating range beyond the hysteresis zone to acti- An alarm state is triggered when the process value vate the alarm function. reaches the alarm high or alarm low set point. Alarm 2. - Page 74 40,001 from each one. Watlow has the Comm7 software package. This is mainly Two consecutive registers are addressed for 32-bit used for diagnostics and basic communications.
- Page 75 Standard. IrDA is an acronym for the Infrared Data As- sociation, www.irda.org. A PDA or other master device communicates with the SD Series using Modbus ASCII via IRCOMM over IrDA. IDC supports wireless commu- nications through transparent material to a distance of no less than one meter between devices at a maximum angle of 15 Degrees.
- Page 76 Parity should be 8, n, 1. Restart PC software and check for settings agreement. Verify the COM bus is active. Application software is not working properly. Verify operation with Watlow communica- tions tool available at www.watlow.com. May need termination, pull-up and pull-down resistors.
- Page 77 Troubleshooting Indication Probable Cause Corrective Action Getting alarm message The process value is beyond an alarm set Determine when alarms messages will dis- point. play and the proper response to an alarm [ A1hi] [A2hi] [A3hi] [A1Lo] message. [ A2Lo] [A3Lo] Alarm is occurring when it should Alarm settings are incorrect.
- Page 78 Troubleshooting Error Messages Indication Probable Cause Corrective Action Input Error The sensor may be improperly wired. Check sensor connections. [Er; I n] Sensor wiring may be reversed, shorted or Check sensor connections and sensor wiring. open. Change Sensor Type (Setup Page) to [`Sen] The input may be set to the wrong sensor or match the sensor hardware.
-
Page 79: Appendix
Appendix Specifications • Voltage input impedance 20 kΩ • Current input impedance 100 Ω • Minimum current source resistance 1 MΩ (2396) • Input resolution 50,000 bits (approximately) at full scale Controller Input Accuracy • Microprocessor-based, user-selectable control modes Thermocouple Input •... - Page 80 • Without contact suppression • Solid or tinned wire recommended for spring clamp style connectors. • Minimum load current: 10 mA rms • Torque: terminal blocks 1 to 6 (SD _ _ - _ [C, K or J] _ _ - _ _ _ _) •...
-
Page 81: Ordering Information And Model Numbers
Red Green Red Red (Not available on 1/32 DIN) *FM-approved limit version is available. For more information, go to www.watlow.com or contact your Watlow representative. Note: User documentation may be available in other languages. Check www.watlow.com for availability. Wat lo w Se rie s S D... -
Page 82: Prompt Index
Prompt Index [A-M] 36, 40, 67 [FiLe] 47, 56 [``P1] to [`P23] 43, 45, [`S; i d] 60 [A1; h i] 25, 38, 41 [FLtr] 28, 65 [SiL1] 32, 71 [A1hi] 75 [Ftb1] 28 [P1; H E] 27 [SiL2] 32, 71 [A1;... - Page 83 Alarm 1 Silencing 32, 71 Series SD Calibration Manual 24 End Set Point Value 57 Alarm 2 High 39, 42 Calibration Offset 36, 40 End Step 50, 53 Alarm 2 Hysteresis 32, 71 Checksum Error 76 error condition 21 Alarm 2 Latching 32, 71 closed loop control 20, 66 Ethernet Gateway.
- Page 84 Infrared Data Communications Modbus Output Power Scale High 3 31, (IDC) 73, 78 address 72 67–69 inputs 64 monitor profi le status 57 Output Power Scale Low 1 29, inputs and outputs 2 profi ling registers 56 67–69 input accuracy 77 register numbers 58 Output Power Scale Low 2 30, Input Error 25, 76...
- Page 85 Wait-for Process Value 49, 57 proportional control 67 solid-state relay 77 WATCONNECT™ 72 proportional plus integral (PI) specifi cations 77 Watlow web site 72 control 68 Start File Number 56 WATVIEW™ 72 proportional plus integral plus de- Start Step Number 56...
- Page 86 Wat lo w Se rie s S D Wat lo w Se rie s S D Chapter 1 Ov e r v i ew Appe ndix • • • •...
- Page 87 Declaration of Conformity Series SD Watlow Winona, Inc. 1241 Bundy Blvd. Winona, MN 55987 USA Declares that the following product: Designation: Series SD Model Numbers: SD(3, 4, 6, 8 or 9)(Any letter or number) – (H or L)(C, F, J or K) (A, C, J, K or U) (A, C, E, F or K) –...
- Page 88 How to Reach Us Your Authorized Watlow Distributor: TOTAL CUST T O O M M ER S S A A TISF TISFA A CTI CTIO O N N 3 Year Warranty Corporate Headquarters in the Asia/Pacific: Watlow Australia Pty., Ltd.
Need help?
Do you have a question about the SD Series and is the answer not in the manual?
Questions and answers