
Subscribe to Our Youtube Channel
Related Manuals for Whirlpool WDC1070


Summary of Contents for Whirlpool WDC1070
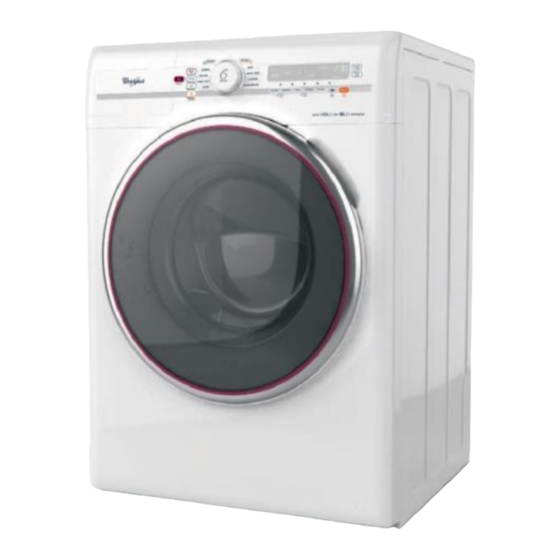
- Page 1 Front Load Washer & Dryer Combo User Guide Model: WDC1070 This washing machine is designed for HE high-efficiency washing detergent.
-
Page 2: Table Of Contents
Index 1. Safety Information ................3 1.1 Important Safety Instruction ............3 2.Installation Guide ................5 2.1 For installation or dismantling of the washer ....... 5 2.2 Electrical and water pressure requirements ........7 2.3 Installing the washer ..............8 2.4 Cleaning the washer .............. -
Page 3: Safety Information
1. Safety Information 1.1 Important Safety Instruction Yours and others ’ safety is an important matter. This guide provides important safety measures and information regarding the use of the product. Please read this User Guide and installation instructions and all other information enclosed with the washer carefully and act accordingly. - Page 4 special attention to electrical Do not place heavy objects above the requirements. washer. Read installation guide in detail, paying Do not operate the washer during gas special attention to electrical leaks. requirements. Do not place the washer near gas stoves ...
-
Page 5: Installation Guide
2. Installation Guide 2.1 For installation or dismantling of the washer When you encounter difficulties during installation or usage of the washer, please call Whirlpool local agent to seek advice of arrange for maintenance or repairs. WARNING Risk of injury during installation This washer requires two or more persons to carry and install. - Page 6 Remove four sets of installation kit attached to four corners at the back of the washer. Each set consists of a screw, washer and plastic retainer (A). Screw Parts Washer Plastic Retainer Use the smaller end of the hex wrench provided, loosen the screw by about 2cm (B).
-
Page 7: Electrical And Water Pressure Requirements
Not following this guide may cause fire or lead to electrical shock and harm lives. Important Notice If the electrical cable is spoilt, please contact Whirlpool, Whirlpool’s local agent or qualified personnel for replacement. Please refer to Whirlpool website for contact numbers. -
Page 8: Installing The Washer
A dedicated water tap for the washer is recommended. If such an option is not available, connect rubber water hose to any existing tap, but ensure that a ¾ inch O ring is used to secure the tap and pipe from leaking. Recommended water pressure is between 20 to 800 kPa (approximately 0.2 - 8.0 kgf/cm , equivalent to 2 - 80m water pressure, which is higher than... - Page 9 Using the curved end of the rubber water hose (F), connect to the outlet at the top on the back of the washer 3. Secure the straight end of the rubber water hose (G) to the top of the water tap with a screw. 4.
-
Page 10: Cleaning The Washer
To check whether the washer is balanced, stand in front of the machine, with hands placed on the top of the machine, shake to see if it wobbles. If it does wobble, check and adjust the height of the four supporting feet to improve on its balance. -
Page 11: Product Functions
3. Product Functions The following diagram is for illustration purposes only. (Your washer’s panel may differ from the one in the diagram above.) Control Touchpad Detergent Compartments (washing detergent / softener / pre-rinse detergent) Transparent Door Loose Object Collection Compartment Adjustable Feet... -
Page 12: Caring For Your Laundry
4. Caring for your Laundry To appropriately care for your laundry, please study the various wash and dry programmes carefully. Understanding the optimum use of the washer would help to care for your laundry items and keep them in shape longer. Check the garment label: Inspecting the clothes before washing:... - Page 13 Practical tips on dirt Drying method: removal: When a drying cycle ends and the washer stops, promptly remove laundry to Promptly clean soiled clothing for effective reduce creases. If the laundry can ’ t be stain removal. Avoid letting stains removed immediately, use ‘...
-
Page 14: Using The Washer
5. Using the Washer Follow the steps below to operate the washer WARNING Fire Hazard Do not soak or stain clothing with fuel, turpentine or petrochemical products, which may cause explosion. Ignoring this warning may cause fire and risk lives. 5.1 Place laundry inside the washer Sort clothing items by fabric type and colour Pull open the washer door... -
Page 15: Adding Washing Detergent To The Detergent Drawer
5.2 Adding washing detergent to the detergent drawer Detergent Softener The detergent box has three compartments, from which detergent is dispersed during washing cycles. Pull out the drawer, add detergent following the instructions below, shut the drawer lightly to prevent the detergent from spilling out. When the washing is completed, the detergent drawer would have small amount of water in it. -
Page 16: Operating The Washer
Important Notice When there’s too much foam, the FOD signal will light up, it is not because the machine is faulty. Simply reduce the amount of detergent used in the next wash. Use the measuring cup to measure the amount, and follow the recommendation on the detergent product label. - Page 17 Start / Pause Initiate or pause a selected programme by pressing this button. Important Notice ‘Add Garment’ signal will blink for a few minutes before a selected programme begins, garments can be added and there would not be water injected during this time. If the ‘Add Garment’...
- Page 18 Quick Wash This programme allows quick washing and drying of lightly soiled and lighter laundry items. It is suitable for drying light cotton, synthetic or mixed materials. Heavier and bulkier items will not be completely dried using this programme. The maximum load for Quick Wash is 1kg. Wash + Dry Select washing plus drying within a selected programme.
- Page 19 Understanding the different Programmes For soiled, hard to wash white clothing items, with high washing WHITES strength and longer washing time to ensure effectiveness. For daily, mildly soiled clothing items, such as shirts, leisure wear, NORMAL school uniforms, t-shirts and tops. For delicate, easily damaged items such as laundry, silk or DELICATE synthetic material.
- Page 20 Refer to the table below for programmed washing time Programme Duration Wash + Dry Washing Drying WHITES 6h 49m 3h 59m NORMAL 4h 37m 1h 37m DELICATE 3h 4m 1h 4m HEAVY DUTY 6h 5m 3h 5m SILENT 6h 49m 3h 49m CLEAN WASHER 1h 40m...
- Page 21 Digital Display and the Programmes Pre-Wash : Can be added to all programmes, except the Clean Washer programme. Press the button to select ‘ Normal ’ for standard pre-wash, ‘ Short ’ for quick pre-wash, or to cancel the selection. The duration will vary according to the selection.
- Page 22 4. Spin Speed : Choose the Speed : Normal: dries laundry but leaving more crease Slow: laundry will be semi-wet, but leaving less crease The speed and duration is varies with different programmes, the highest spin speed being 1200 rpm. Not applicable to the Clean Washer and Allergen programmes.
- Page 23 Tumble Fresh : If not able to remove the laundry immediately when washing is completed, press the Tumble Fresh button to activate periodic tumbling to keep the laundry smelling fresh and creases from forming, up to 8 hours. Tumble Fresh signal light will light up when the function is in operation.
-
Page 24: Cleaning The Washer
6. Cleaning the Washer WARNING Electrical Shock Risk Before conducting any maintenance or repair, please remove the plug from the wall socket. Replace all parts that need replacement before reactivating the washer. Not following this instruction may cause electrical-shock and risk lives 6.1 Cleaning the washer interior Clean the washer interior once every two months, following the steps below: Check to make sure there ’... -
Page 25: Cleaning The Detergent Drawer
6.3 Cleaning the detergent drawer Periodically clean the detergent drawer helps to prolong its use. Pull out the drawer to the maximum, till it stops in its track. Push downwards the grey spring lock at the inside bottom of the drawer (refer to the arrow in the diagram), this releases the spring lock and the drawer can be removed accordingly. -
Page 26: Cleaning The Rubber Water Hose Filter
Using a wet sponge, clean the exterior of the detergent drawer. Put back the spring lock, separator plate board and washing essence compartment. Gently push the detergent drawer along its track, till it shuts tight. 6.4 Cleaning the rubber water hose filter Remove the pipe from the tap, spray the filter with water and clean it with a brush. -
Page 27: Cleaning The Loose Object Collection Compartment
6.6 Cleaning the loose object collection compartment This compartment retains buttons, coins or any other small loose objects left behind from the wash, thus requires periodic cleaning. It is located at the front bottom right-hand corner of the washer. Follow the steps below to clean the compartment: Hold on to the compartment door latch, pull the door outward and downward. -
Page 28: Troubleshooting
7. Troubleshooting Problem Possible Causes Solution “ Power ” button not pressed Press “ Power ” button. Washer does not start “ Start/Pause ” button not Choose the programme and press “ Start/Pause ” Button pressed No power supply Wait for power supply to resume. Door not closed or shut Shut the door tight. - Page 29 Problem Possible Causes Solution Can ’ t initiate No or insufficient water Check if the tap or connecting water supply source is switched off. The drying drying system adopts the condensing technology which requires cold water to operate. The washer is connected to hot Do not connect the washer to hot water tap.
- Page 30 Problem Possible Causes Solution The length of the soft pipe Length of soft pipe inserted should not inserted into water exceed 20cm. discharge pipe is too long Press “ Start/Pause ” button to reactivate The washer pauses (blinking signal light). the machine.
- Page 31 Problem Possible Causes Solution ‘ Slow ’ option is selected. The spinning is slower, so that clothing items are more damp and have less crease. Clothing items of different It is best to separate wash load by materials are mixed in the different materials.
- Page 32 Problem Possible Causes Solution Tube cover in loose object Push the tube cover to the bottom. collection compartment not properly fitted. The washer Some parts are made from The smell will dissipate over time. lets out a rubber. ‘ rubbery ’ smell...
- Page 33 The washer shows symbols on its digital display to indicate status of operation or issues during operation. Some symbols are not related to machine faultiness. Please refer to the table below. If an display symbol persists, contact Whirlpool agent. Symbol...
-
Page 34: Product Warranty
For one year from the date of purchase, when this major appliance is operated and maintained according to instructions attached to or furnished with the product, Whirlpool will pay for Factory Specified Parts and repair labour to correct defects in materials or workmanship. Service must be provided by a Whirlpool designated service company. -
Page 35: Product Specification
Telephone:__________________________________________________ Model Number:_______________________________________________ Product Number:_____________________________________________ Date of Purchase:____________________________________________ Product Specifications Model Number WDC1070 Notes Product Name Washer and Dryer Combo Voltage 220 V / 60 Hz Maximum Wash Load 10.5 kg (Dry Laundry) Maximum Drying Load (Dry Laundry) -
Page 36: Support And Service
If you would like to order parts, we strongly suggest that you use parts from Whirlpool- authorised factories. These parts are made with exacting standards for Whirlpool’s...
Need help?
Do you have a question about the WDC1070 and is the answer not in the manual?
Questions and answers